

Connecting to UKG WFM
UKG WFM offers a workforce optimization platform. This platform helps teams improve compliance, scheduling, HR service delivery, reporting and analytics, time and attendance. You can connect UKG WFM to skyData Studio to perform tasks like data ingestion, unification, transformation, and enrichment to gain insights from the data. Leverage skyData’s built-in connector for importing data from UKG WFM, which supports incremental loads and multiple parallel calls to enable faster data updates, significantly reduce load times, and provide users with quicker access to up-to-date information for a more efficient workflow. This document will guide you through the process of connecting UKG WFM to the skyData.Prerequisite
You need the following details to configure and import data using the UKG⇗ connector:- Username
- Password
- Client Id
- Client Secret
- UKG url
- Default activity start date
- Reload records from (days)
To import data using the UKG WFM connector
Follow the below steps to create and configure a new dataflow for the UKG WFM import connector:- Navigate to Dataflow > Imports.
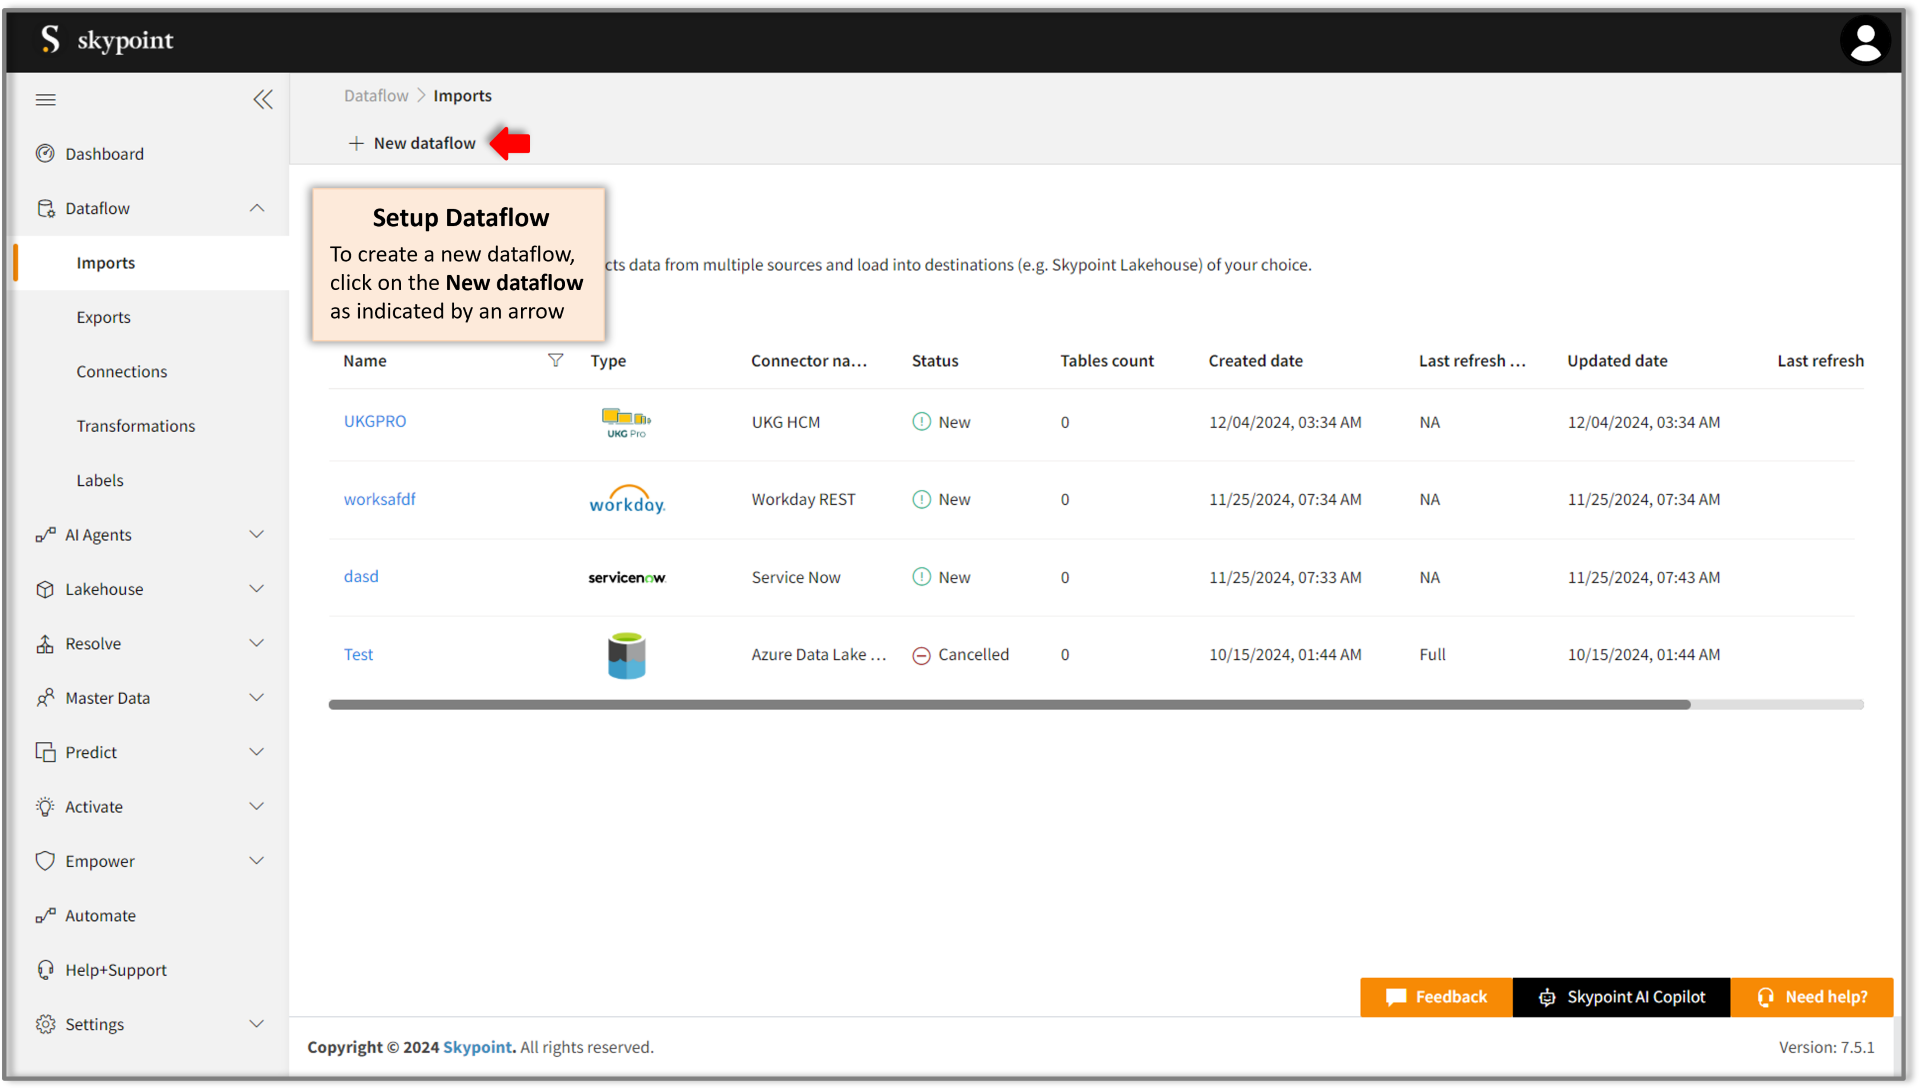
- Click New dataflow as indicated by an arrow.
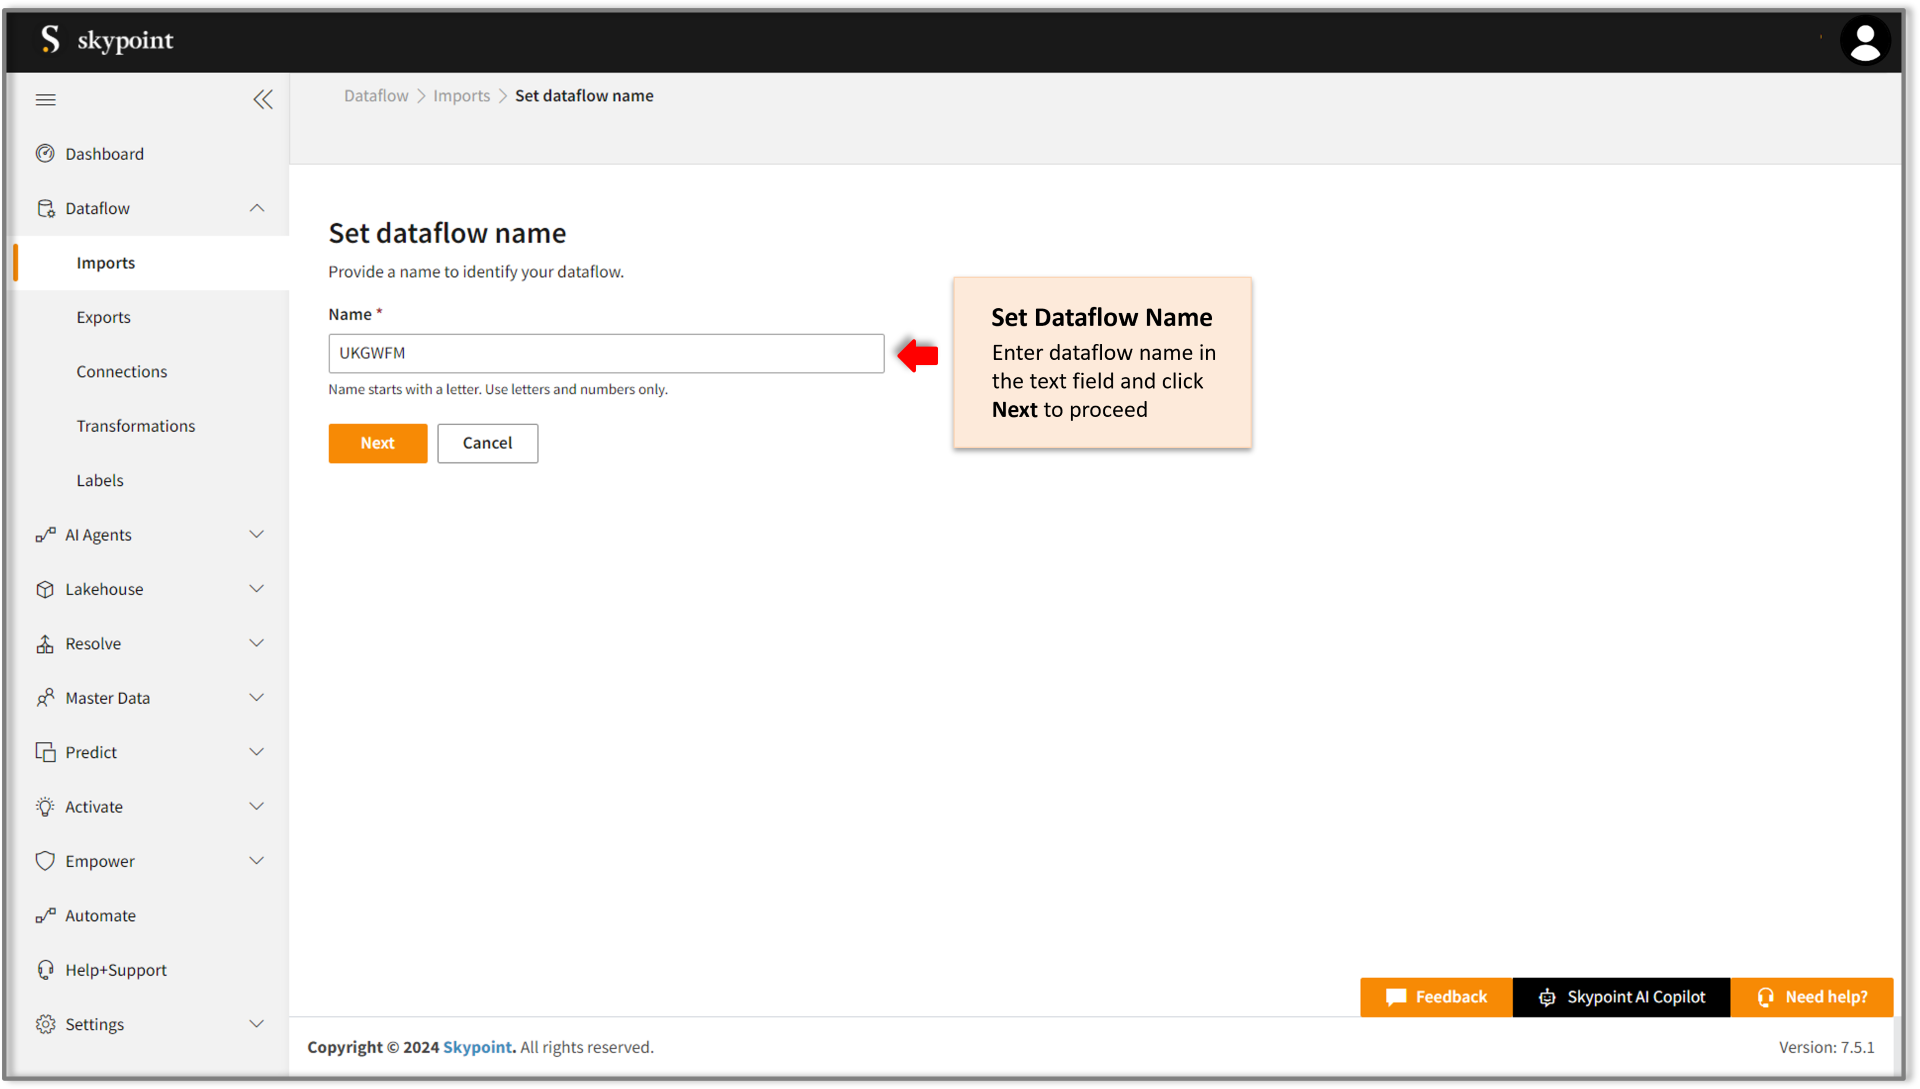
- Enter the desired name for the dataflow in the Name text field.
- Click Next to proceed.
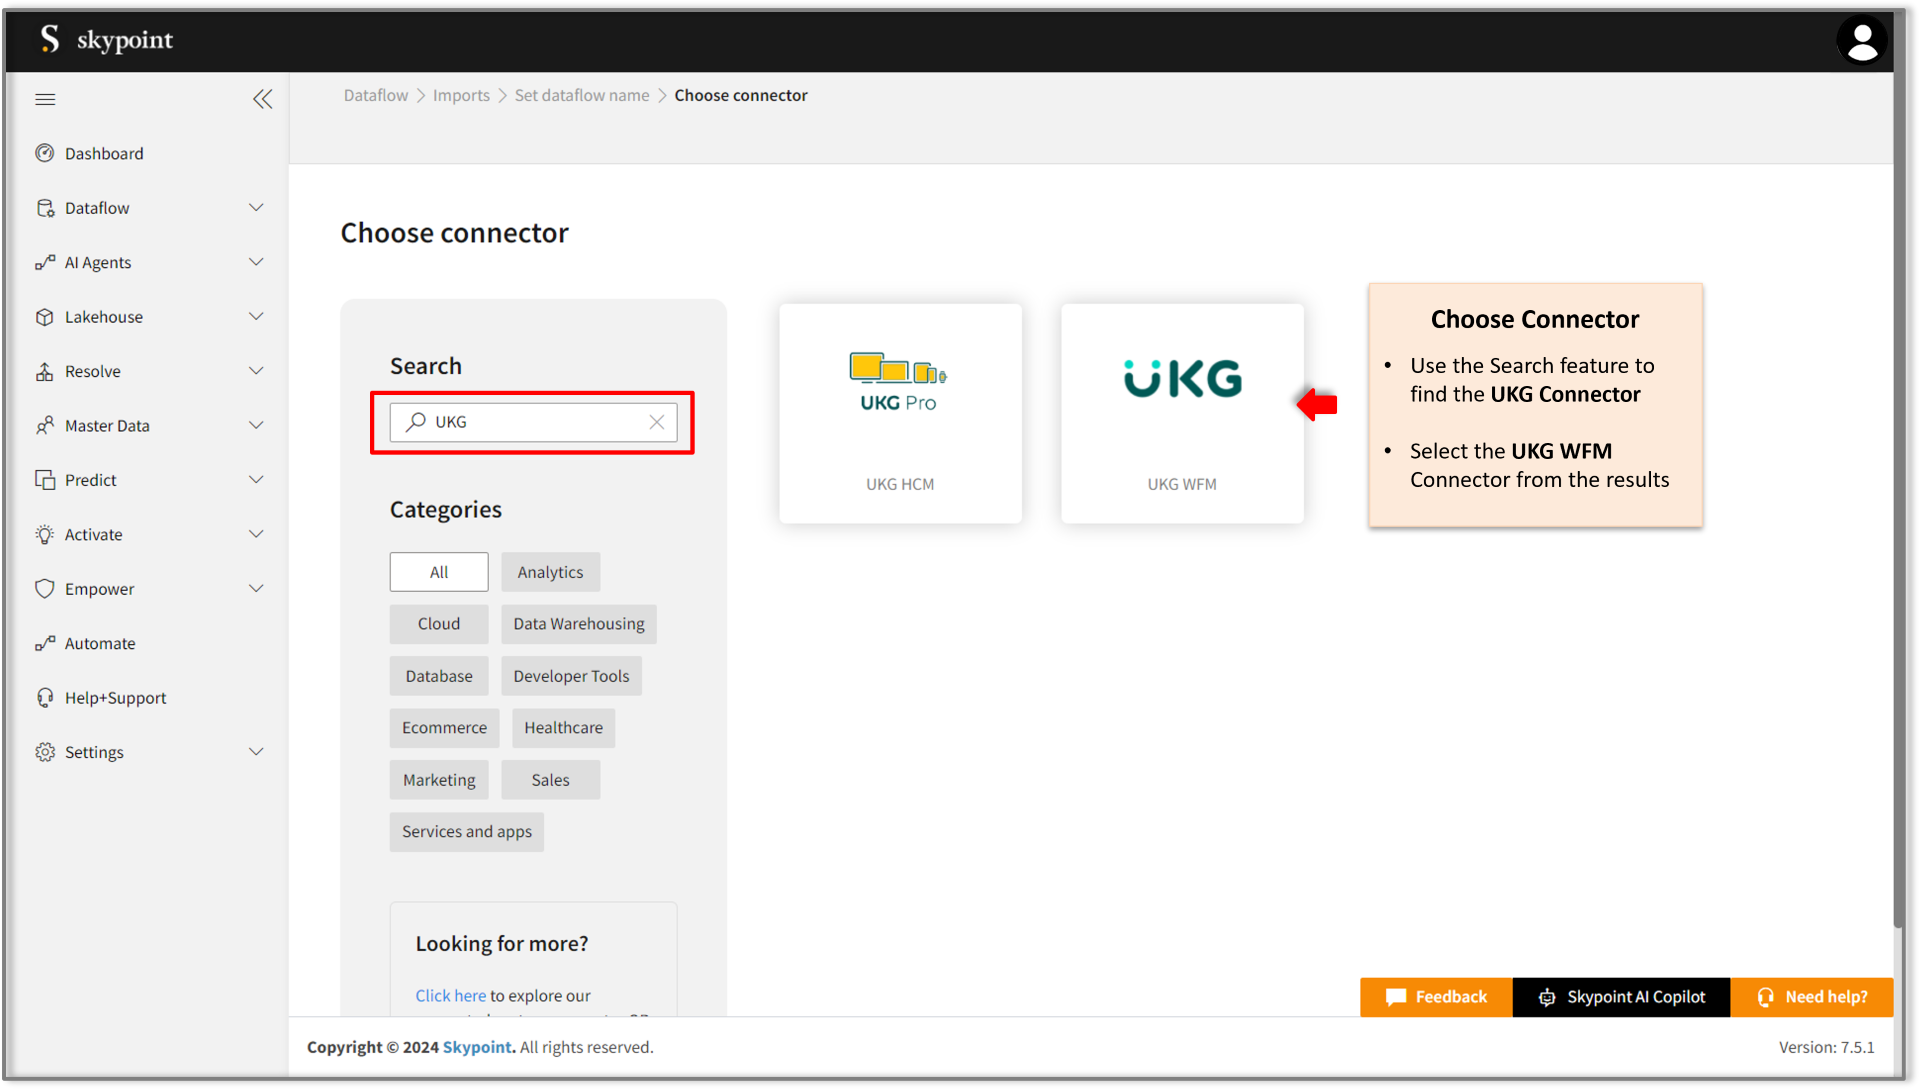
Add UKG WFM connector
- On the Choose Connector page, use the Search feature to locate and select the UKG WFM Connector.
- Enter the Display Name for your dataflow in the provided text field.
- Optionally, add a Description in the designated text area.
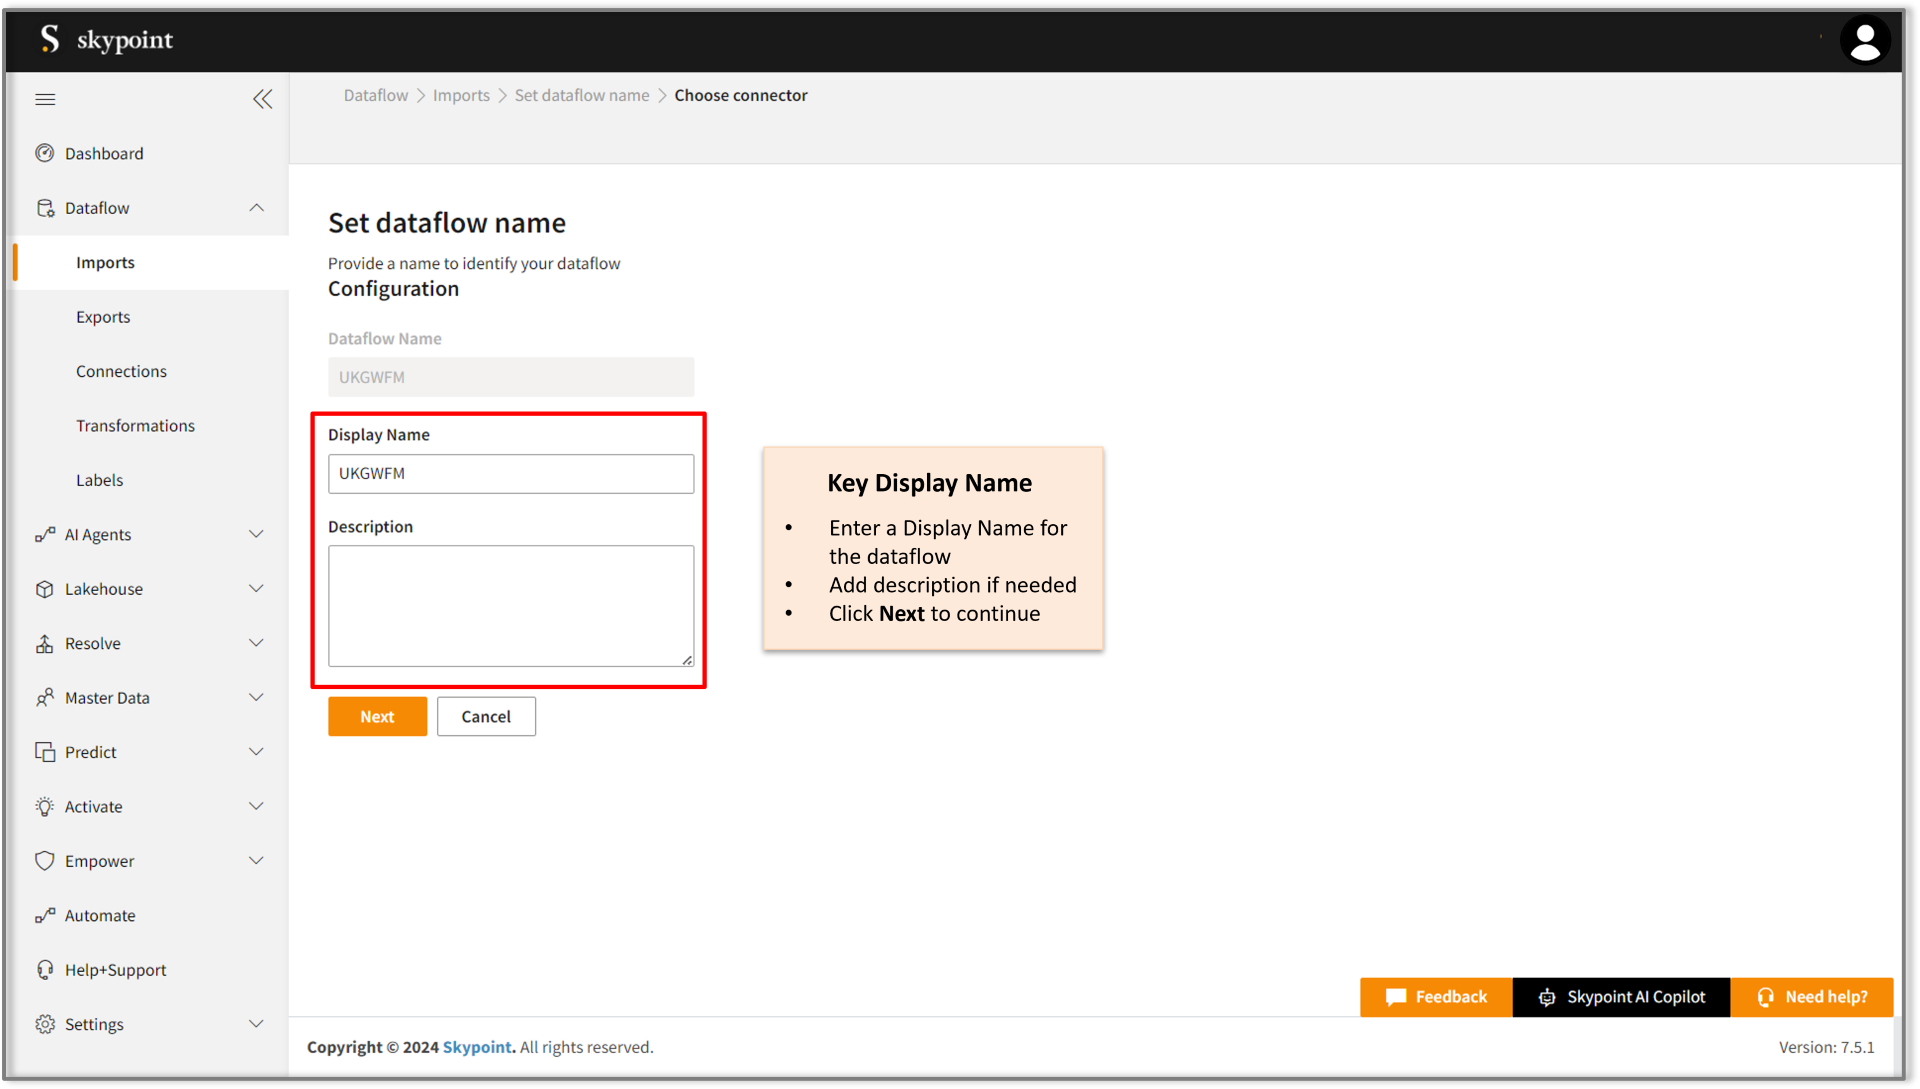
- Click Next to proceed.
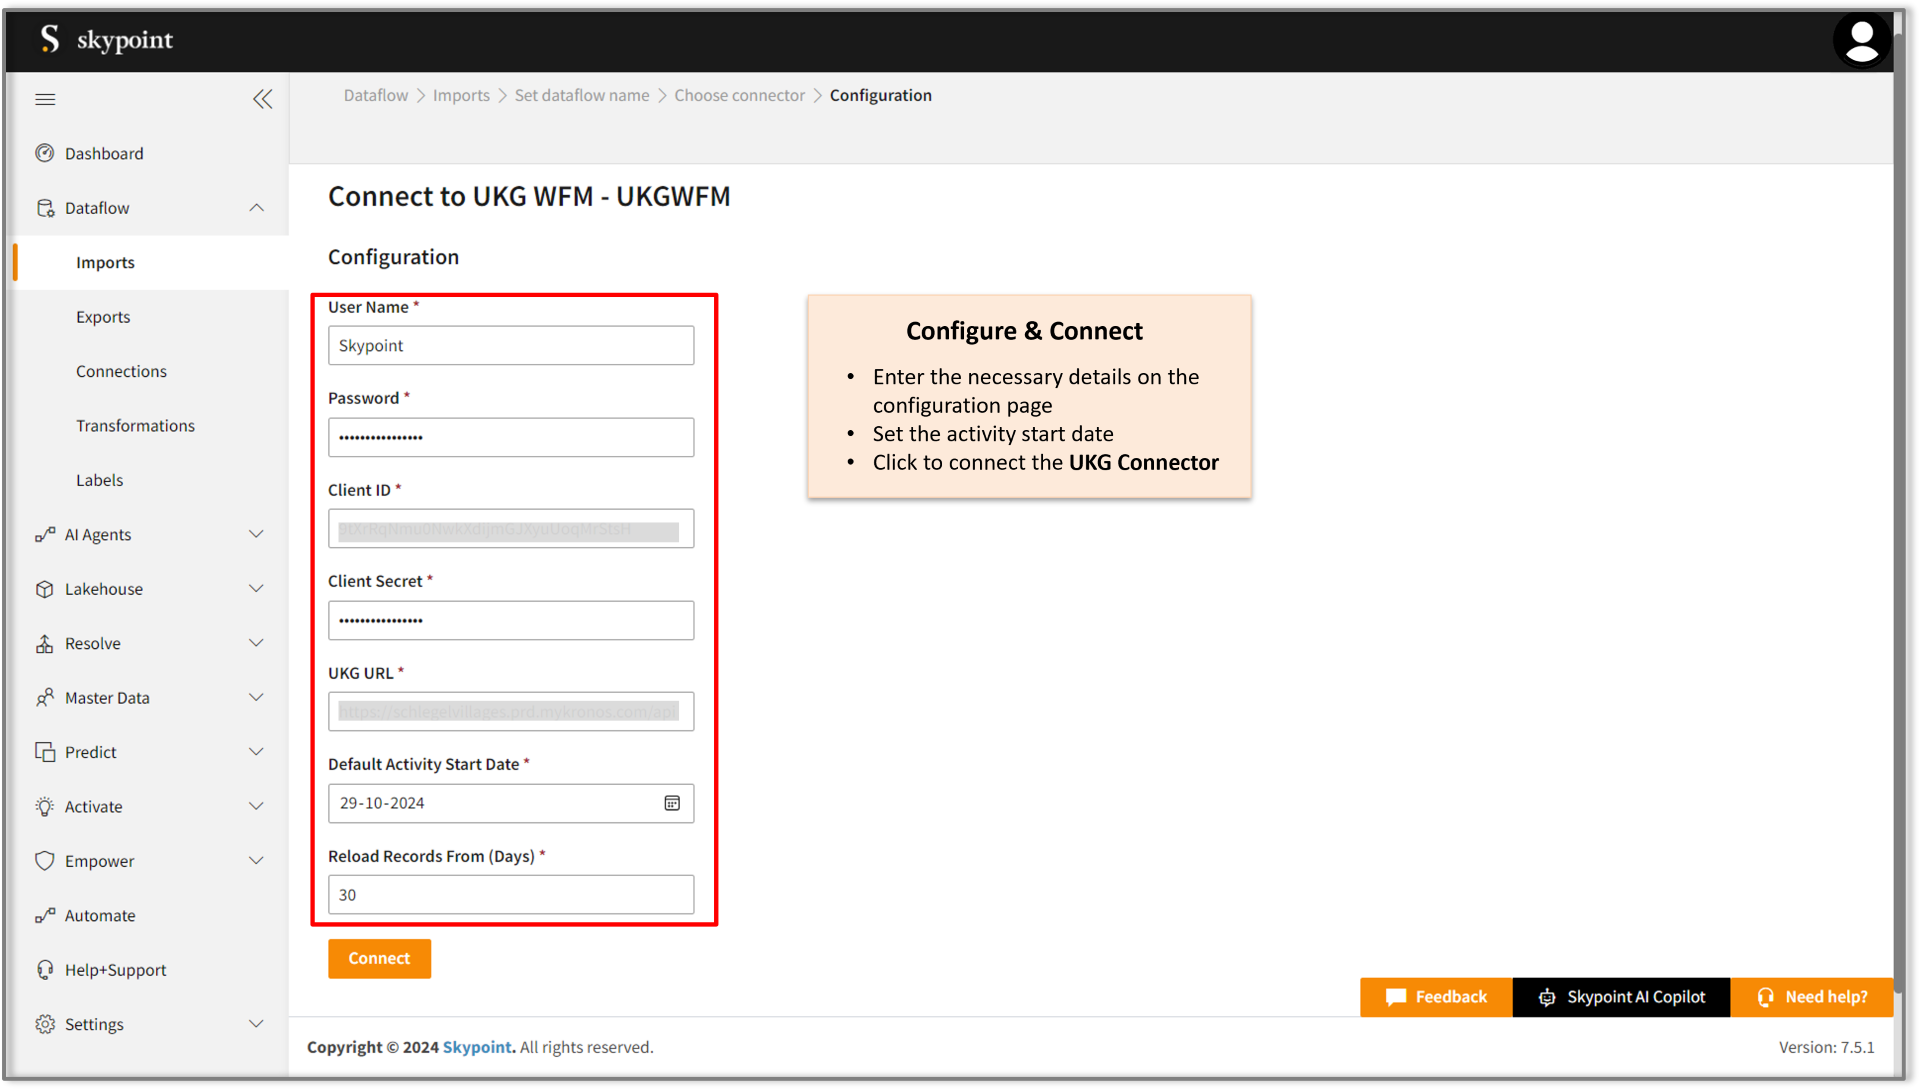
Connect to the UKG account
- Fill in the required details on the Configuration page.
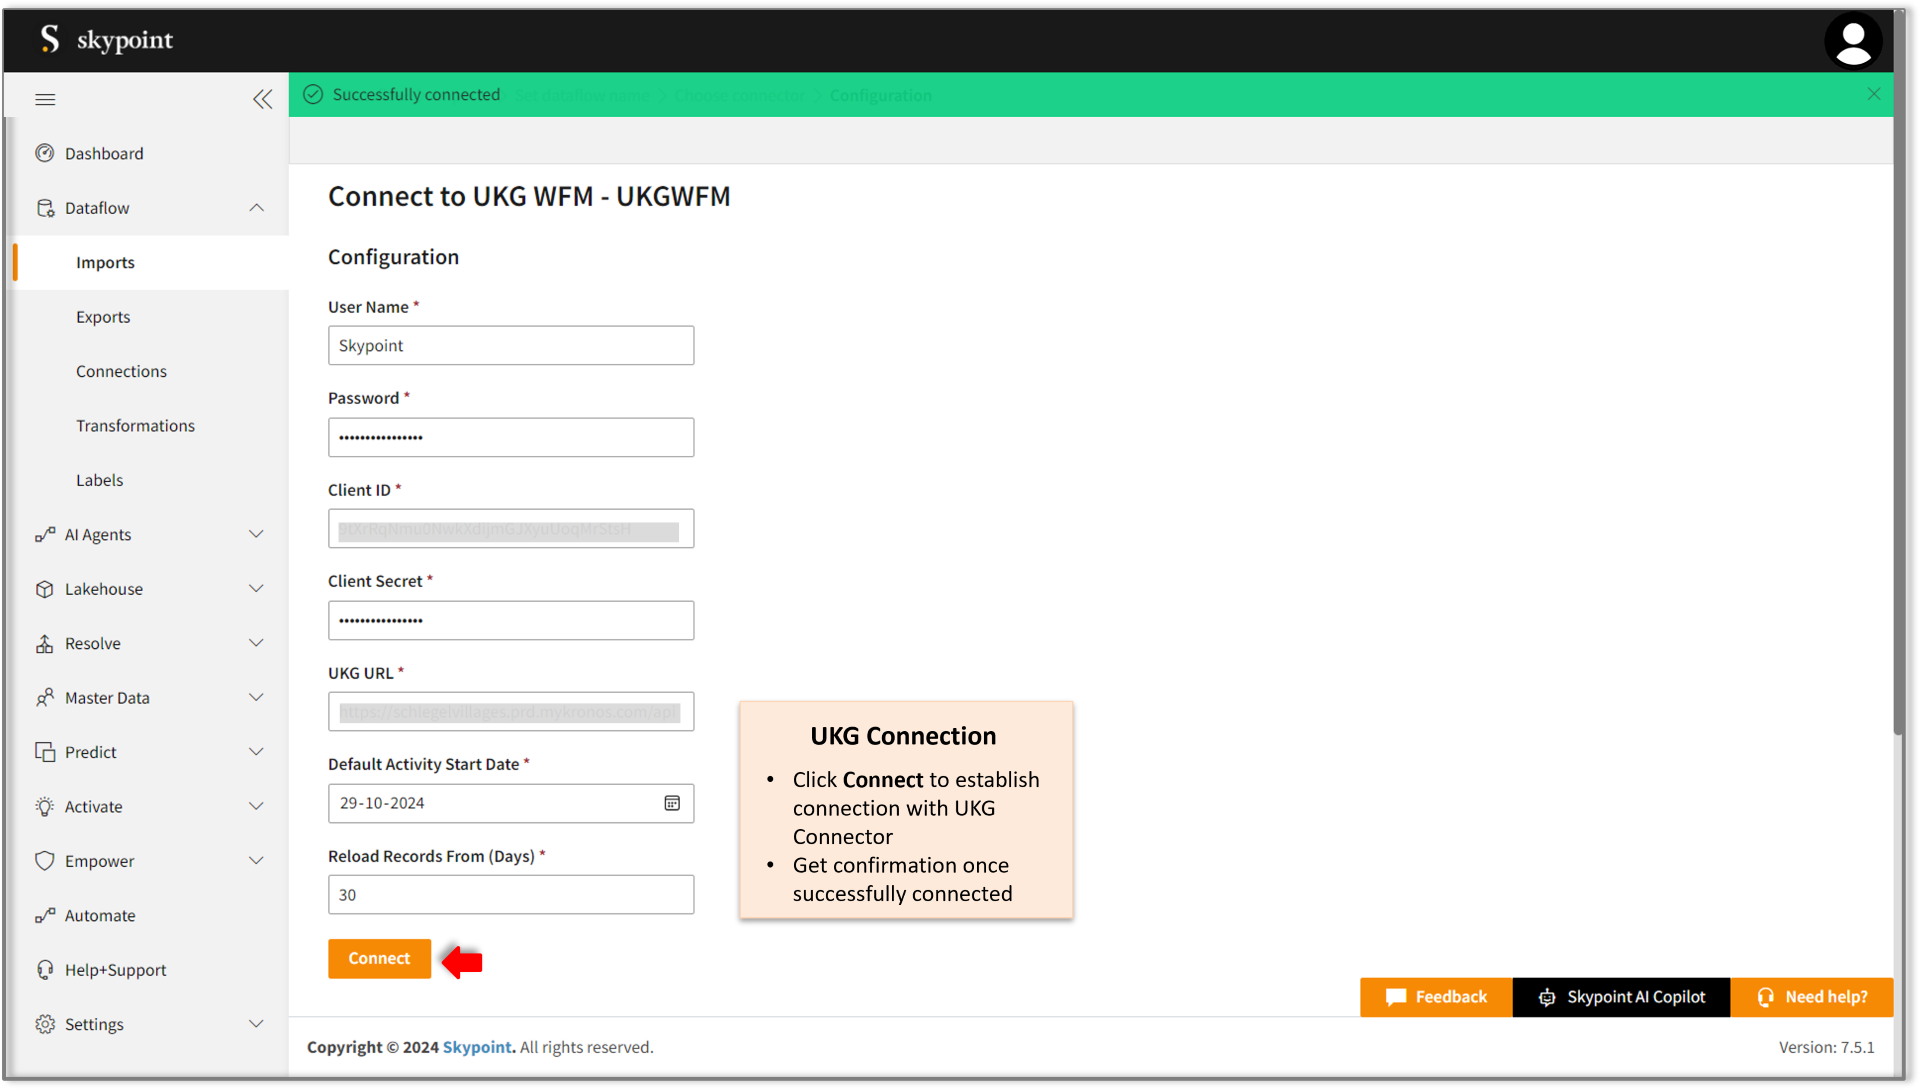
- Click Connect.
- Scroll down to the Table Details section, select the checkboxes for the tables you wish to import, and use the dropdown menu to label them as either Data or Metadata.
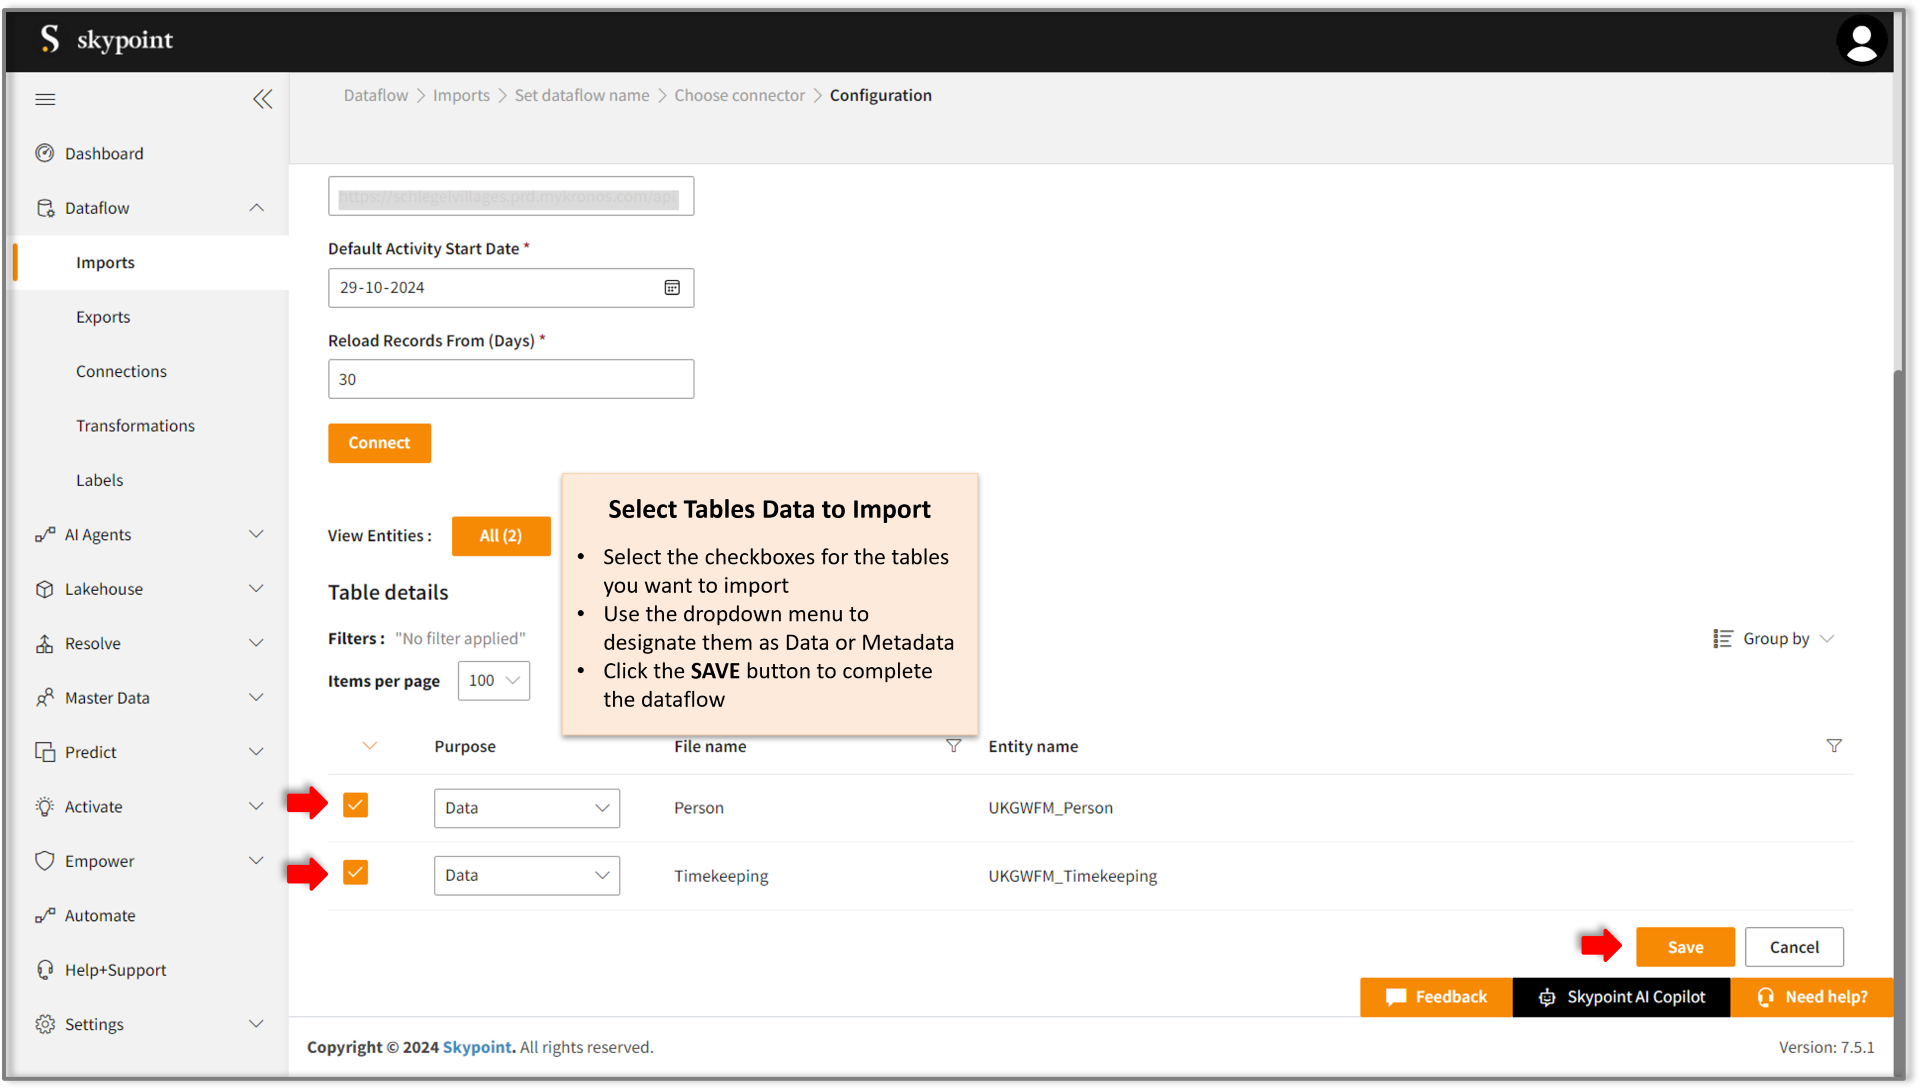
By default, all tables in the Table Details section are selected. You can choose to import only specific tables that are relevant to your data processing needs. For example, to import customer data, select tables containing details like name, email, address, and contact information.
- Click Save to apply the changes.
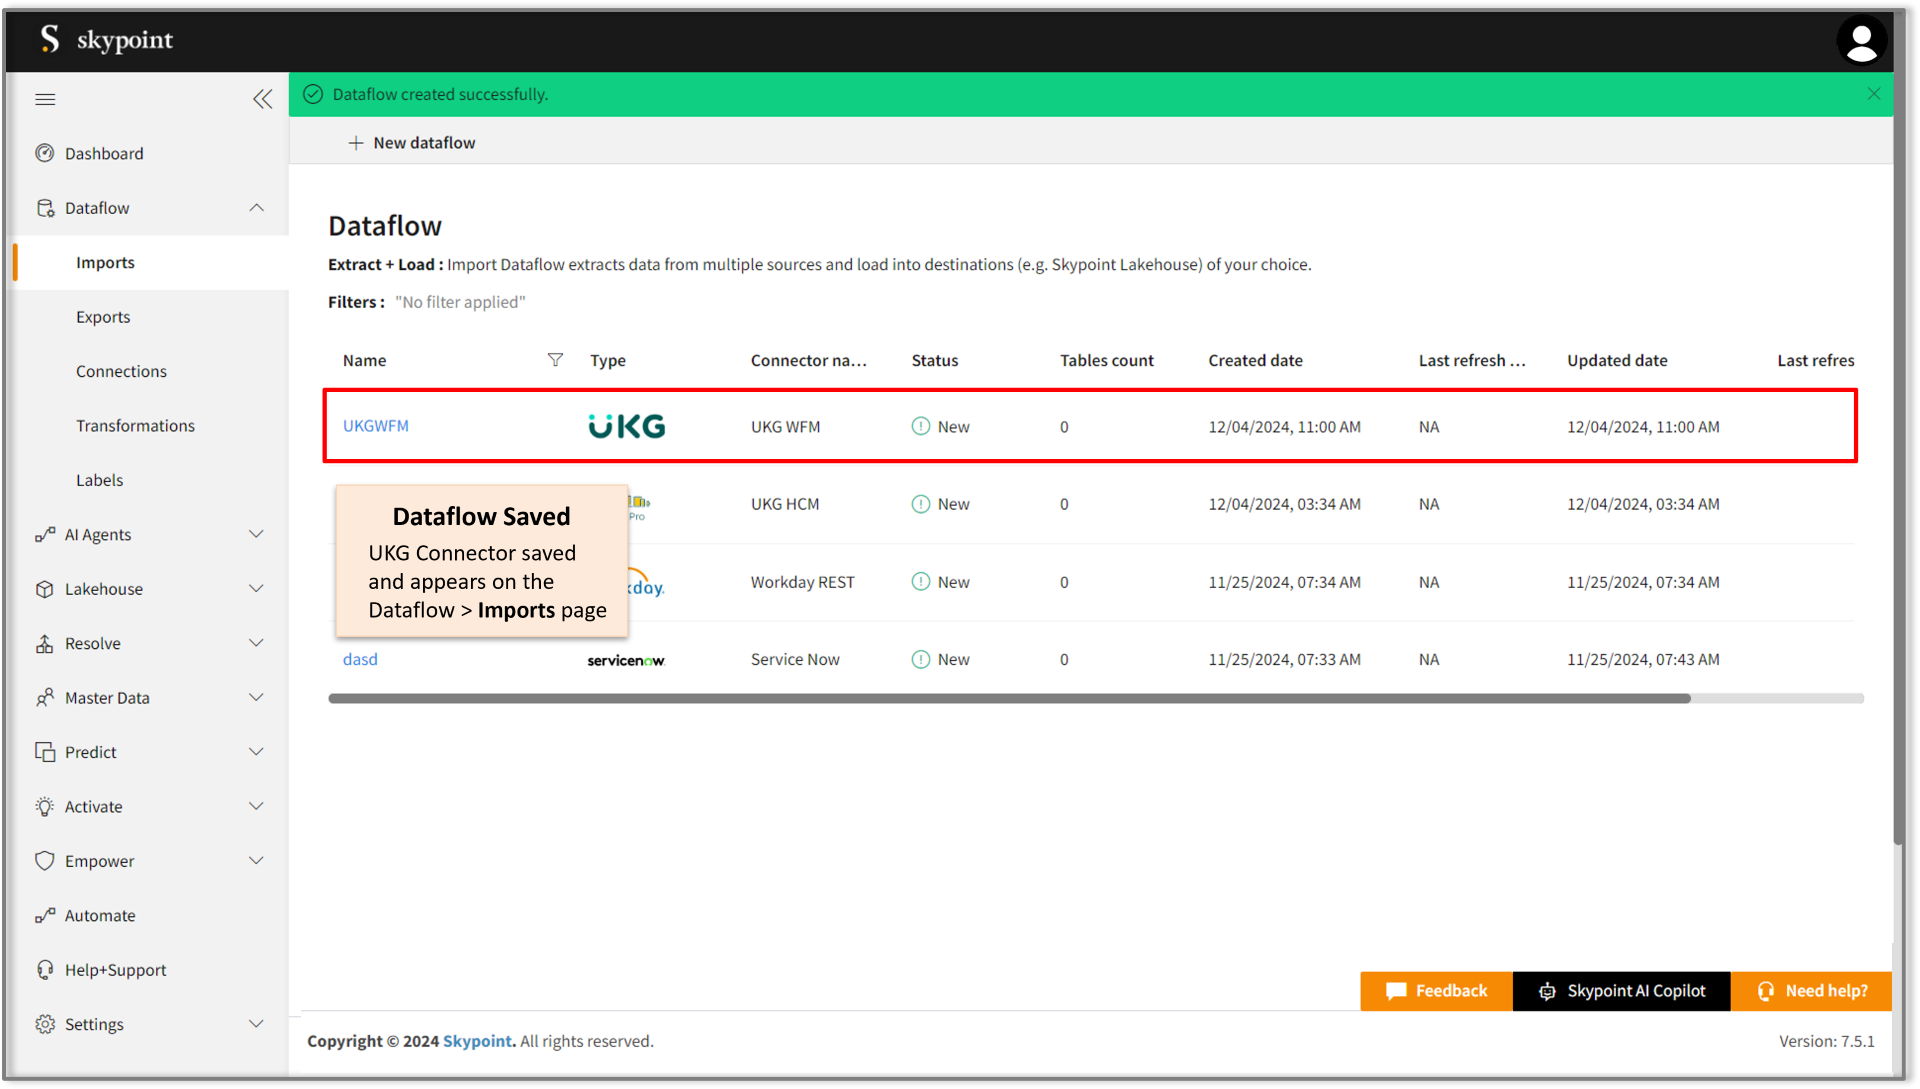
Run, Edit, and Delete the imported data
Once the table is imported, you can execute, modify, and remove the imported table from the Dataflow. Follow the below steps:- Go to the Dataflow > Imports page.
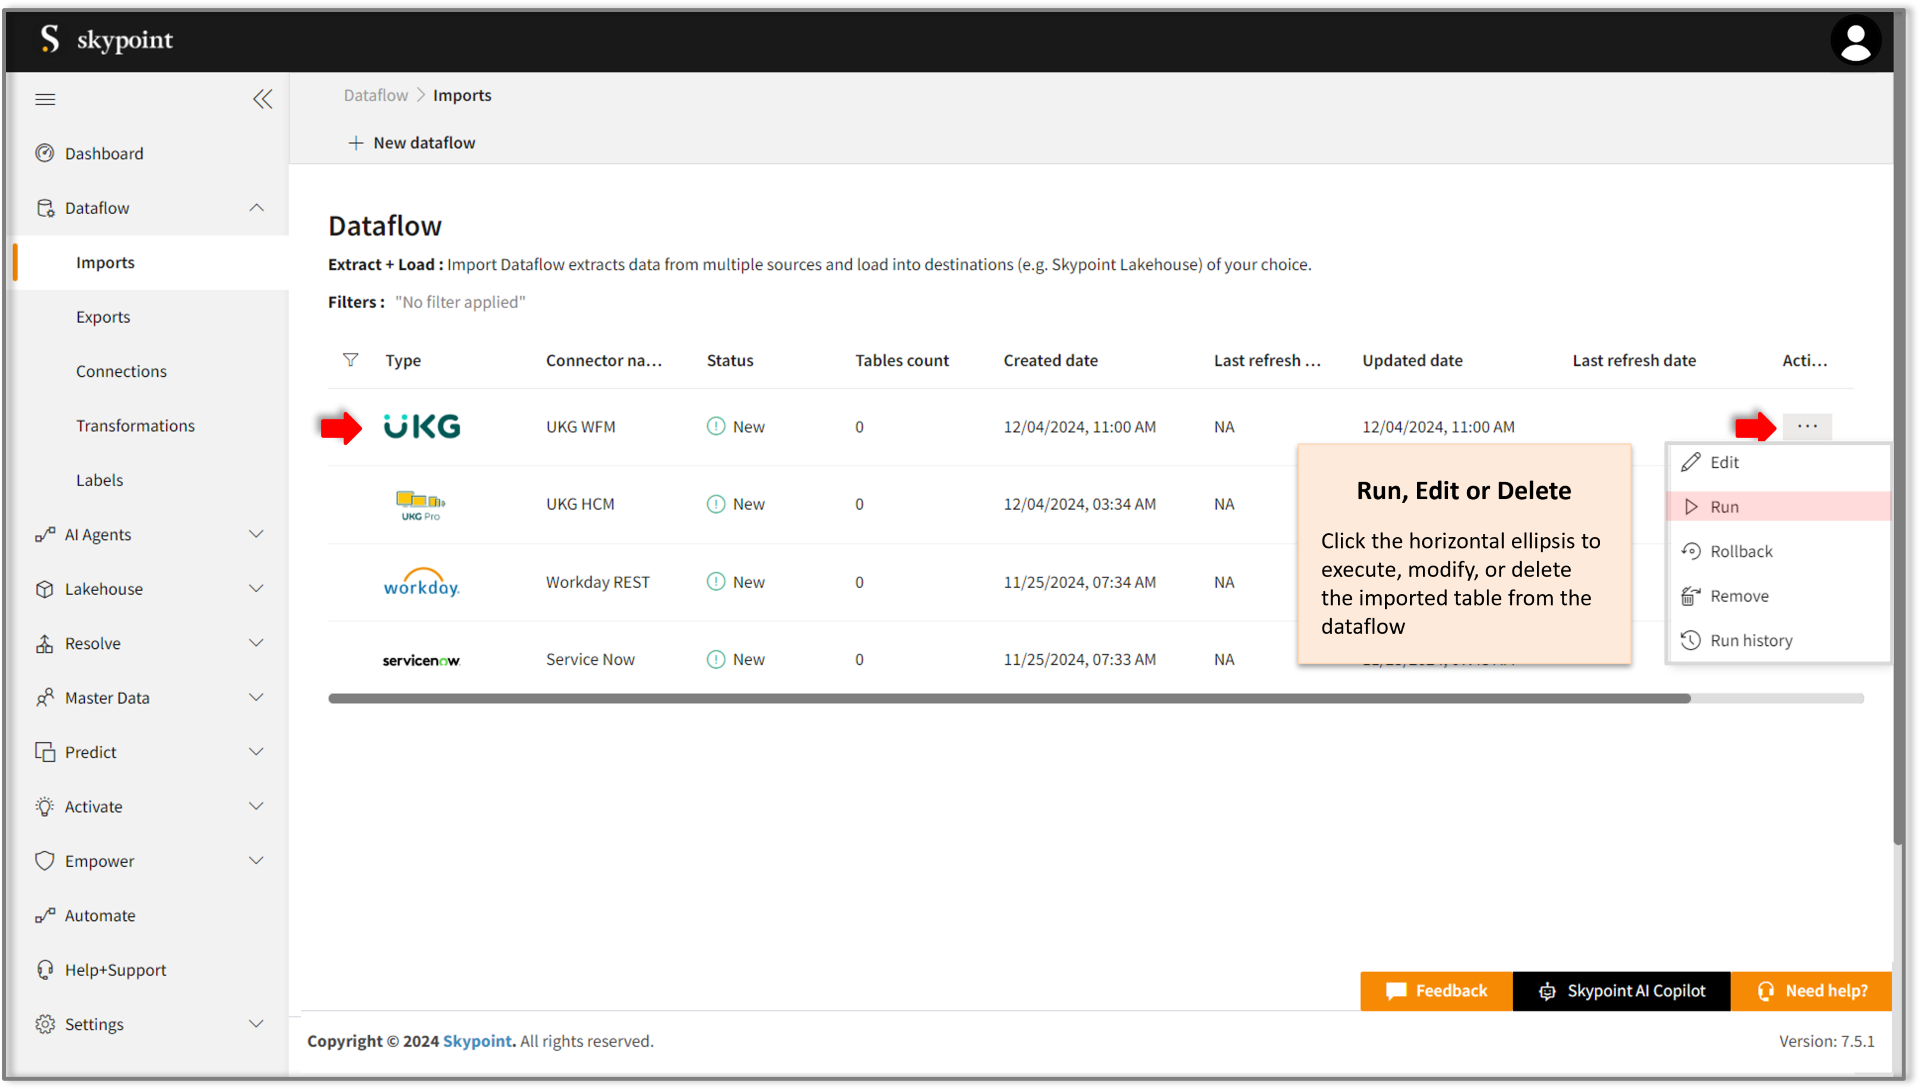
- Select the horizontal ellipsis under the Actions column and do the following:
- Click Run to execute the dataflow. Once the execution is successful, the data pipeline status will update to Completed, as illustrated in the figure below.
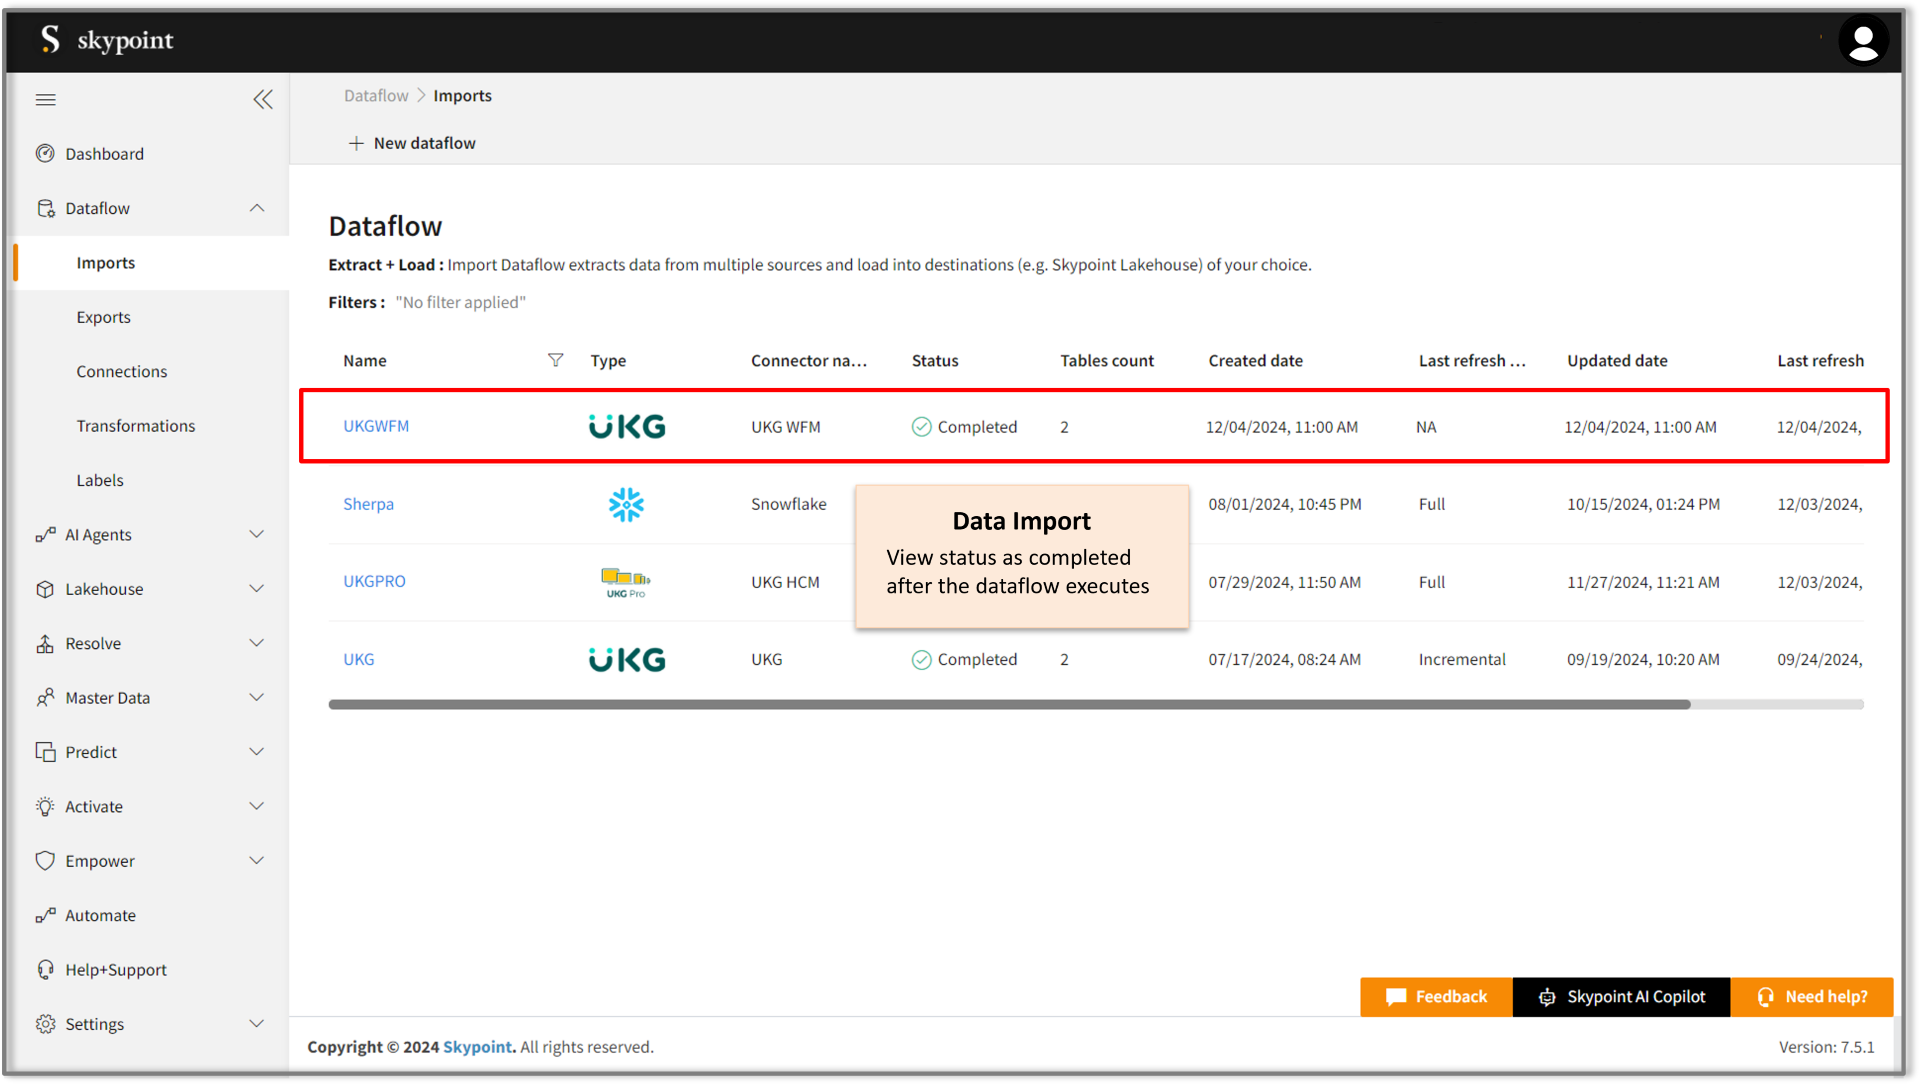
In the Dataflow’s Run History Description, you can view error messages related to data import failures from a data source. Additionally, you can check the status, start time, and end time of the data pipeline execution.