

Connecting to FHIR
The Fast Healthcare Interoperability Resources (FHIR) connector enables efficient, secure exchange and management of healthcare data in compliance with the FHIR standard. It integrates with business intelligence tools for real-time data visualization and analysis, enhancing organizational efficiency and informed decision-making. Additionally, the connector supports various authentication methods, including basic authentication and OAuth tokens, ensuring secure access to FHIR servers. Fast Healthcare Interoperability Resources (FHIR) connector seamlessly integrates with the skyData Platform (AIP), facilitating efficient and secure healthcare data exchange. By connecting with business intelligence tools, it enables real-time data visualization and analysis, empowering organizations with intelligent automation and predictive analytics. This streamlined workflow enhances efficiency, ensures compliance, and supports informed decision-making. This document will guide you through the process of connecting FHIR to the skyData.Prerequisite
You need the following details to configure and import data using the FHIR⇗ connector:- Display Name
- Provider Name
To import data using the FHIR connector
Follow the below steps to create and configure a new dataflow for the FHIR import connector:- Go to Dataflow > Imports.
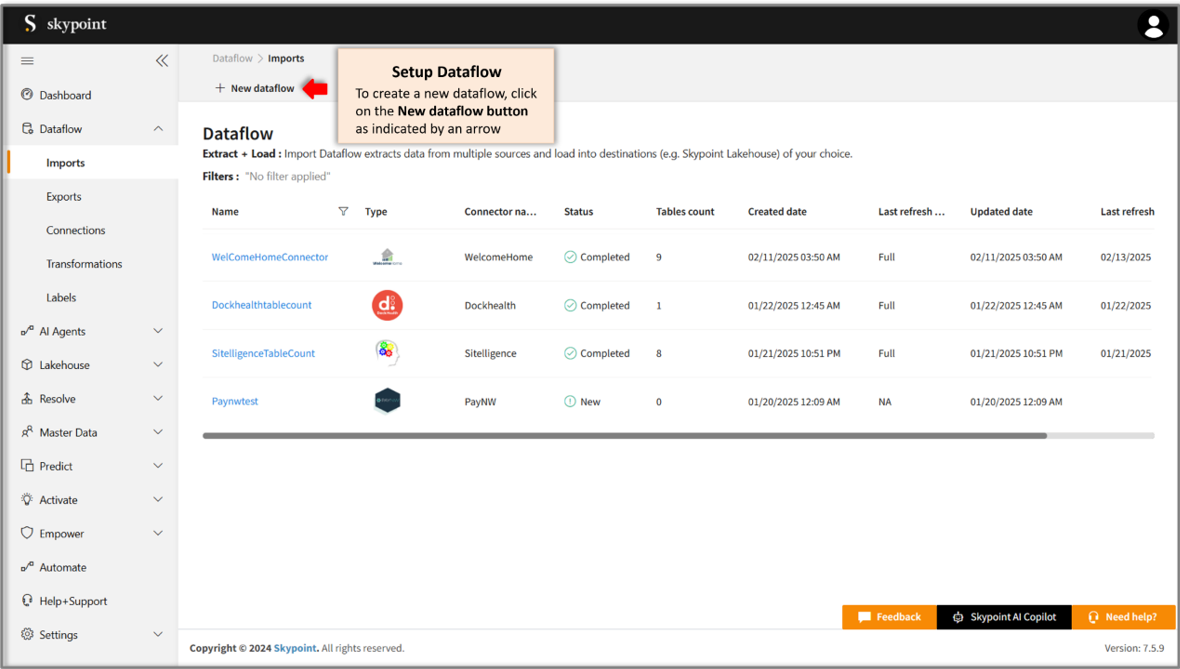
- Click New dataflow (indicated by an arrow).
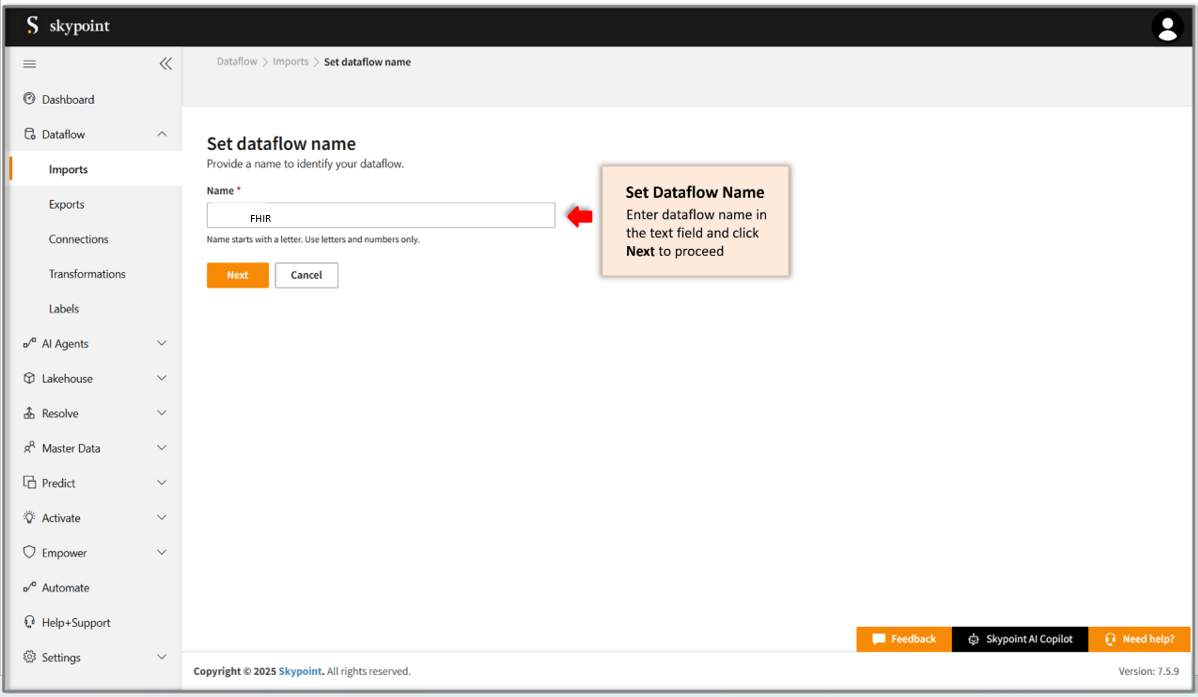
- Enter the dataflow name in the Name text area.
- Click Next to proceed.
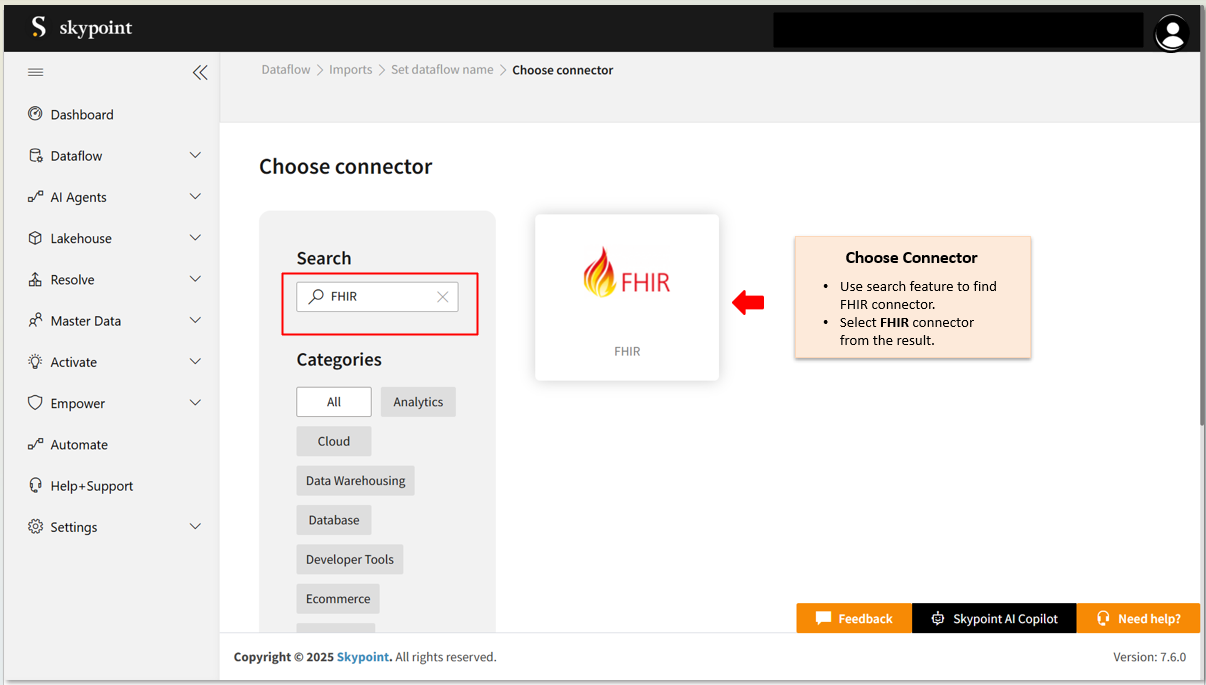
Add Workday connector
- On the Choose Connector page, use the Search feature to locate and select the FHIR Connector.
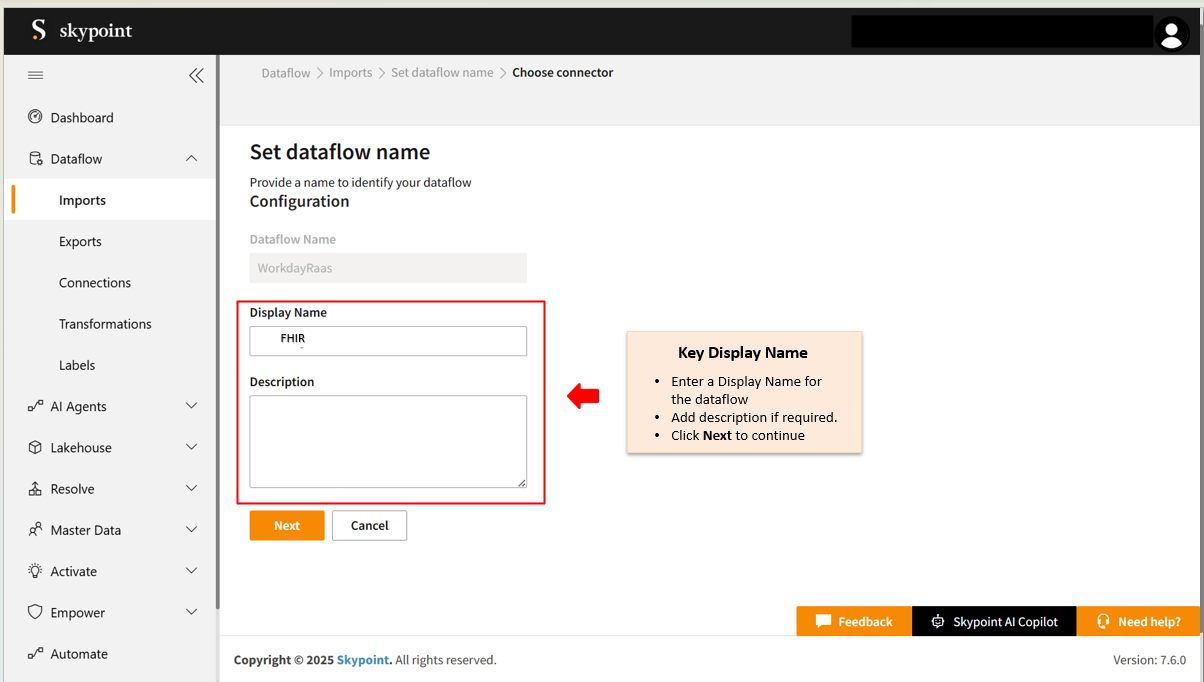
- Enter the Display Name for your dataflow in the text area.
- You can add a Description in the text area.
- Click Next to proceed.
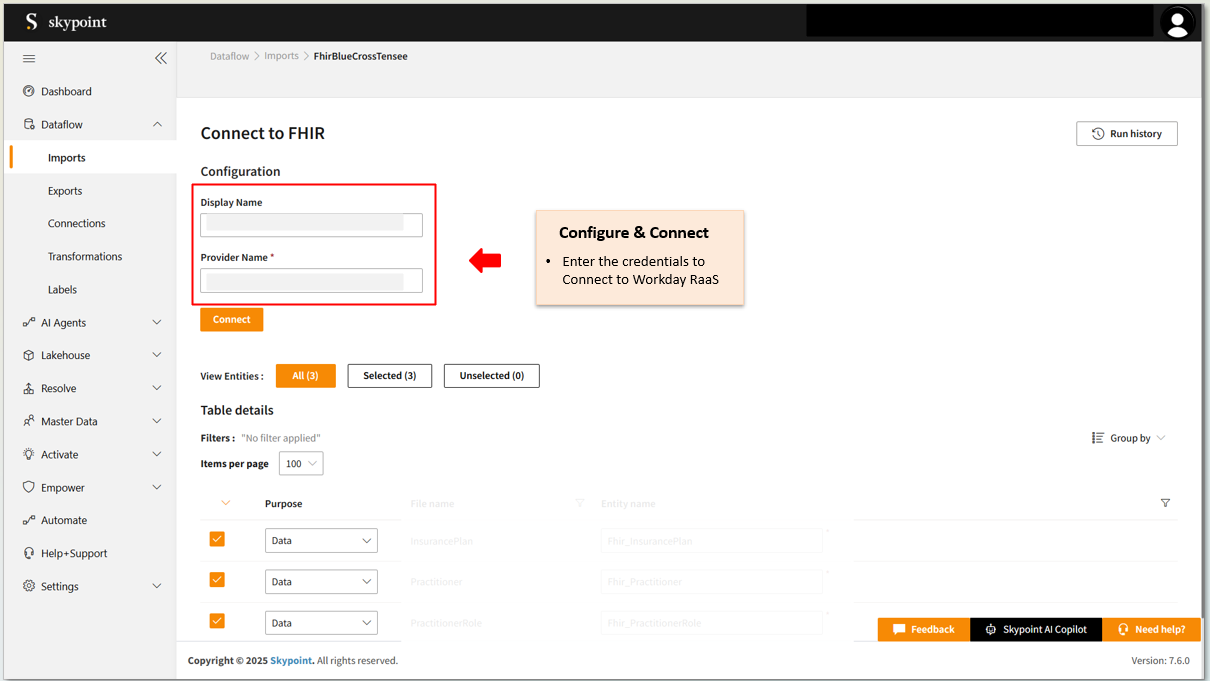
Connect to the FHIR account
- Fill in the required details on the Configuration page.
- Click Connect.
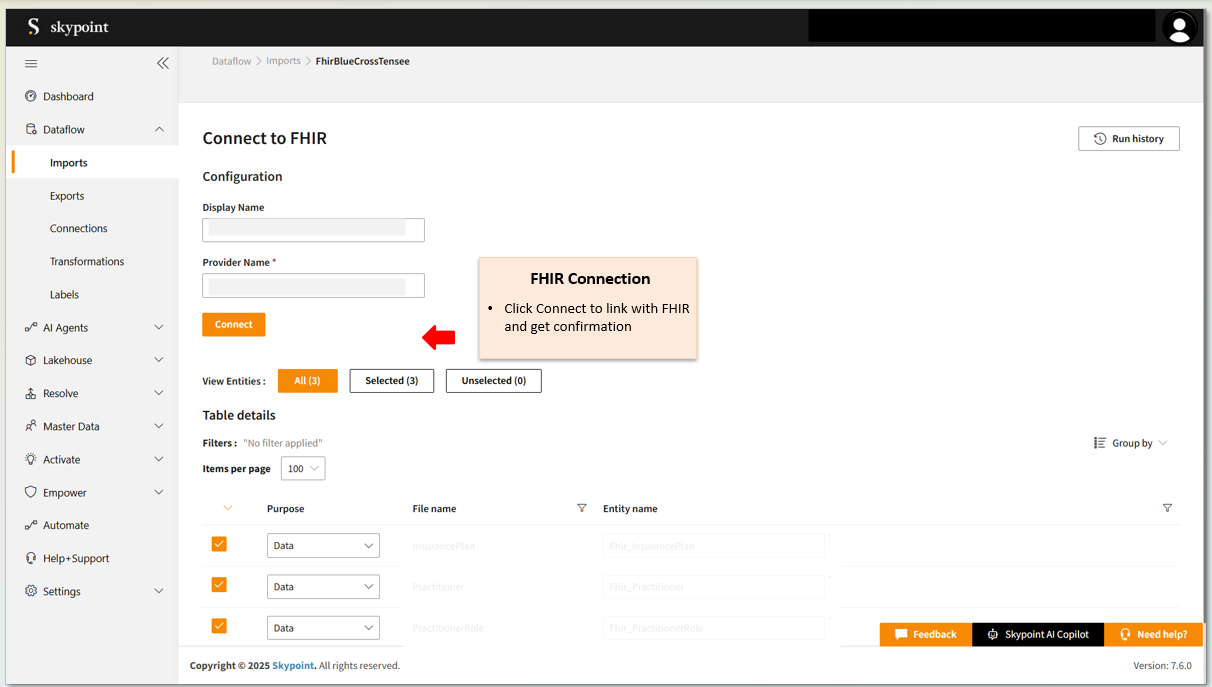
- Scroll down to the Table Details section, select the checkboxes for the tables you wish to import, and use the dropdown menu to label them as either Data or Metadata.
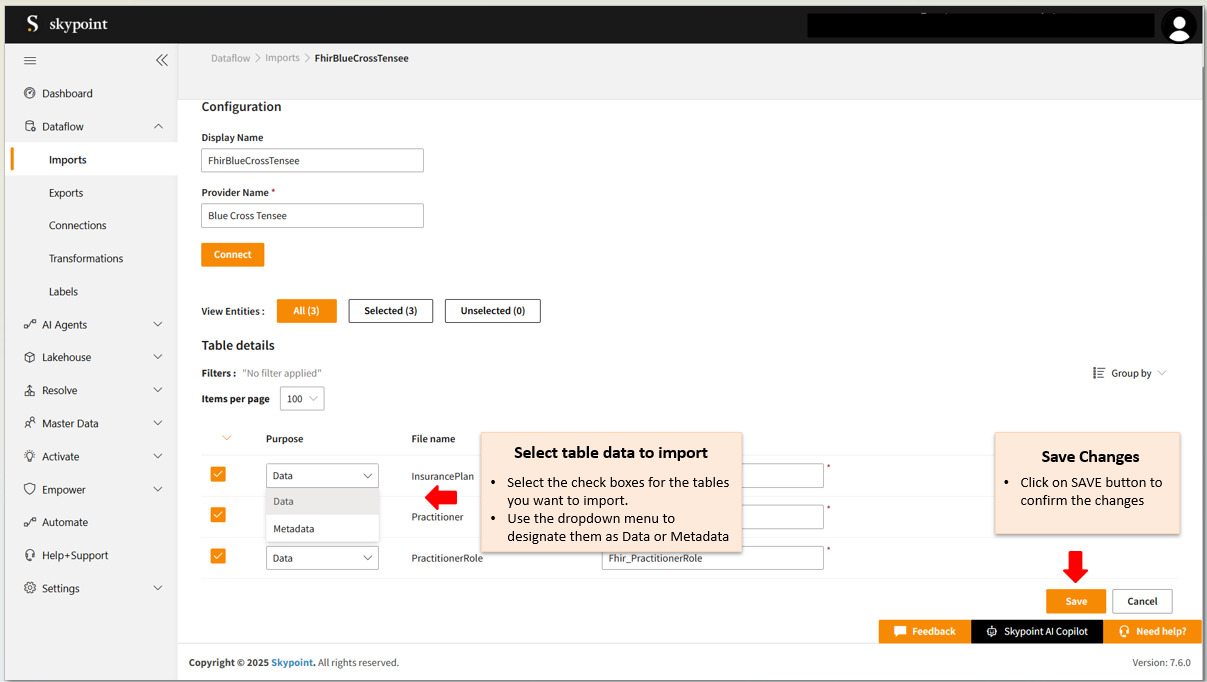
In the Table Details section, by default, all tables are selected. You can mark only those tables that you want to import and process the data. For example, to import customer data, you can check those tables which contain customer information, such as name, email, address, and contact details.
- Click Save to apply the changes.
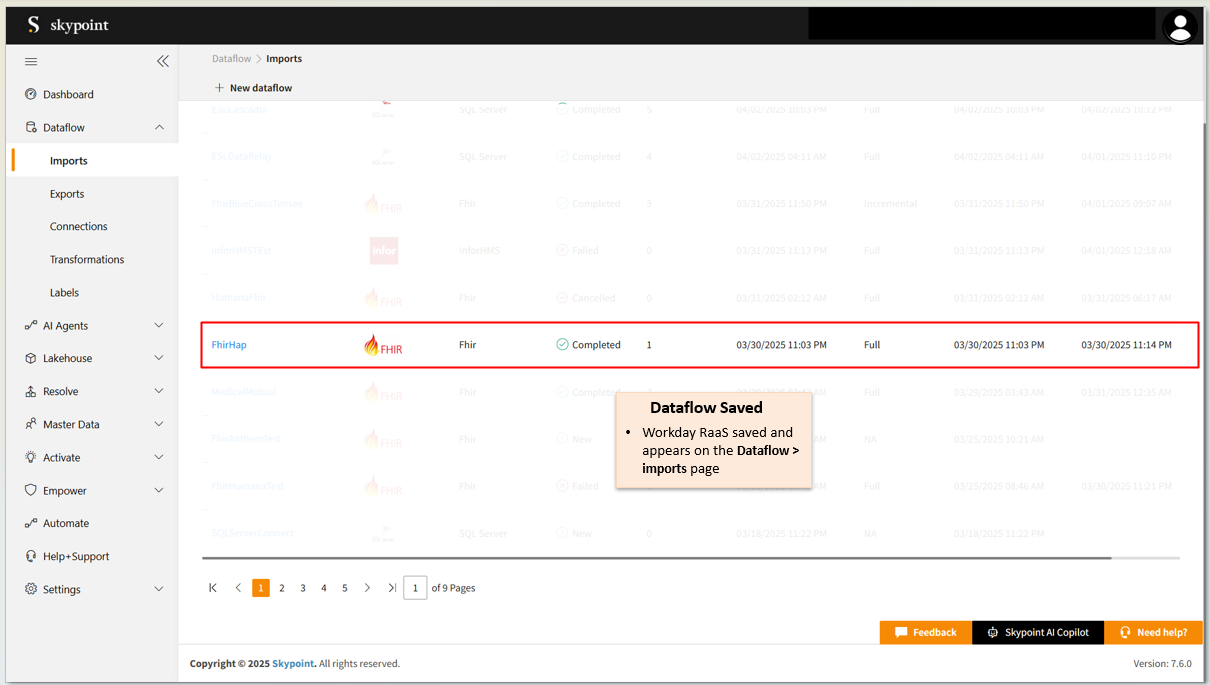
Run, edit, and delete the imported data
Once the table is imported, you can execute, modify, and remove the imported table from the Dataflow. Follow the below steps:- Go to the Dataflow > Imports page.
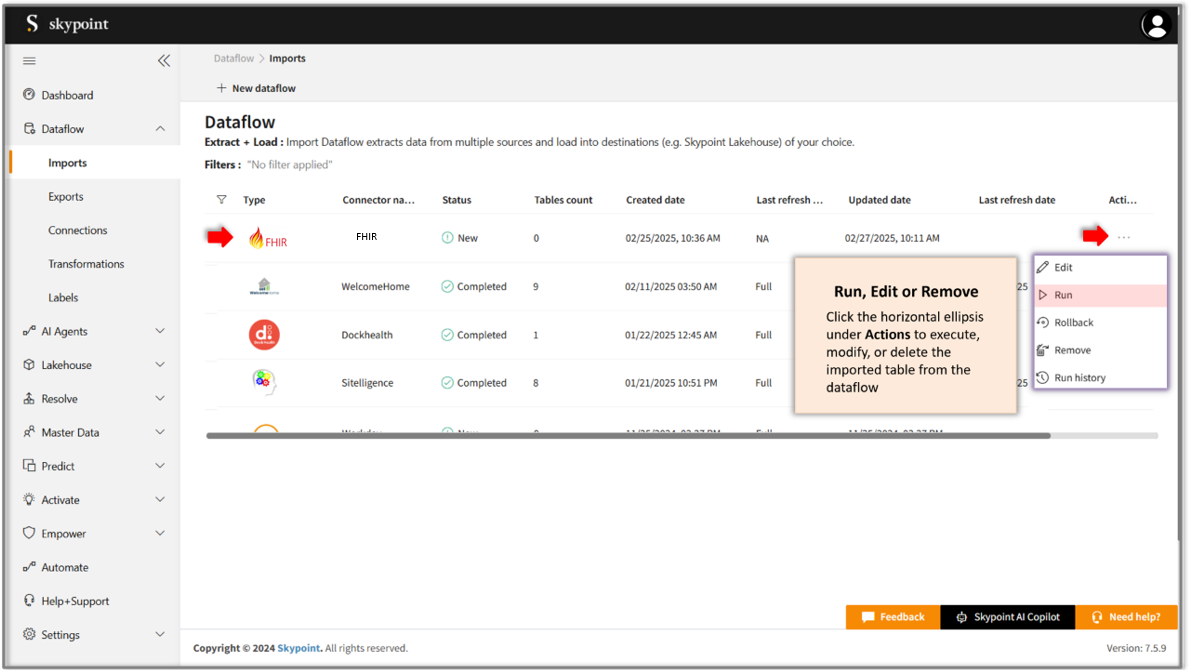
- Select the horizontal ellipsis under the Actions column and do the following:
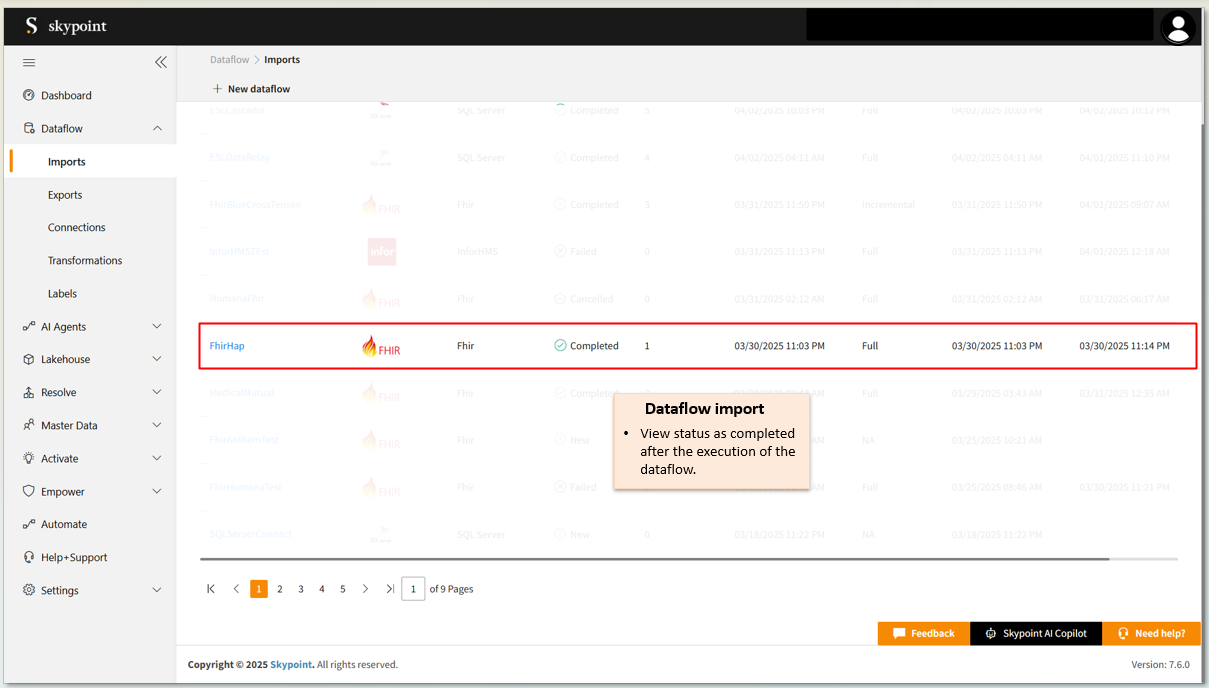
You can see the error message corresponding to failure while importing data from a data source in the Dataflow under Run History > Description. Also, you can see the status, start time, and end time for the execution of the data pipeline.