

Connecting to Azure Blob Storage
Overview
Azure Blob Storage helps you to store massive amounts of unstructured data in the Blob storage. You can use skyData’s built-in connector for importing data from Azure Blob Storage. This document will guide you through the process of connecting Azure Blob Storage to skyData.Prerequisite
You will need the following details to configure and import data using Azure Blob Storage:- Storage Account Name
- Account Key
- Storage Path.
You can refer to the Setting up Azure Blob Storage document to learn more about the Prerequisites.
To import data using Azure Blob Storage connector
Follow the below steps to create a new dataflow for the Azure Blob Storage import connector:- Go to Dataflow > Imports.
- Click New dataflow.
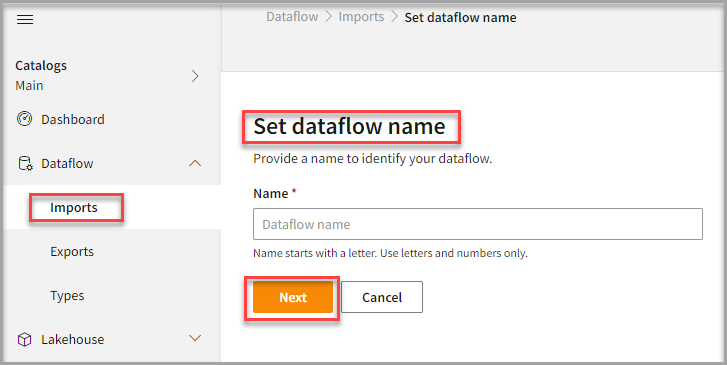
- In the Set dataflow name page, type dataflow name in the Name text area.
- Click Next.
To add Azure Blob Storage connector
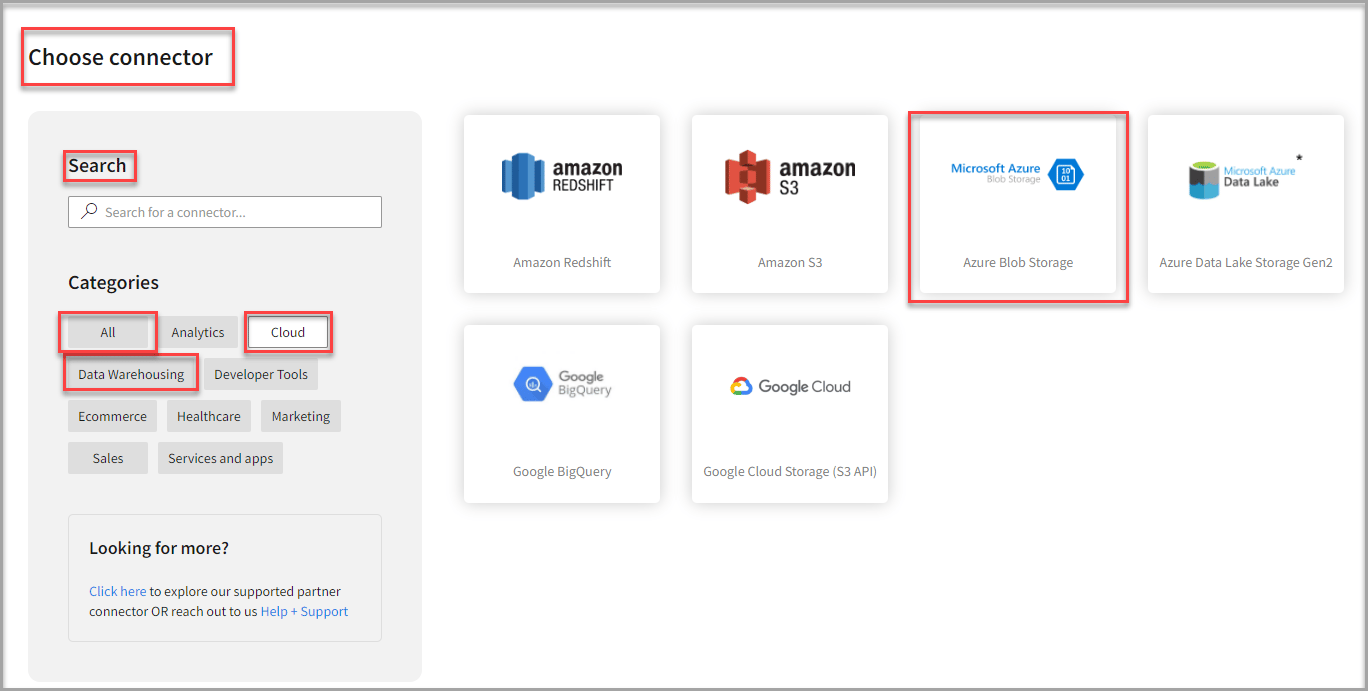
- In the Choose connector page, select Azure Blob Storage connector.
You can also use the Search feature to find the connector. The Azure Blob Storage connector is located under the Cloud and Data Warehousing category.
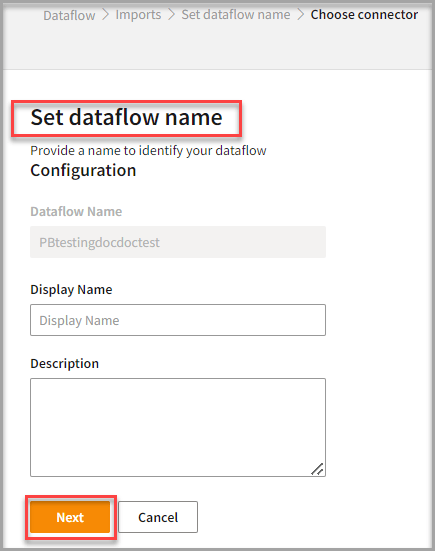
- Enter Display Name for your dataflow in the text area.
- Enter Description for your dataflow in the text area.
- Click Next.
To configure Azure Blob Storage
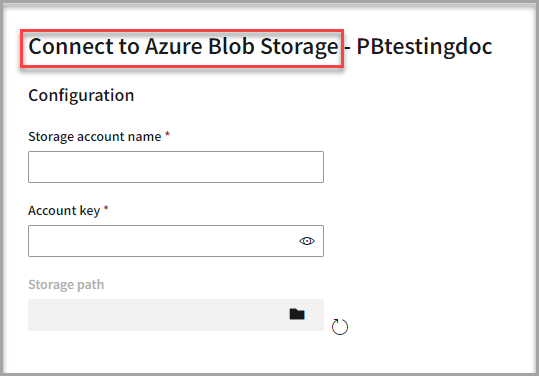
Follow the below steps to configure the connection to Azure Blob Storage:- Enter the Storage account name in the text area.
- Enter the Account key in the text area.
- Click the Folder icon in the Storage path text area.
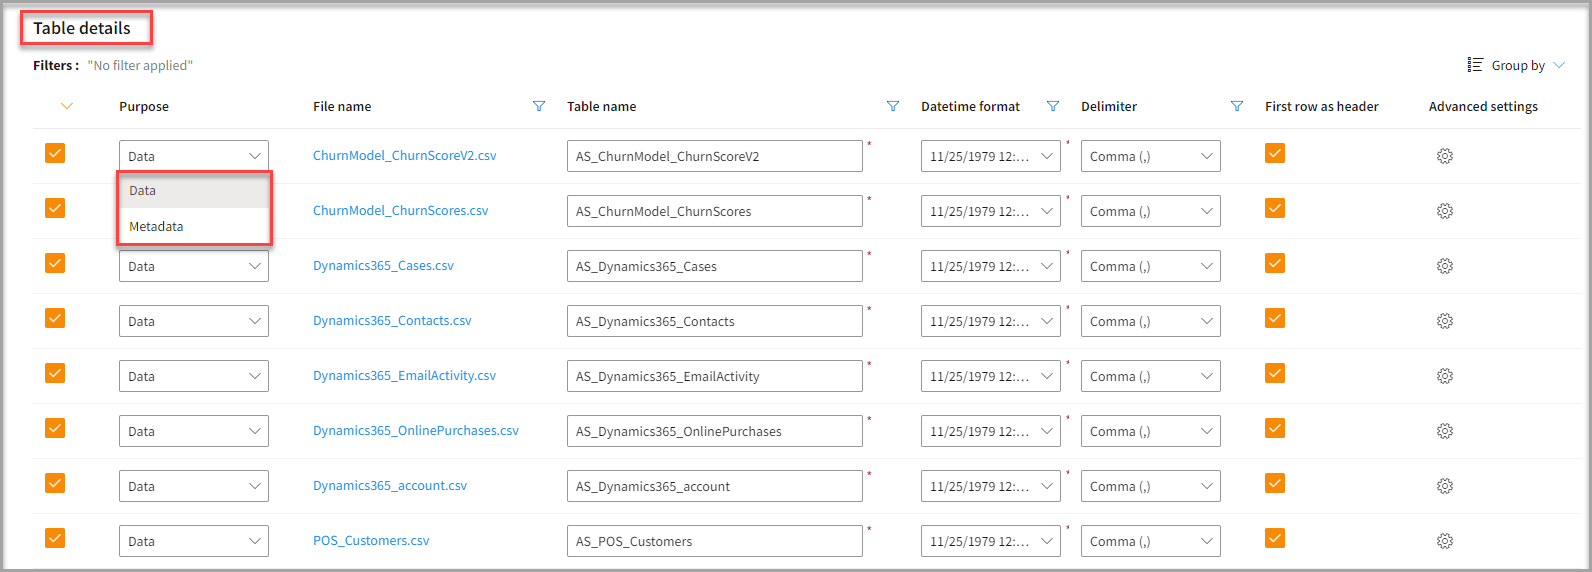
- Enter the Table Details to process the data.
- Click the Advanced settings for your desired file name.
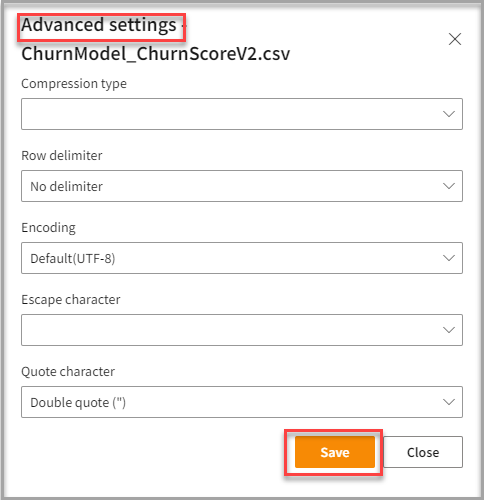
- Click Save on the Advanced settings pop-up to save the advanced settings.
- Click Save.
Run, edit, and delete the imported data
Once you save the connector, the Azure Blob Storage connector gets displayed in the list of tables created in the Dataflow page.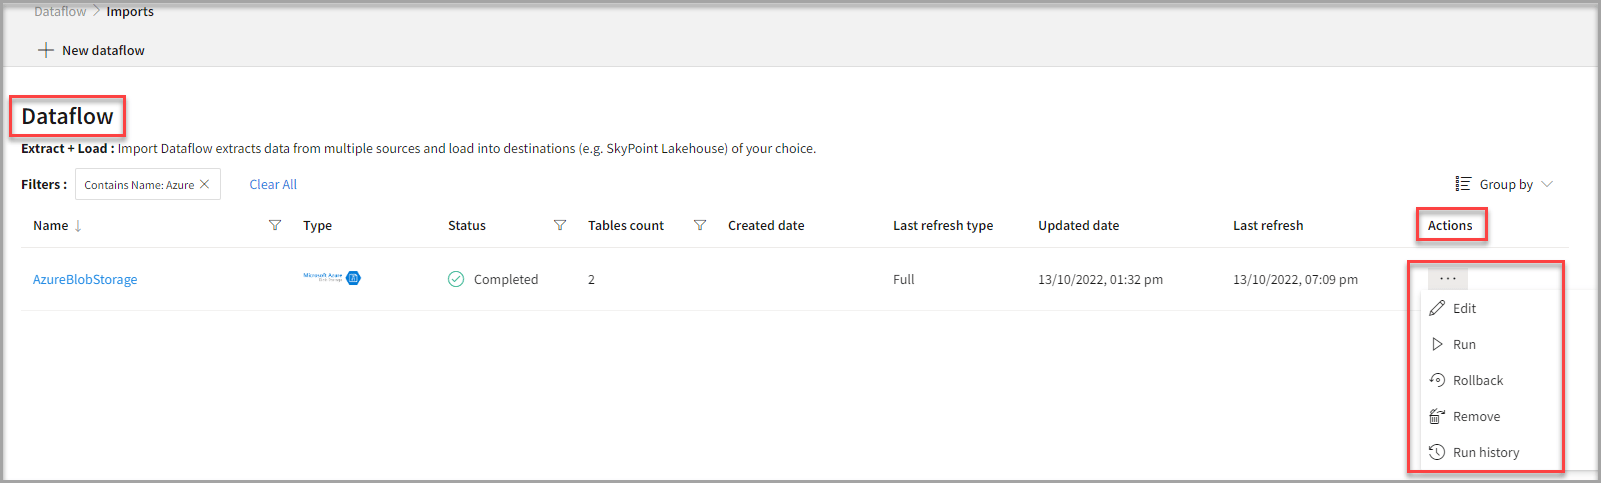
- Select the horizontal ellipsis in the Actions column and do the following: