

Imports
Overview
Dataflow allows you to import data from the relevant sources, transform, and load it into the Lakehouse. skyData imports raw customer data from across systems and applications with over 200 connectors spanning e-commerce platforms, marketing automation tools, email service providers, cloud platforms, and many more. You can ingest data to skyData from any data source including pre-built connectors with popular applications such as Shopify, Salesforce, etc. skyData Studio ingests raw data and transforms it into a standardized, modular, and extensible collection of data schemas for further processing in downstream processes such as Master Data Management (MDM) - Resolve process.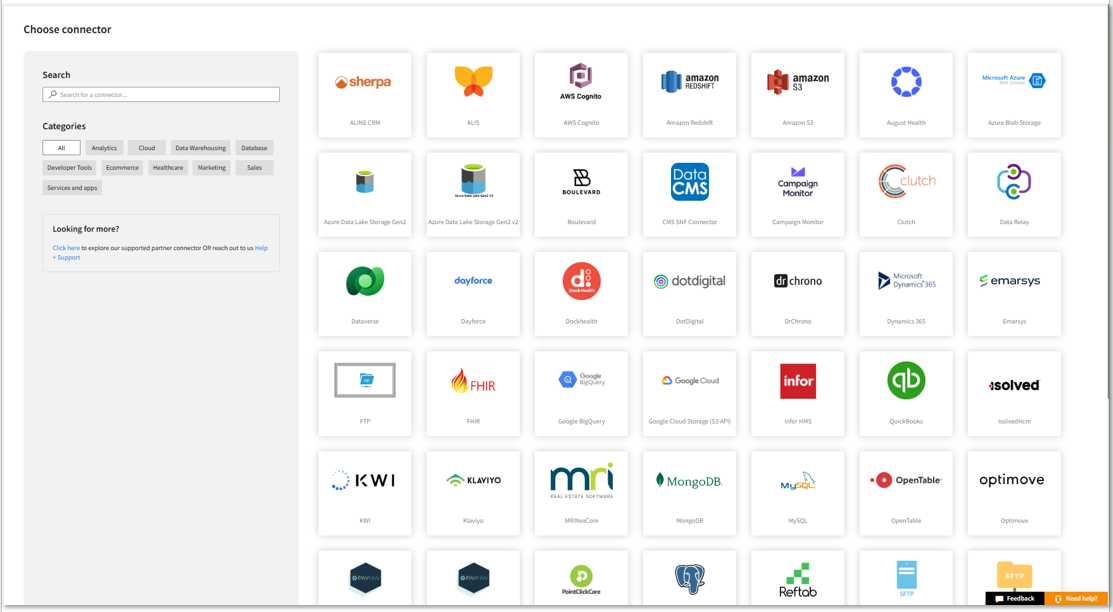
To add new Dataflow
- In the left pane, go to Dataflow > Imports.

- Click New Dataflow to create dataflow.
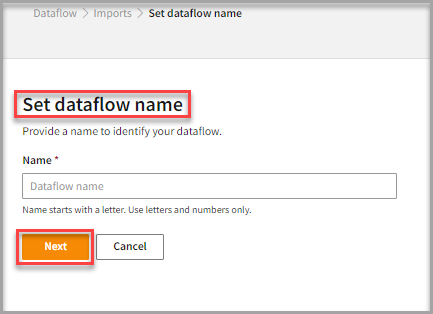
- Enter a Name to identify your Dataflow.
The name must start with a letter and can only contain letters and numbers, with no spaces between the characters.
- Click Next.
Add connectors
- Choose one of the existing Connectors to access the data.
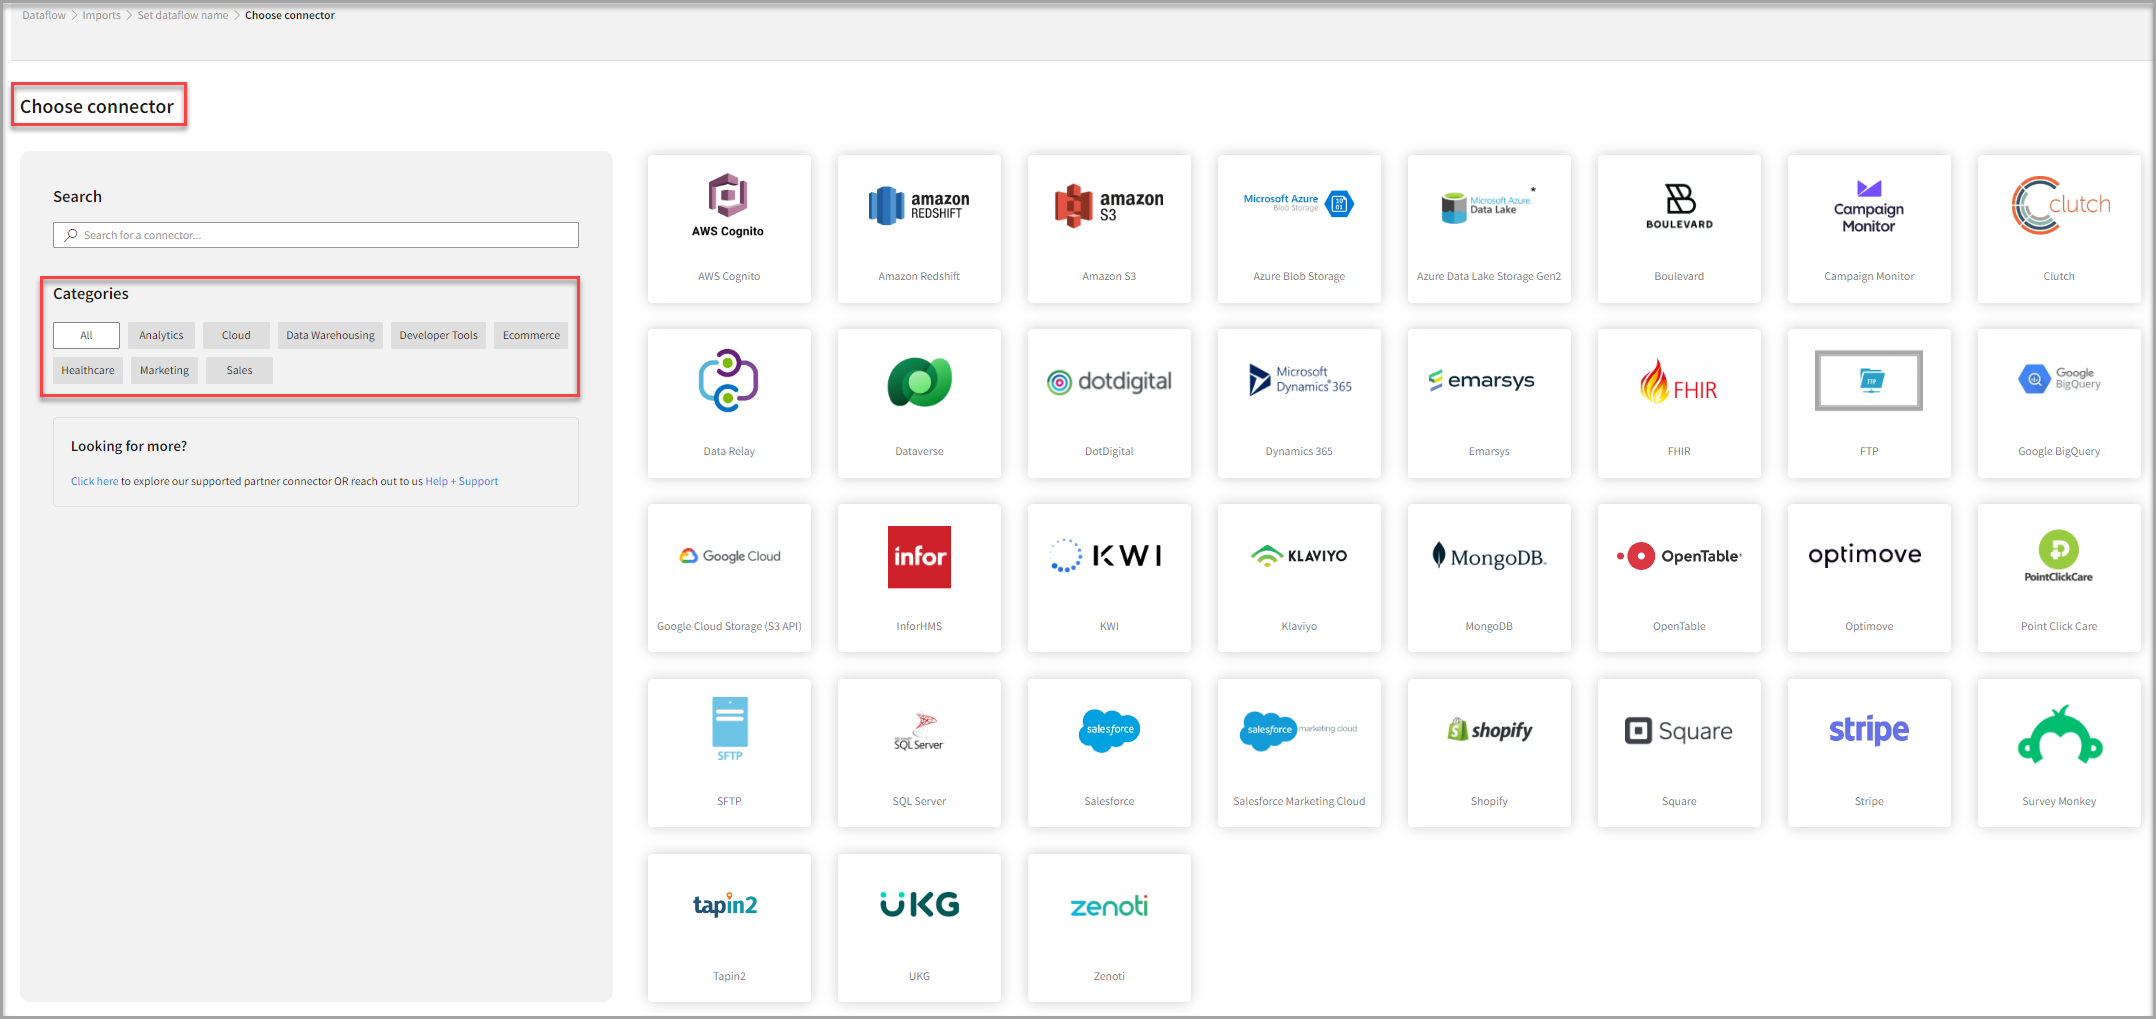
Connectors categorization
You can filter the list of connectors concerning the following categories:- You can use the search function to find the available connectors. For more information about different type of connectors and their configuration, refer to the Connector section.
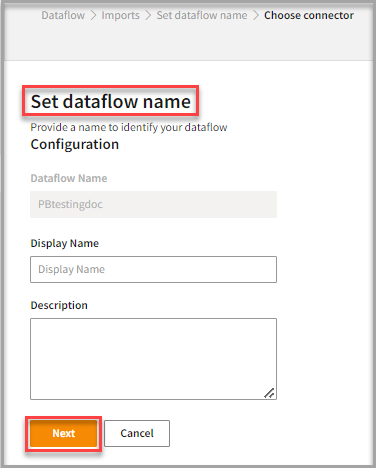
- Enter the Display Name and the Description of the connector.
- Click Next.
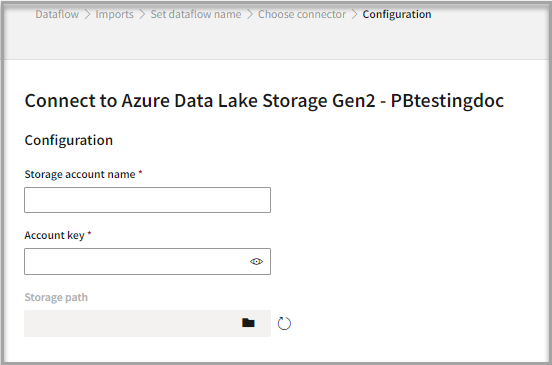
- Enter the account credentials to configure with the selected connector.
- If you want to keep the same date-time format for all the tables, select the check box.
- Click Save
- Select the Table Details to process the data.
After configuration, all tables that are part of the connector are listed in the Table Details. By default, it displays a single table upon successful connection, showing information specific to the client connector and the tables it supports. For multiple tables, you can select only those tables you want to import and process. For example, to import customer data, choose the tables that contain customer information such as name, email, address, and contact details.
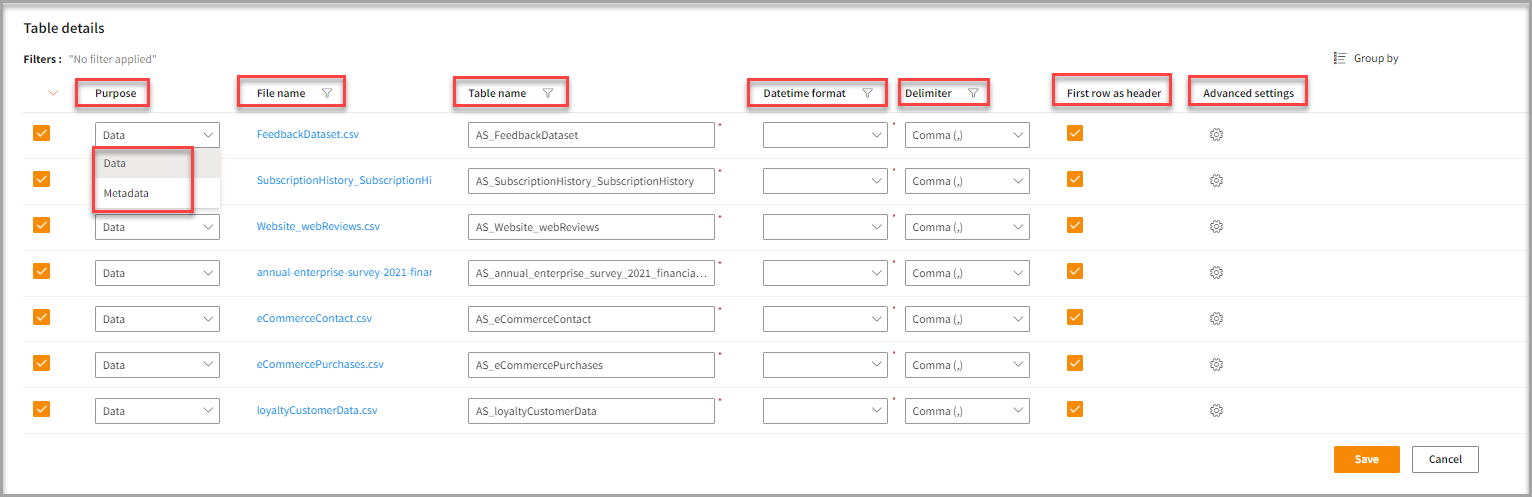
You can select the Datetime in MM/DD/YYYY format, for example, 11/25/1979. It helps the system to understand the data format and apply further formatting if required during downstream processes. The same Datetime format as set in the instance settings can be seen for the Datetime fields in the profile card. If you wish to see the profile card with Datetime as imported from the source, you can unselect the option in Stitch > Map > advanced settings.
- If necessary, apply the Advance settings to modify the default settings.
Advanced settings allow you to modify the default settings. It gives more flexibility to apply advanced use cases. However, the default settings are adequate to perform the task.
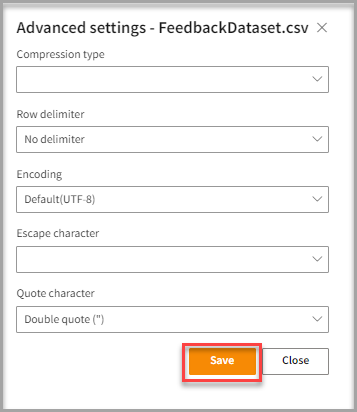
- Click Save to apply the changes.
Run, edit, and delete the imported data
- After saving the connection, imported data appears on the Dataflow page. Also, you can see a list of the created tables in the Databases section.
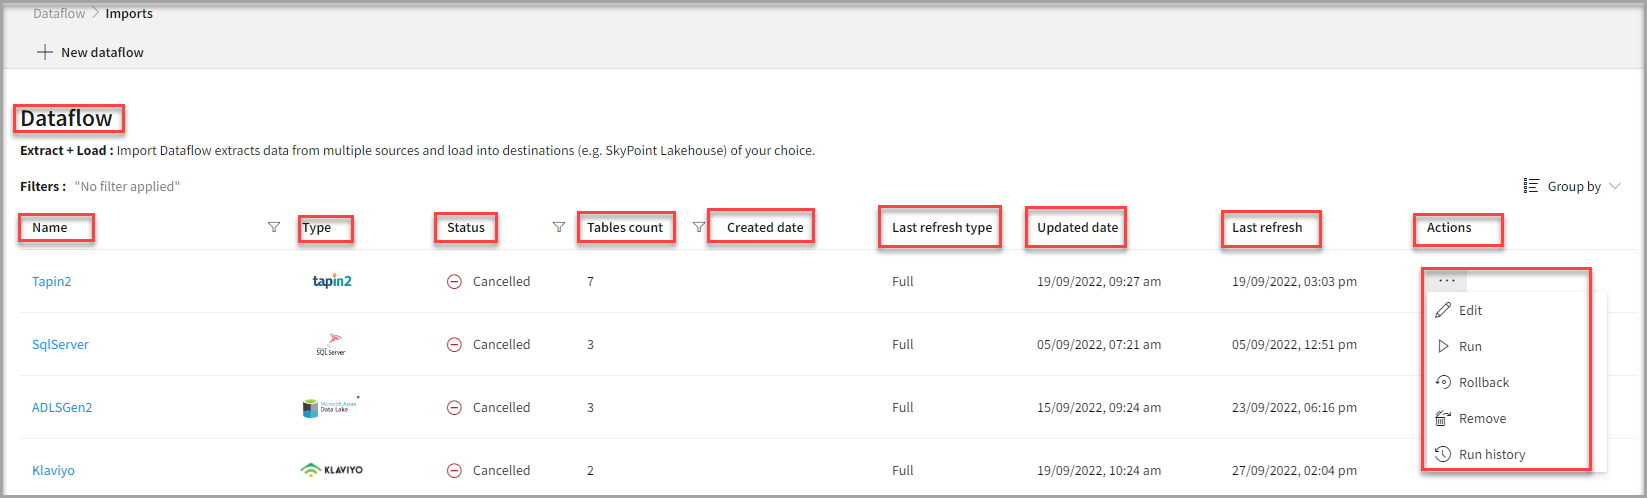
- Select the horizontal ellipsis in the Actions column and do the following:
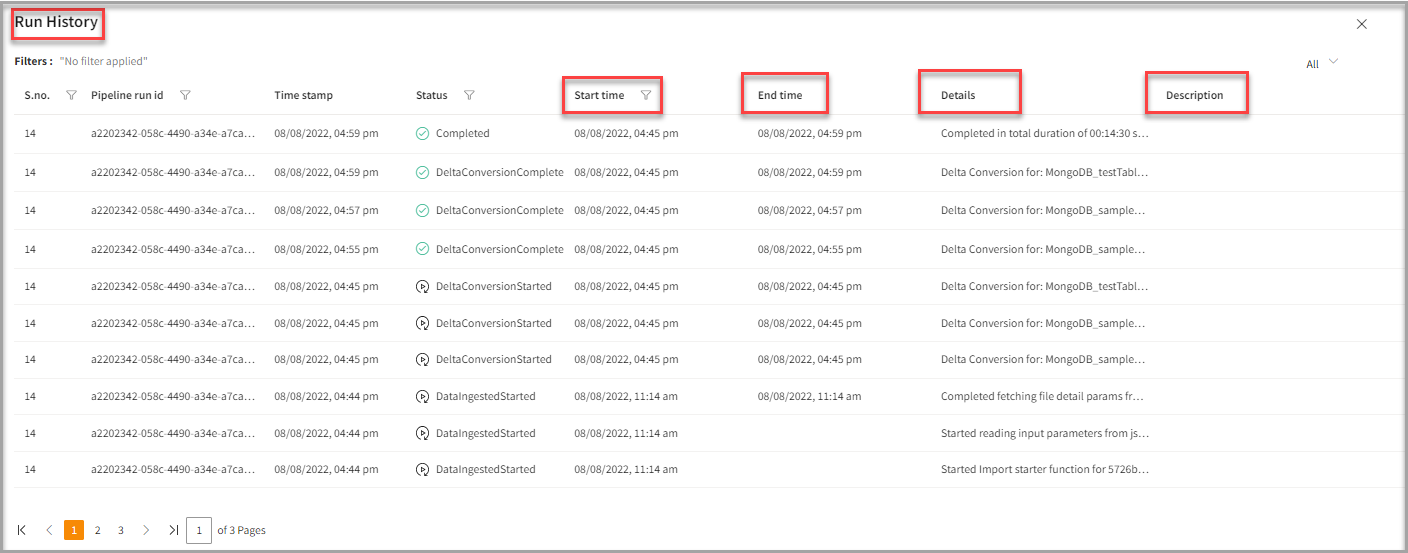
The Run history for SQL connector import in Dataflow shows all the states for ingestion and the completion time reflects the complete time for the pipeline completion. Also, you can see the error message corresponding to failure while importing data from a data source under Description.
To configure Email Notification for pipeline status
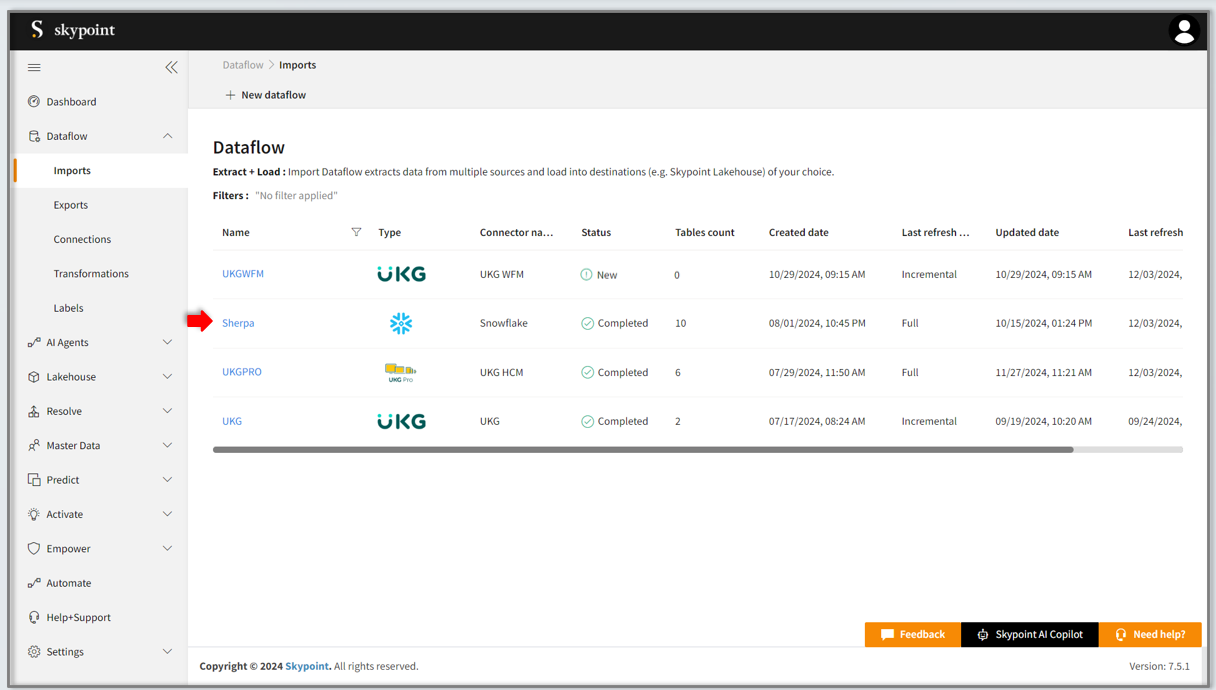
Now you can set up email notifications to stay informed about pipeline success or failure events in real time. Follow these steps to configure notifications.- Click on the Pipeline name for which you want to configure notifications.
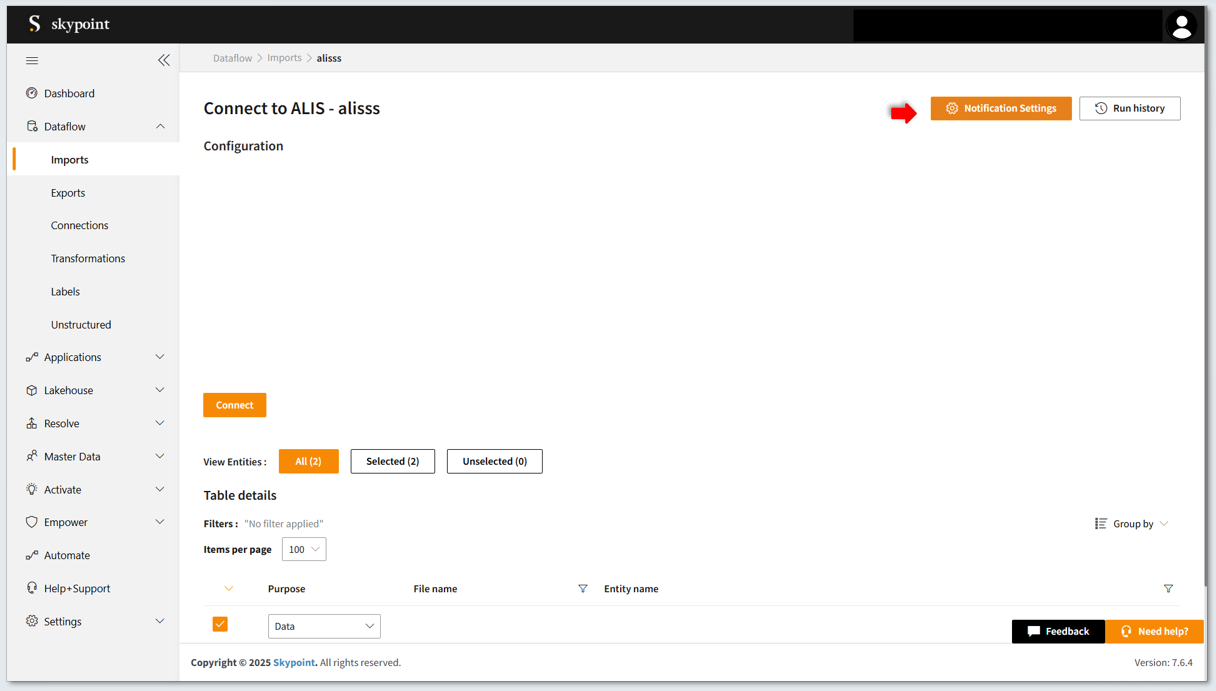
- Click Notification Settings on the right corner of the screen.
- Notification settings form appears, check the box Enable Notifications to proceed.
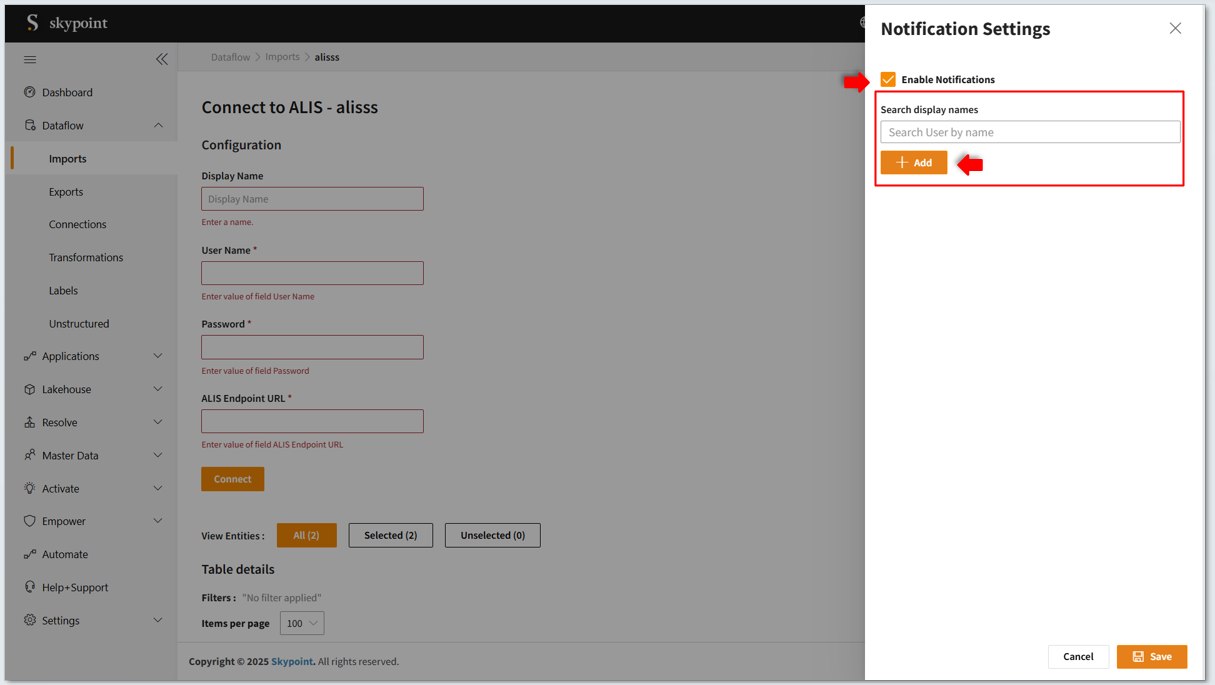
- Enter the mail id to Add user.
- Click on the Add button to add multiple users.
- Access the Manage User option to configure notifications for pipeline completion of statuses of success, failure, or both.
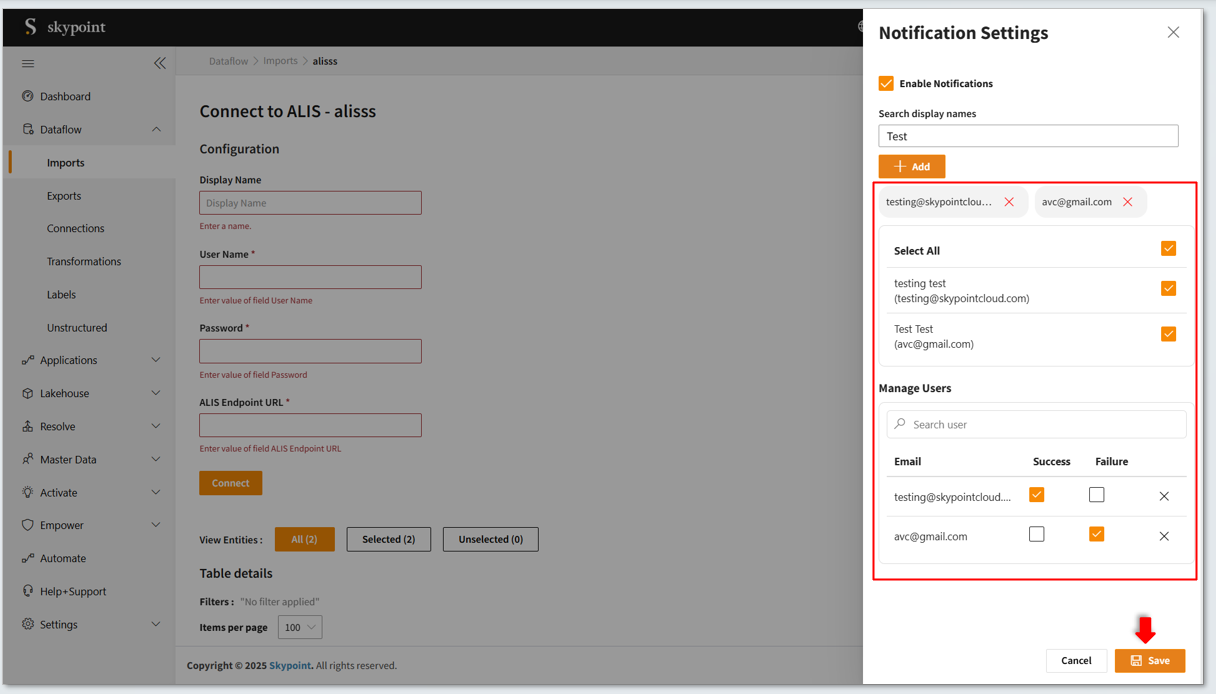
- Click Save to apply for changes.
- User will get the mail notification based on the configuration, such as Sucess/Failure or Both.
Notifications set for a specific connector are limited to that connector only. You won’t receive updates for other connectors unless configured separately.
- Follow the same steps to configure notifications for other pipelines.
Get assistance for your connector
In case, you are unable to find your desired import connector, you can perform one of the action in the Looking for more section. You can raise a support ticket for the Skypoint team to look into your request.List of all import connectors
- Alis
- August Health
- AWS Cognito
- Amazon Redshift
- Amazon S3
- Azure Synapse Analytics
- Microsoft Azure Blob Storage
- Microsoft Azure Data Lake
- Boulevard
- Campaign Monitor
- CMS SNF
- Dataverse
- Dayforce
- DockHealth
- Dotdigital
- Dr Chrono
- Microsoft Dynamics 365
- FHIR
- Google Cloud Storage
- Infor HMS
- iSolved
- KWI
- Klaviyo
- MRINexcore
- MySQL
- NetSuite
- Paychex
- PayNW
- PayNW Reports
- PointClickCare
- Reftab
- SFTP
- Salesforce
- Salesforce Marketing Cloud
- SharePoint
- Shopify
- Sitelligence
- Snowflake
- SQL Server
- Square
- Stripe
- UKG PRO
- UKG WFM
- WelcomeHome
- Workday
- Workday Raas
- Zenoti