

Connecting to Azure Synapse Analytics
This guide provides a step-by-step approach to effortlessly connecting Azure Synapse Analytics with skyData. The Azure Synapse Connector allows your platform to connect with Azure Synapse Analytics, enabling the ingestion of structured data from Synapse SQL pools. It simplifies data integration by securely extracting data from Synapse tables or views and loading it into your platform for further transformation, reporting, or AI-driven insights. The Azure Synapse Analytics Connector in skyData enables seamless integration with Azure Synapse Analytics, a cloud-based data warehouse and analytics service. It allows organizations to ingest and synchronize structured data such as transactions, general ledger entries, and vendor records using secure connections. The connector supports service principal authentication, automated scheduling, and data transformation, making it easy to integrate data into Skypoint’s unified data models. This enhances data accessibility, analytics capabilities, and enables AI-driven financial and operational insights.Prerequisite
You will need the following details to configure and import data using Azure Synapse Analytics- Server Name
- Database Name
- Port Number
- User Name
- Password
To Import data using Azure Synapse Analytics
Follow the below steps to create a new dataflow for the Azure Synapse Analytics import connector:- Go to Dataflow > Imports.
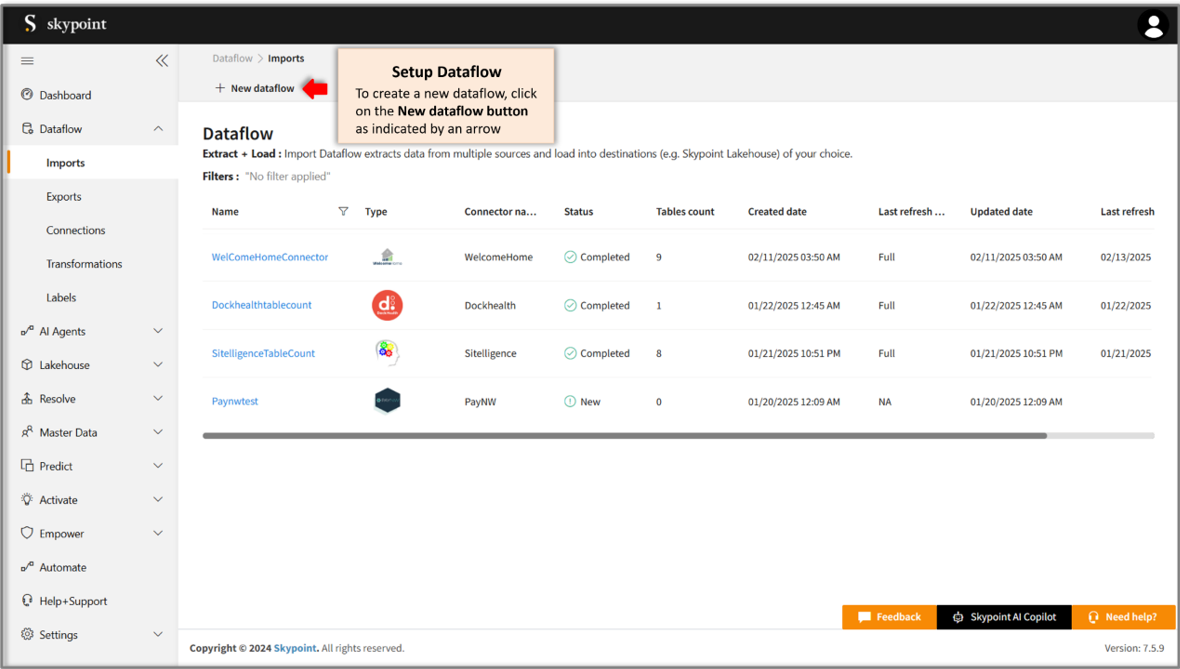
- Click New dataflow.
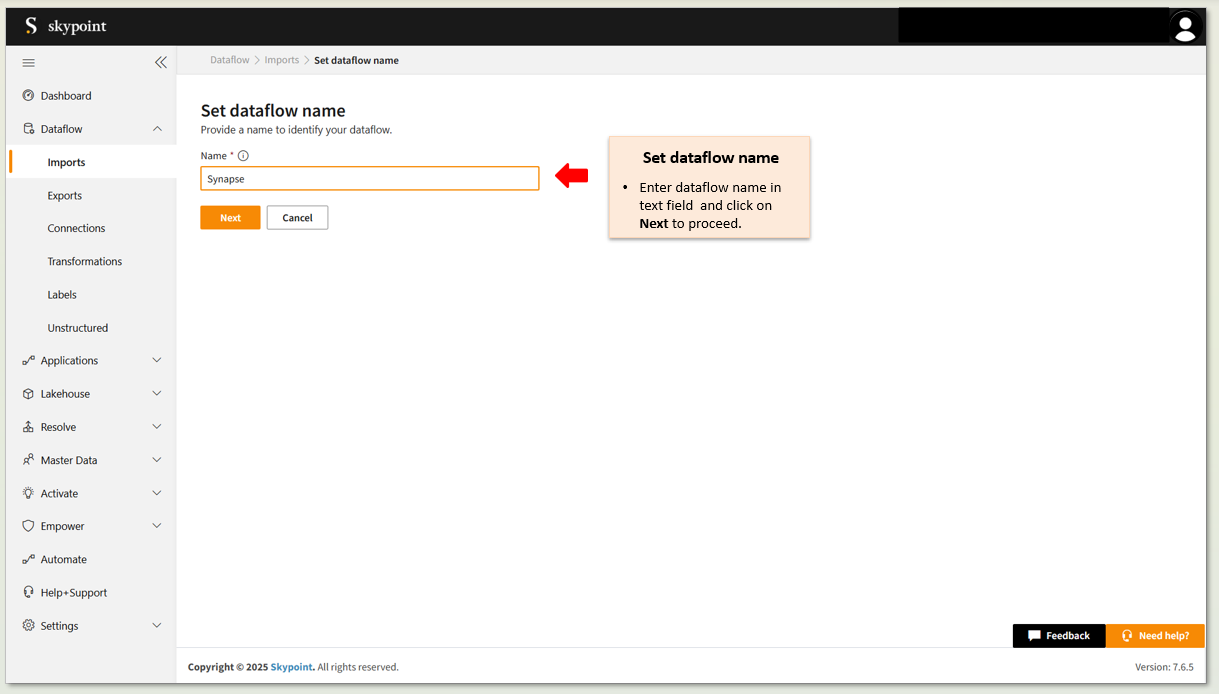
- Enter Dataflow name in the Name text area.
- Click Next.
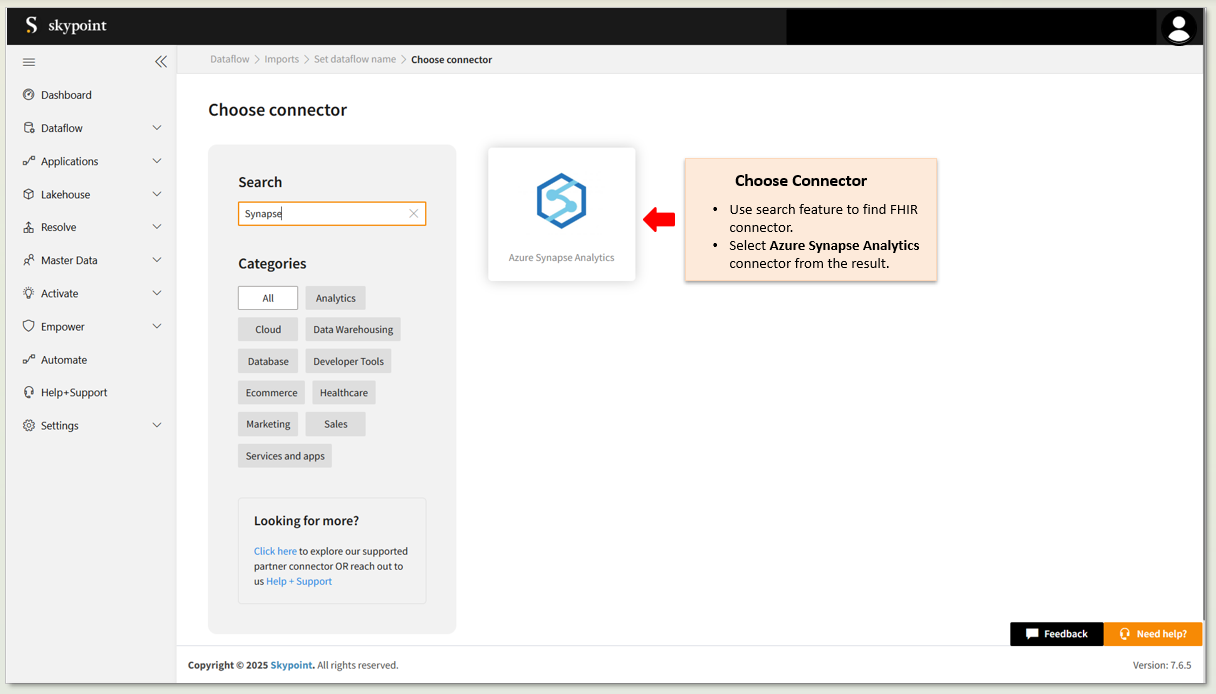
Add Azure Synapse Analytics connector
- On the Choose Connector page, use the Search feature to locate and select the Azure Synapse Analytics Connector.
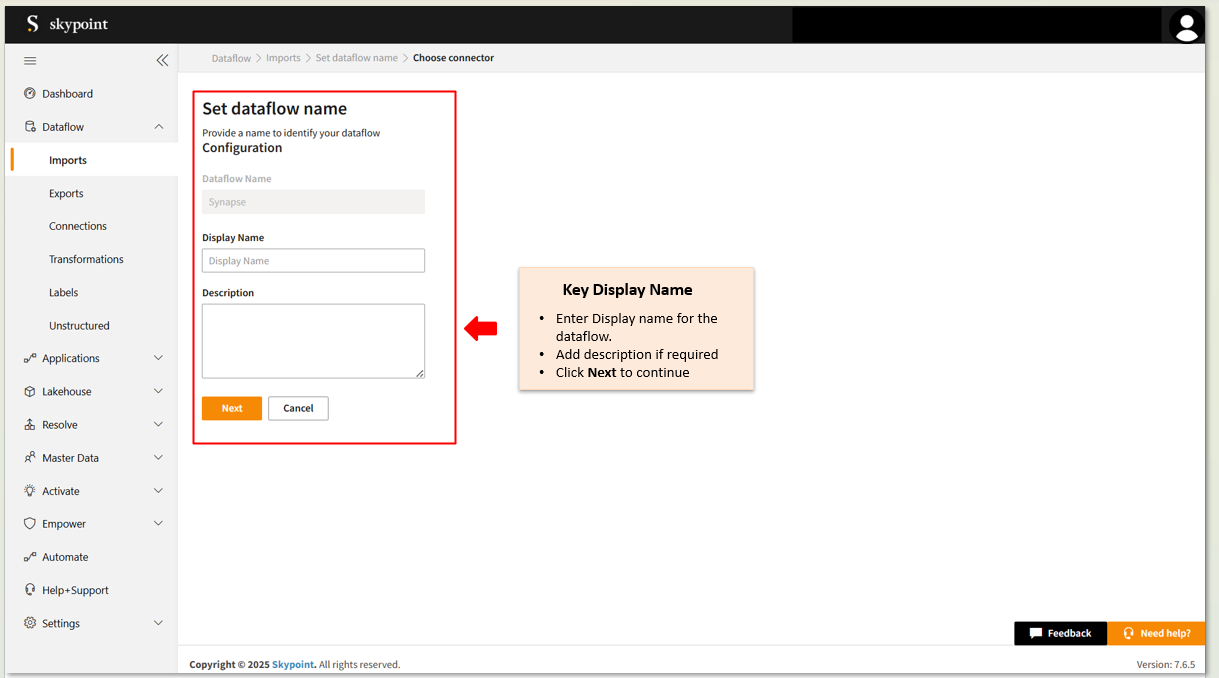
- Enter the Display Name for your dataflow in the text area.
- You can add a Description in the text area.
- Click Next to proceed.
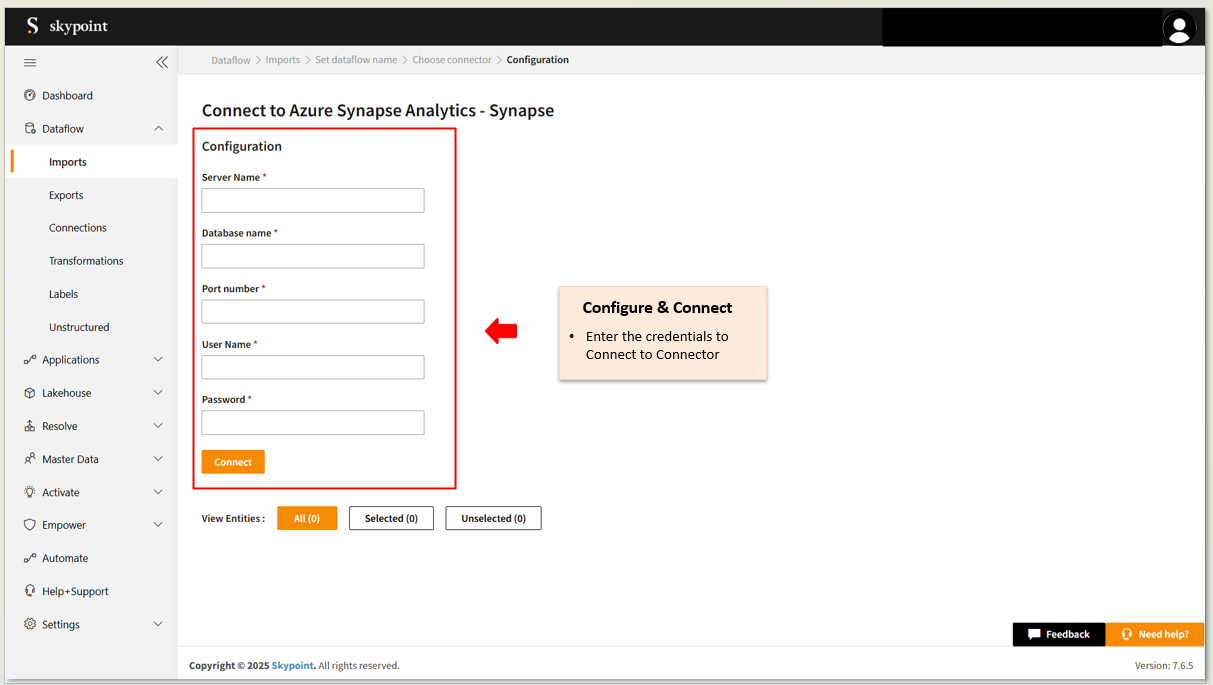
Connect to the Azure Synapse Analytics account
- Fill in the required details on the Configuration page.
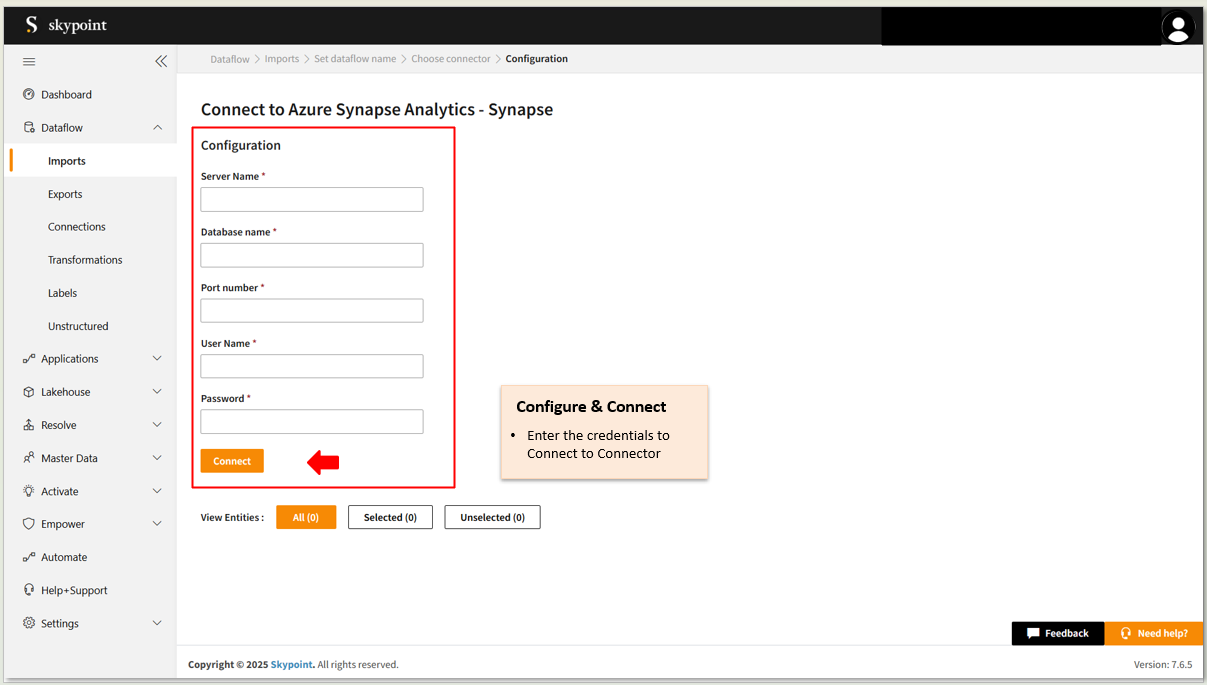
- Click Connect.
- Scroll down to the Table Details section, select the checkboxes for the tables you wish to import, and use the dropdown menu to label them as either Data or Metadata.
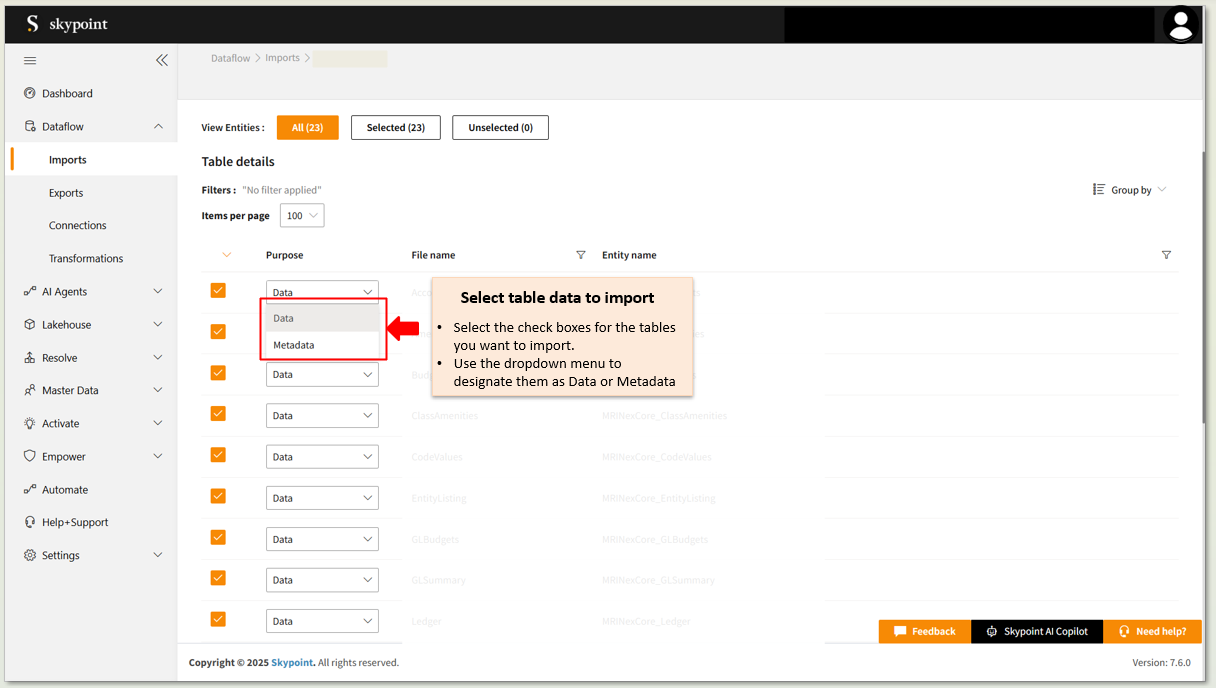
In the Table Details section, by default, all tables are selected. You can mark only those tables that you want to import and process the data. For example, to import customer data, you can check those tables which contain customer information, such as name, email, address, and contact details.
- Click Save to apply the changes.
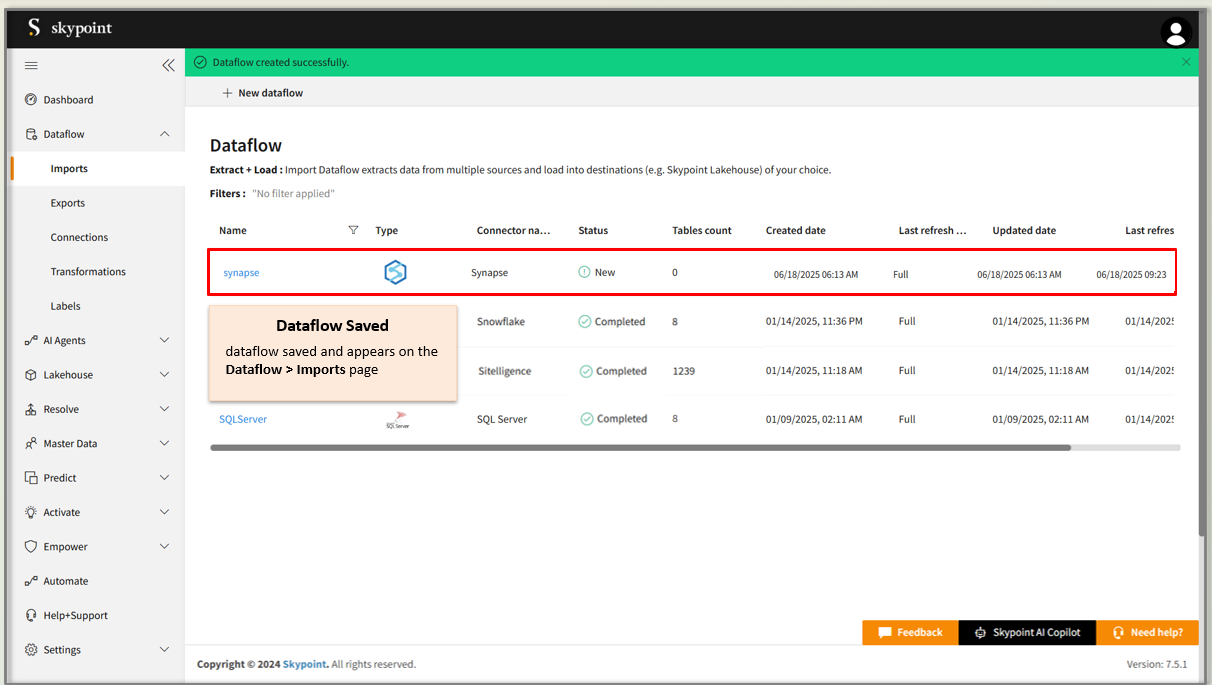
Run, edit, and delete the imported data
Once the table is imported, you can execute, modify, and remove the imported table from the Dataflow. Follow the below steps:- Go to the Dataflow > Imports page.
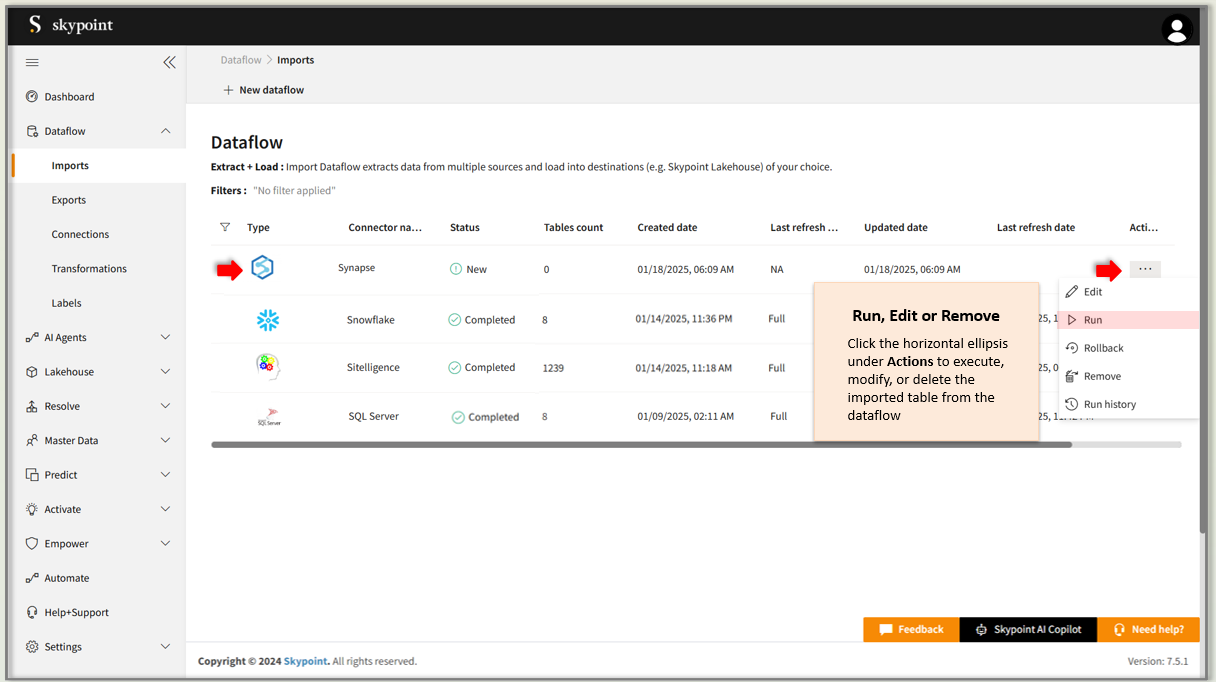
- Select the horizontal ellipsis under the Actions column and do the following:
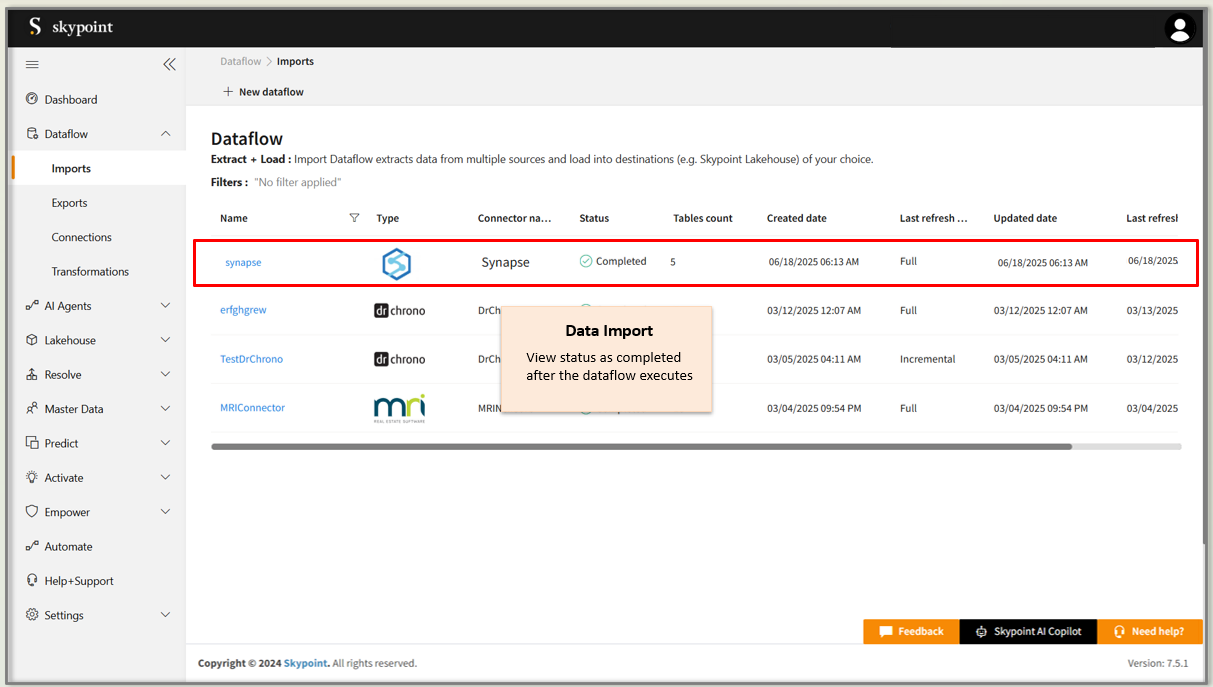
You can see the error message corresponding to failure while importing data from a data source in the Dataflow under Run History > Description. Also, you can see the status, start time, and end time for the execution of the data pipeline.