

Connecting to PayNW
Learn how to seamlessly integrate PayNW with skyData, covering setup, configurations, and important factors. PayNW provides cloud-based Human Capital Management (HCM) solutions for mid-sized and growing businesses, streamlining payroll, HR, time tracking, benefits administration, and talent acquisition. Key features include accurate payroll processing, automated compliance, self-service tools for employees, and scalable integrations. Businesses benefit from reduced administrative burdens, improved efficiency, and regulatory compliance, enabling them to focus on strategic growth. The skyData Platform (AIP) seamlessly integrates with PayNW via an inbuilt connector, enabling real-time data synchronization for payroll, HR, time tracking, and benefits while enhancing automation, providing AI-driven insights, ensuring compliance, and offering self-service tools,all within a scalable, future-ready solution designed to minimize manual effort and optimize decision-making.Prerequisite
You need the following details to configure and import data using the PayNW⇗ connector:- Server name
- Database name
- Port number
- Username
- Password
To import data using the PayNW connector
Follow the below steps to create and configure a new dataflow for the PayNW import connector:- Navigate to Dataflow > Imports.
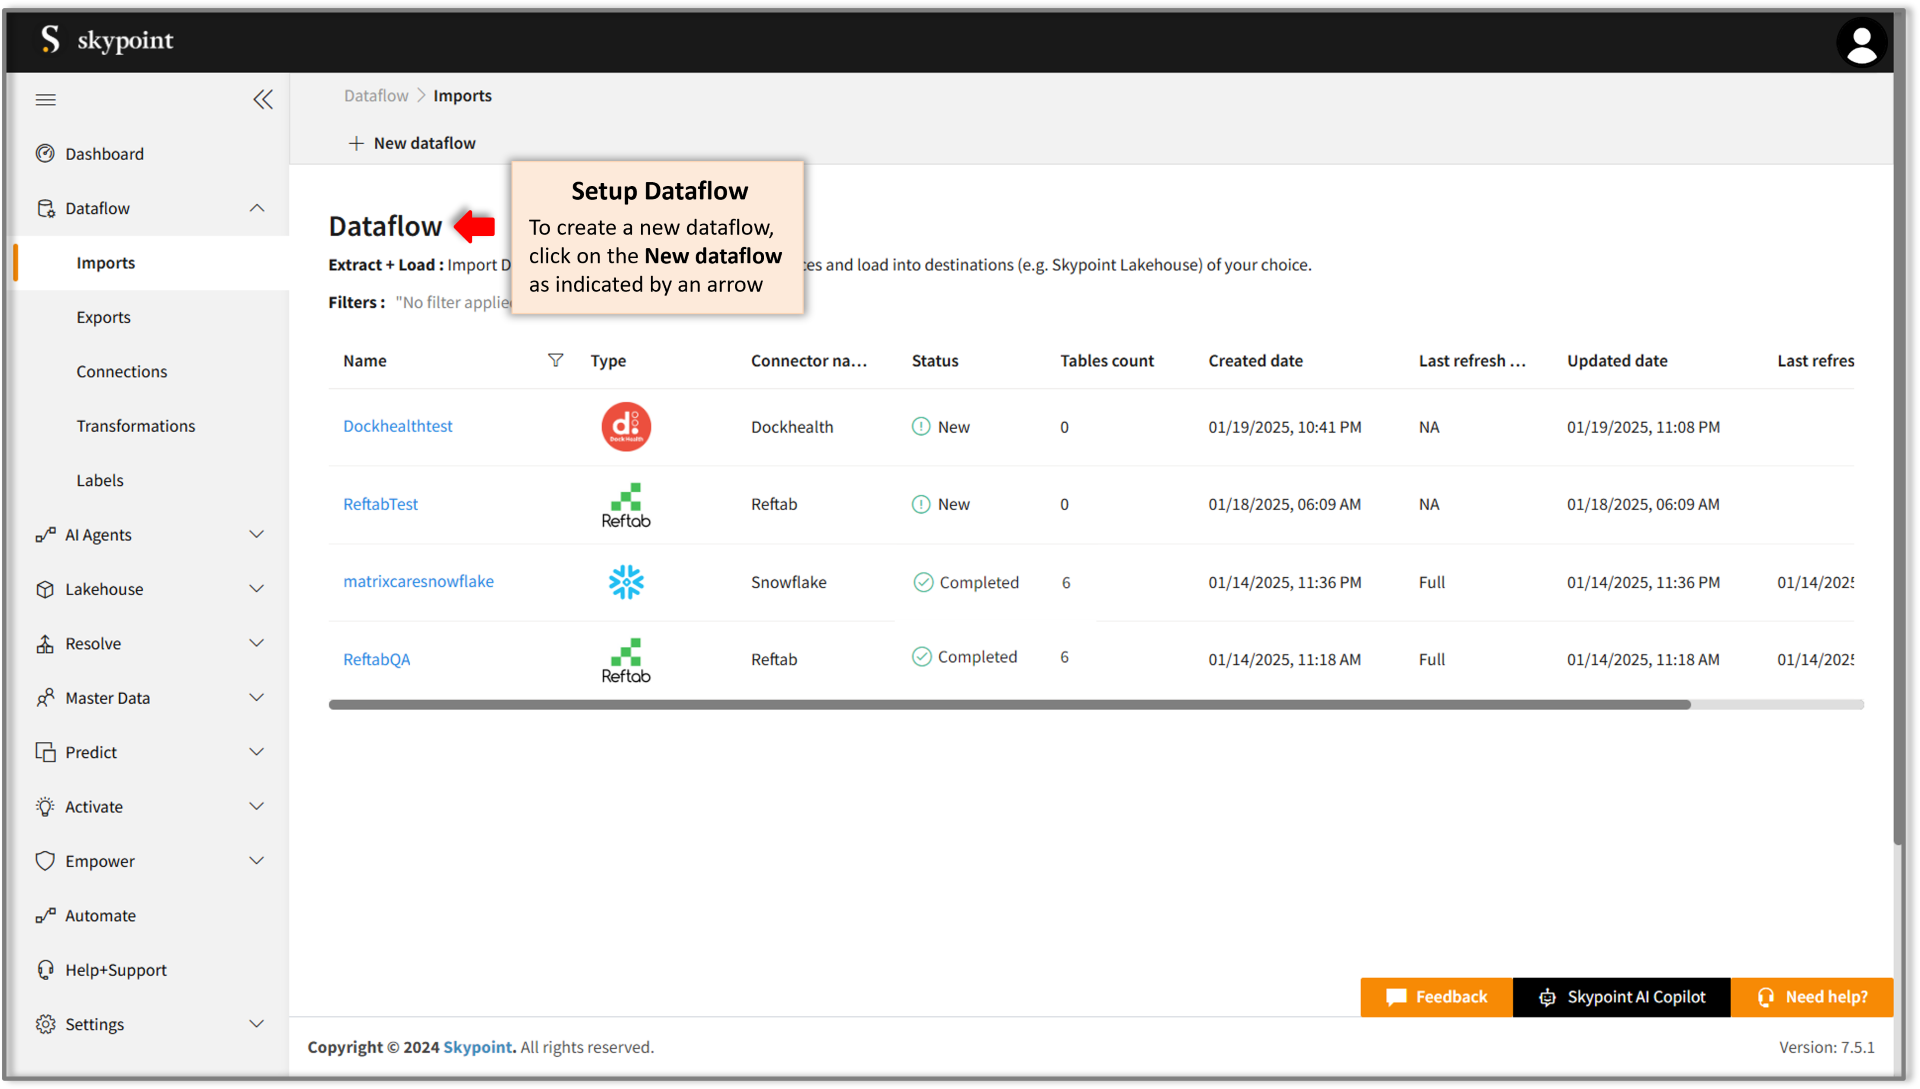
- Click New dataflow as indicated by an arrow.

- Enter the desired name for the dataflow in the Name text field.
- Click Next to proceed.
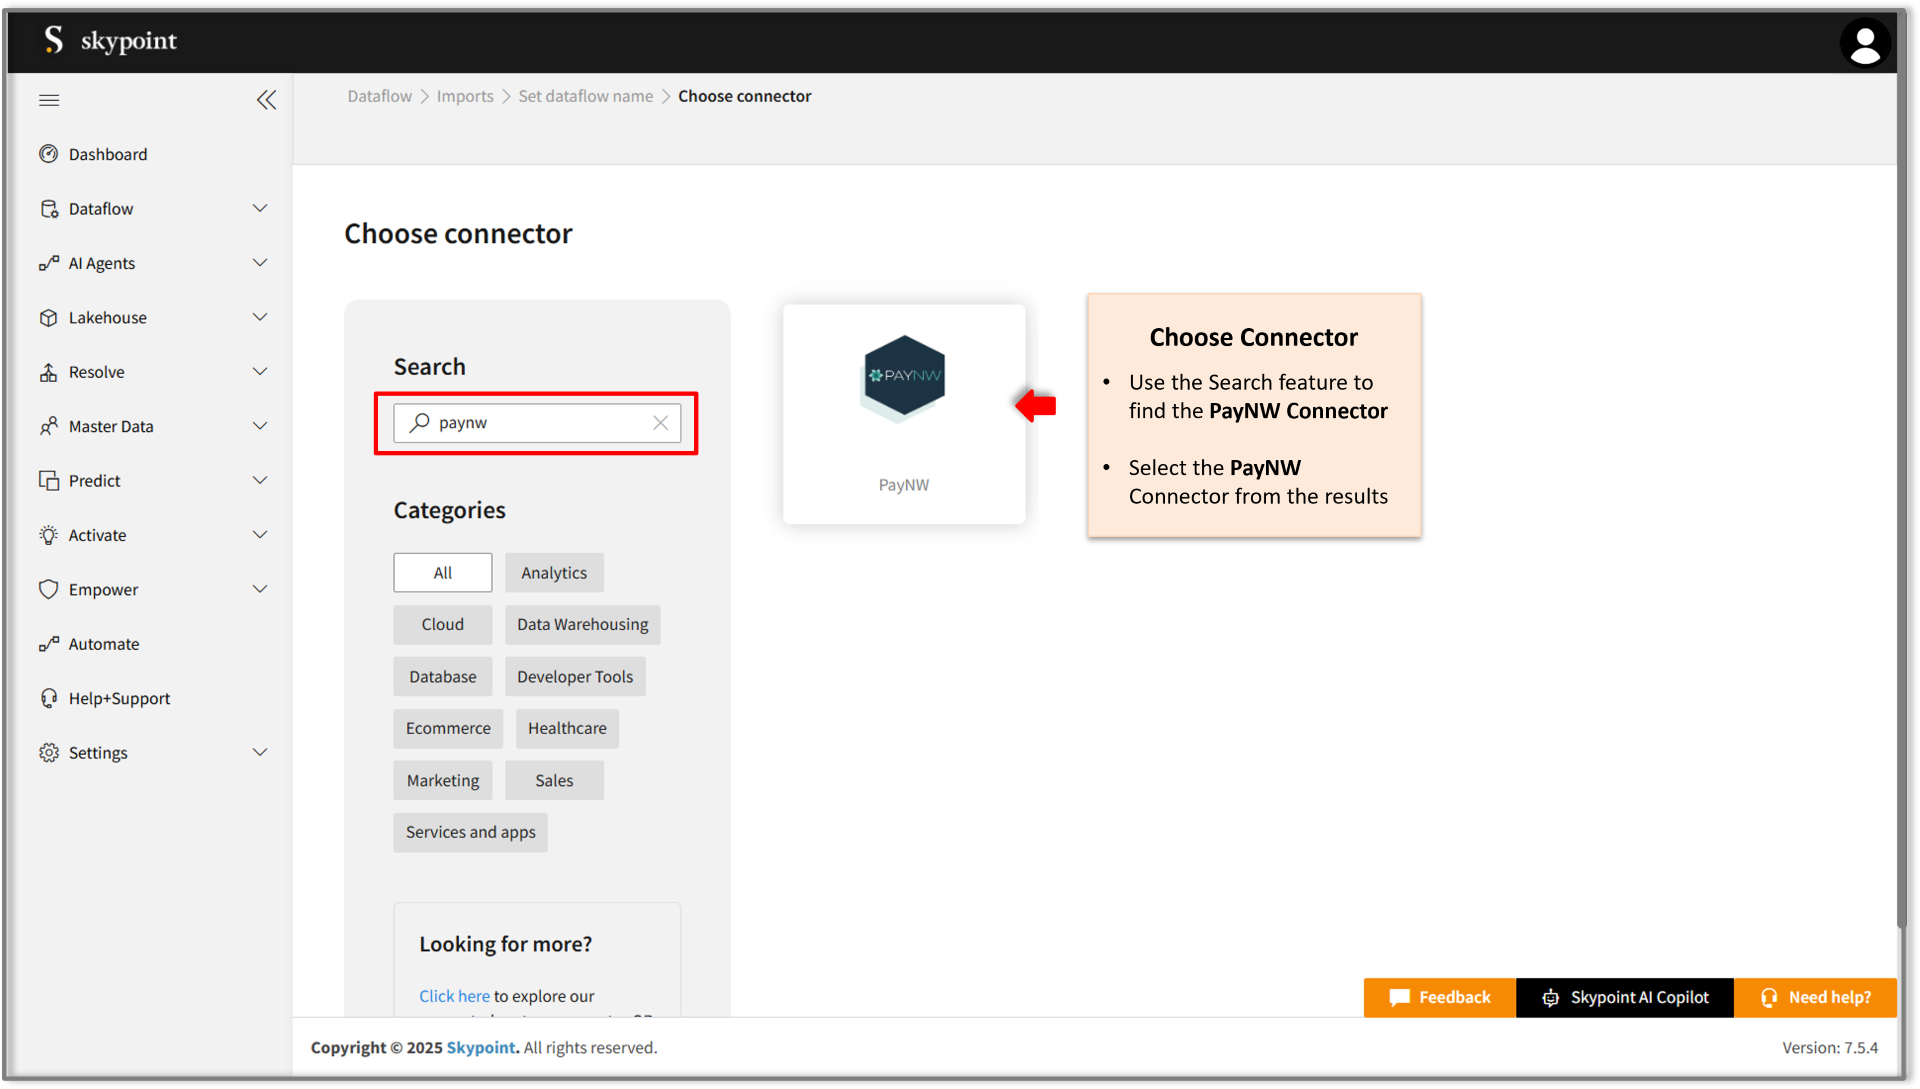
Add PayNW Server connector
- On the Choose Connector page, use the Search feature to locate and select the PayNW Connector.
- Enter the Display Name for your dataflow in the provided text field.
- Optionally, add a Description in the designated text area.
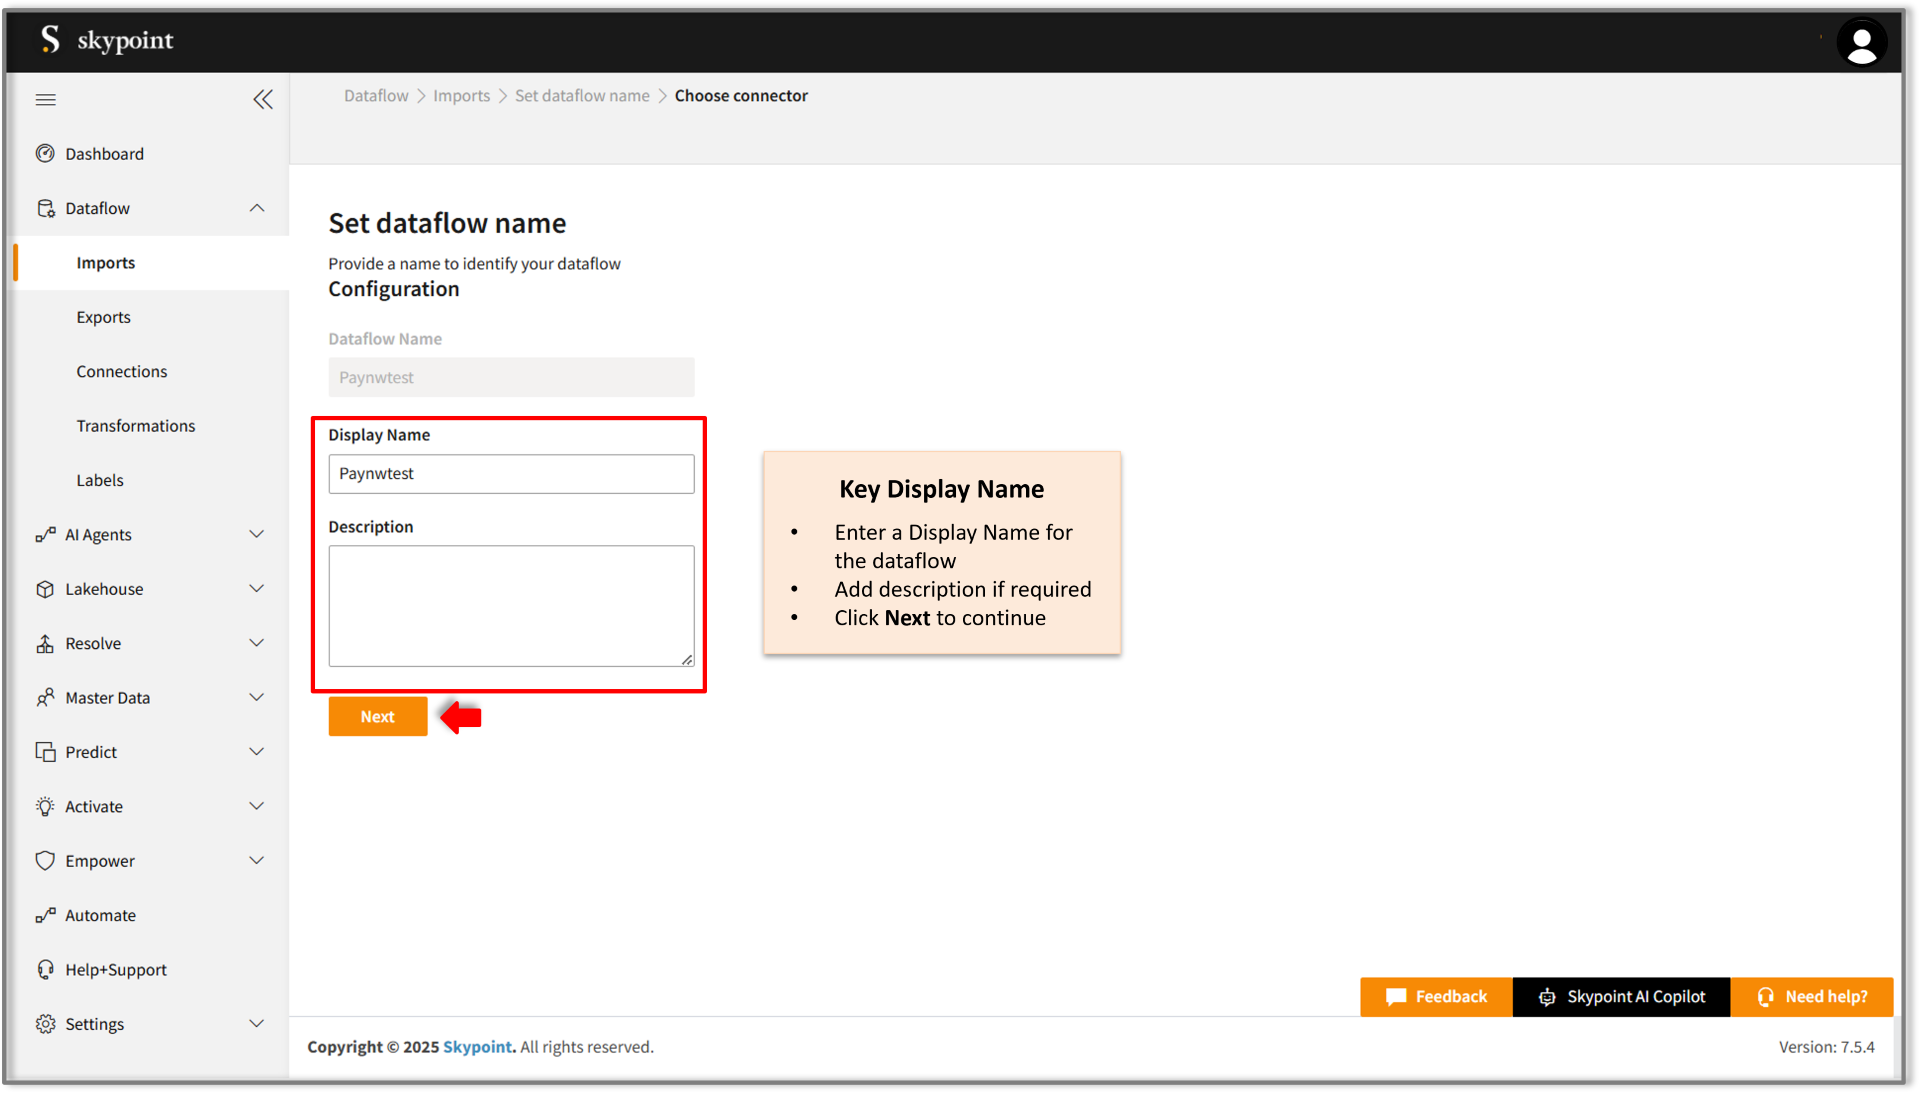
- Click Next to proceed.
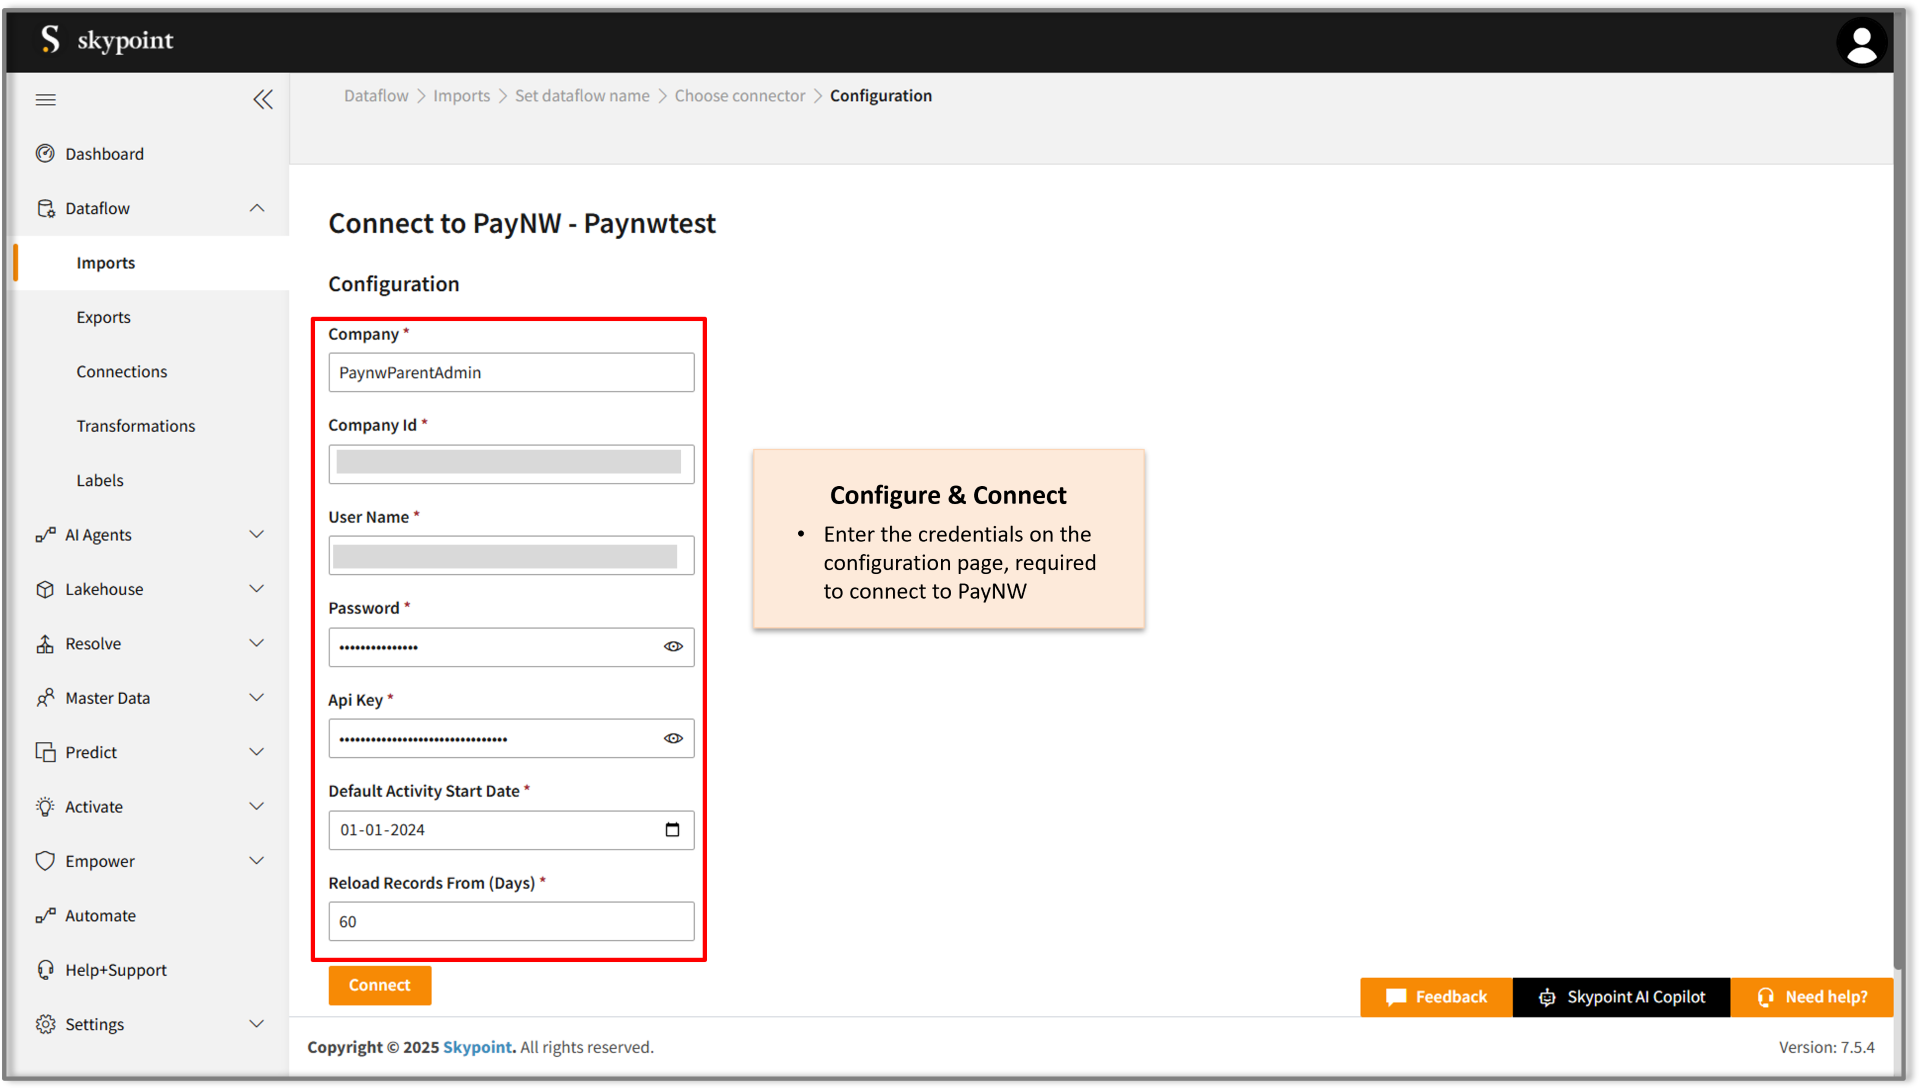
Connect to the PayNW account
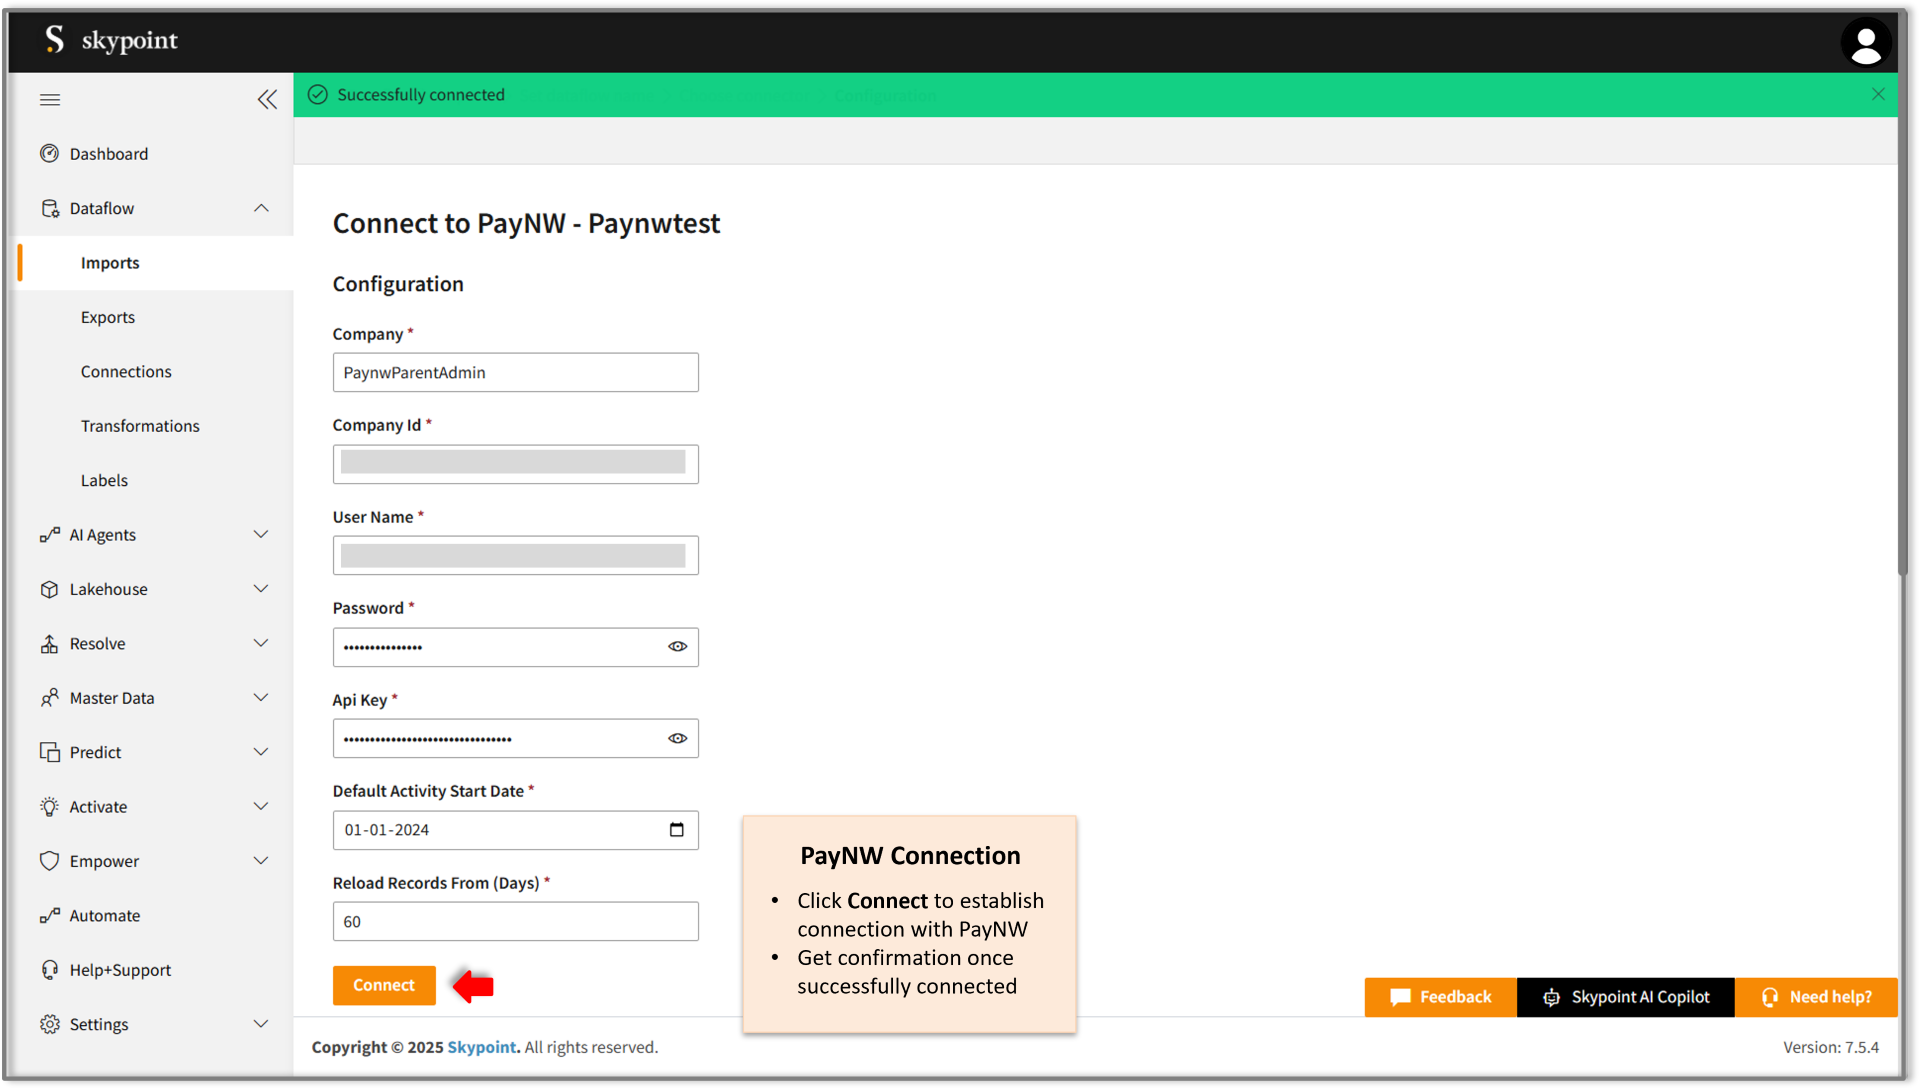
- Fill in the required details on the Configuration page.
- Click Connect.
- Scroll down to the Table Details section, select the checkboxes for the tables you wish to import, and use the dropdown menu to label them as either Data or Metadata.
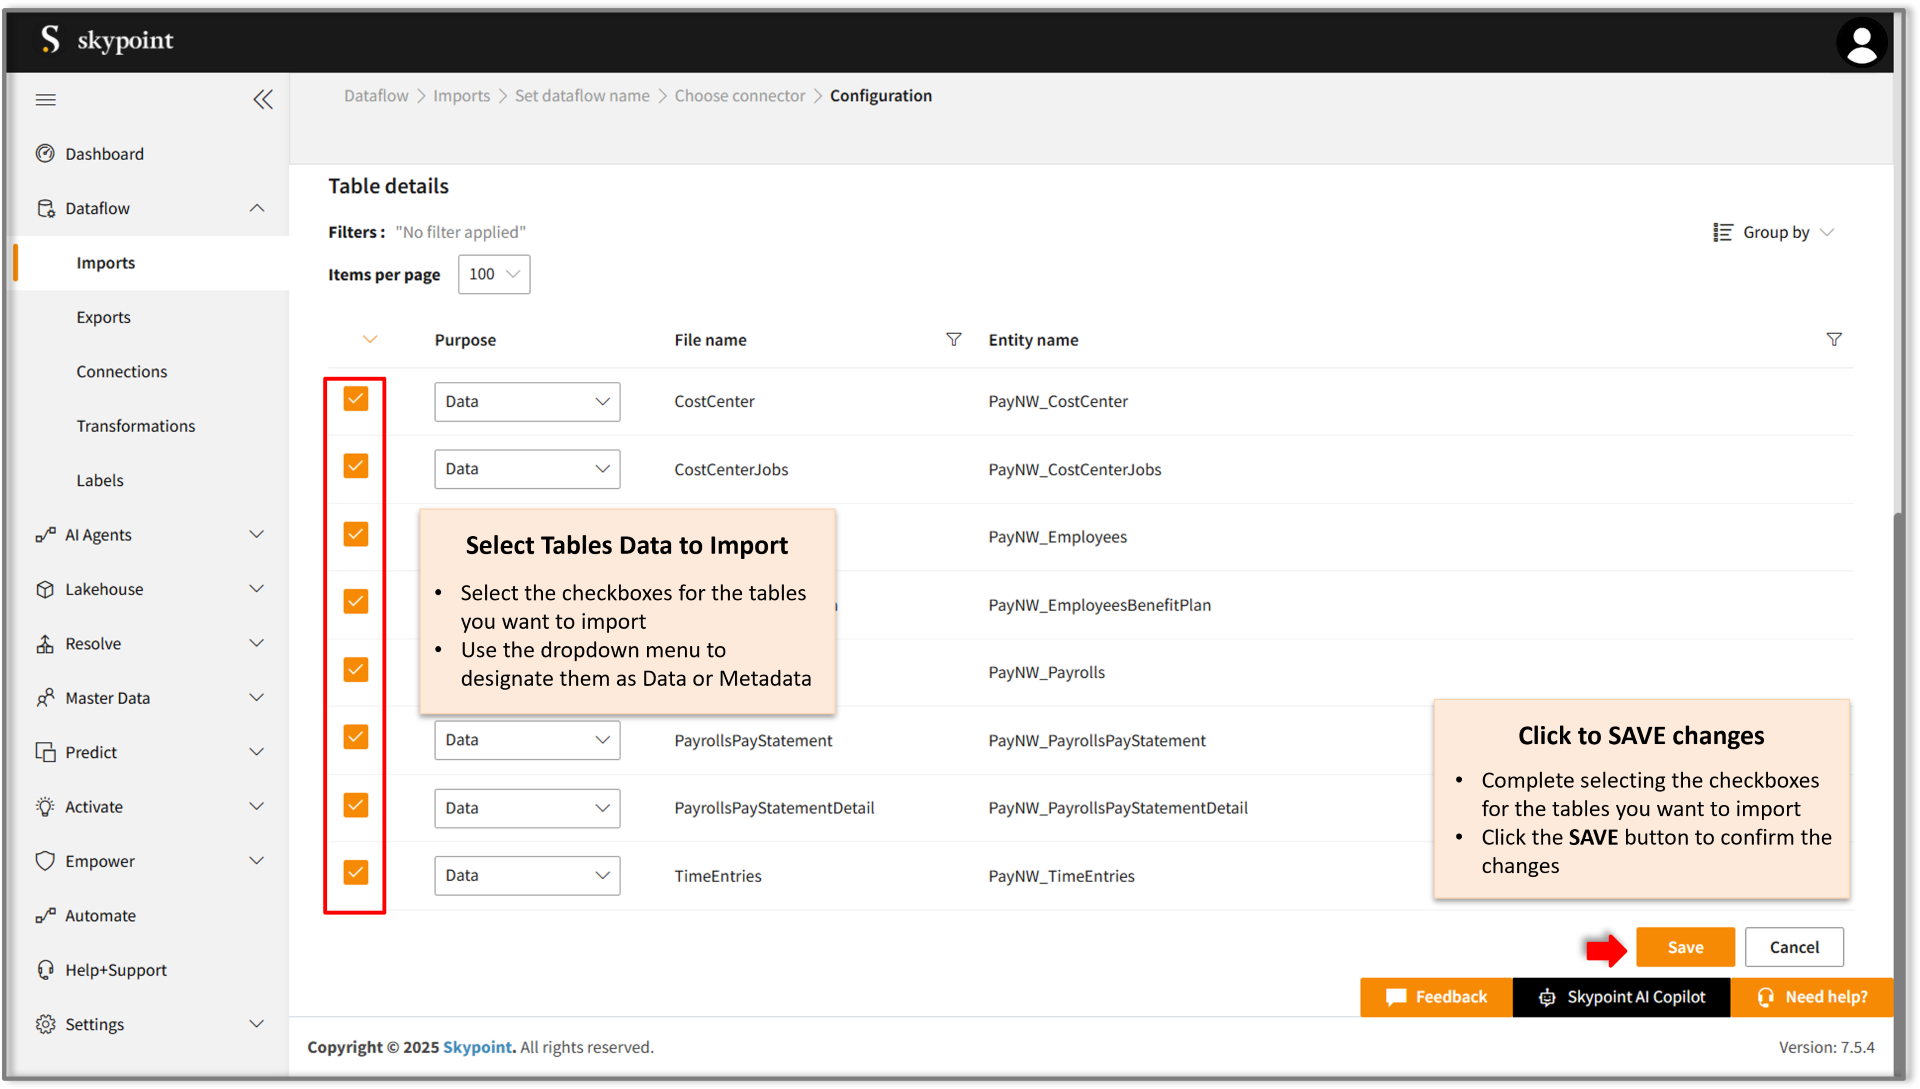
By default, all tables in the Table Details section are selected. You can choose to import only specific tables that are relevant to your data processing needs. For example, to import customer data, select tables containing details like name, email, address, and contact information.
- Ensure all required tables are selected.
- Click Save to apply the changes.
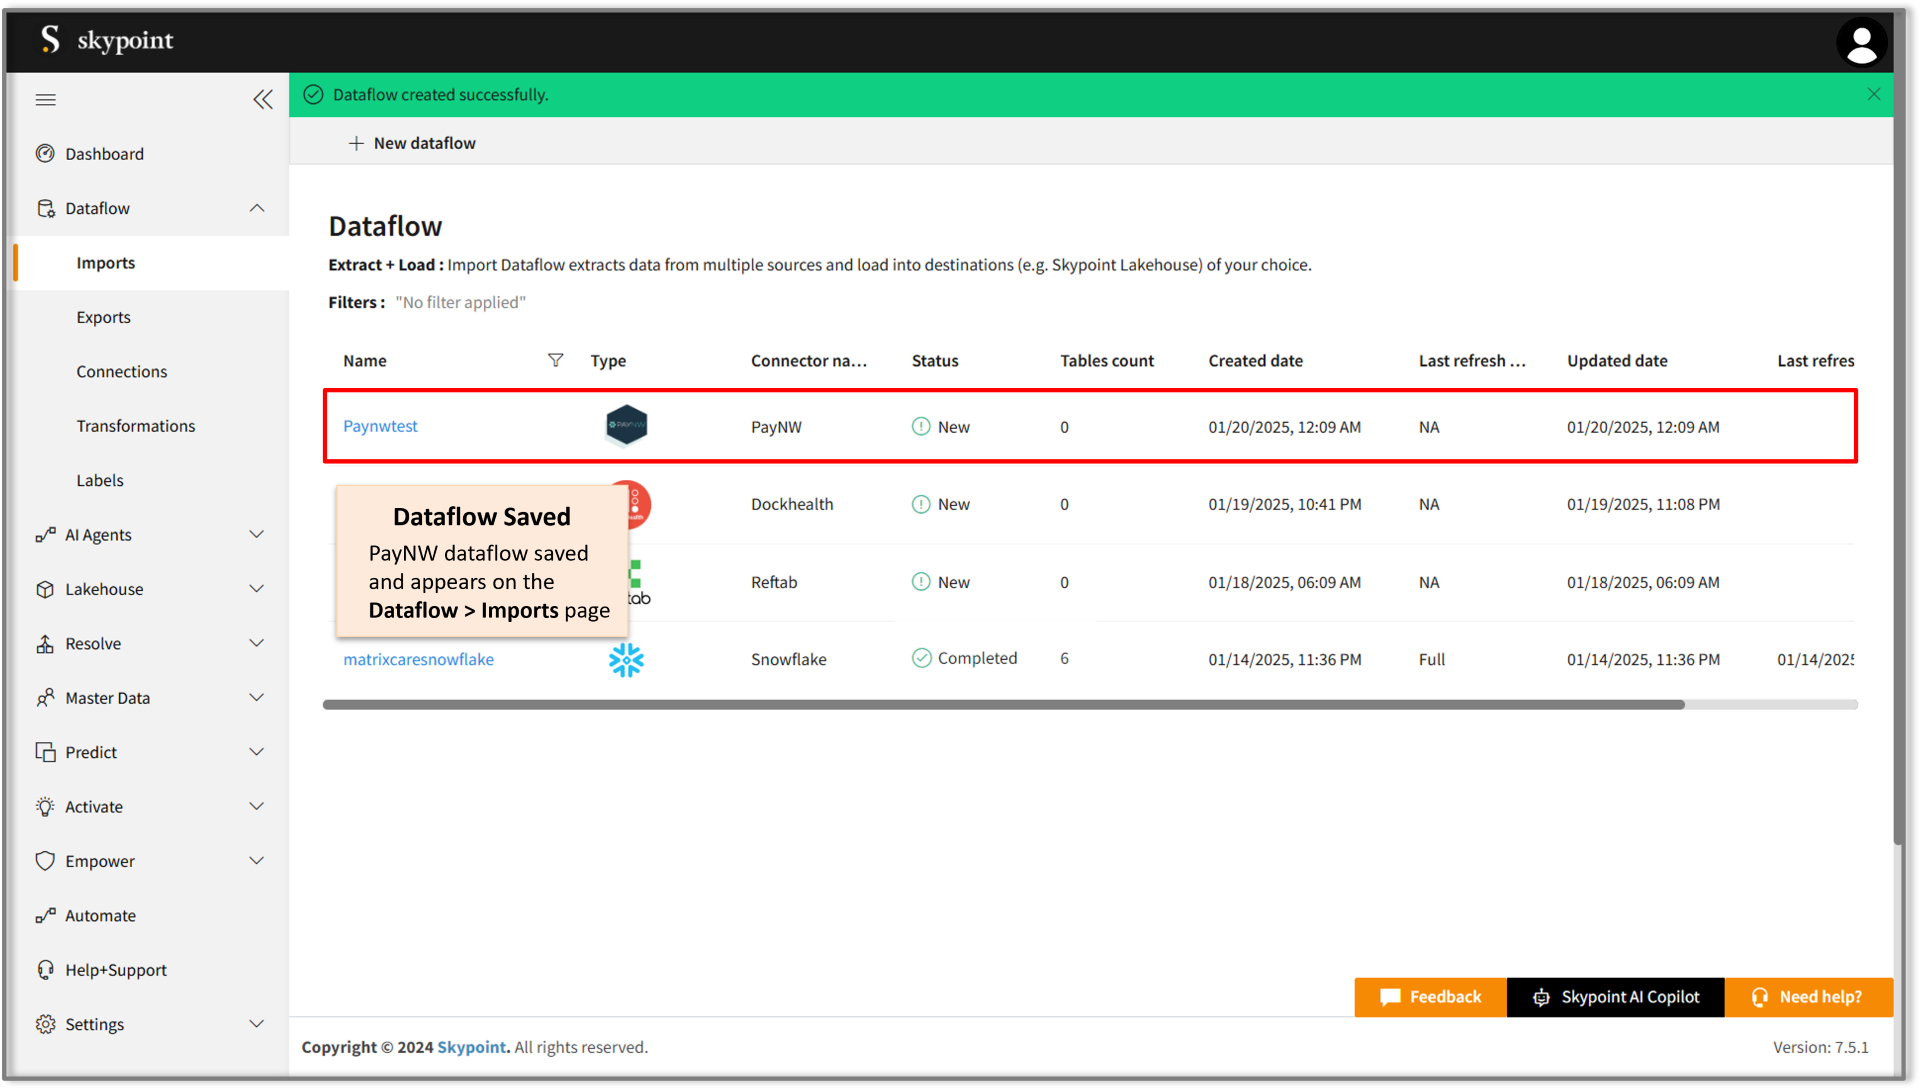
Run, Edit, and Delete the imported data
Once the table is imported, you can execute, modify, and remove the imported table from the Dataflow. Follow the below steps:- Go to the Dataflow > Imports page.
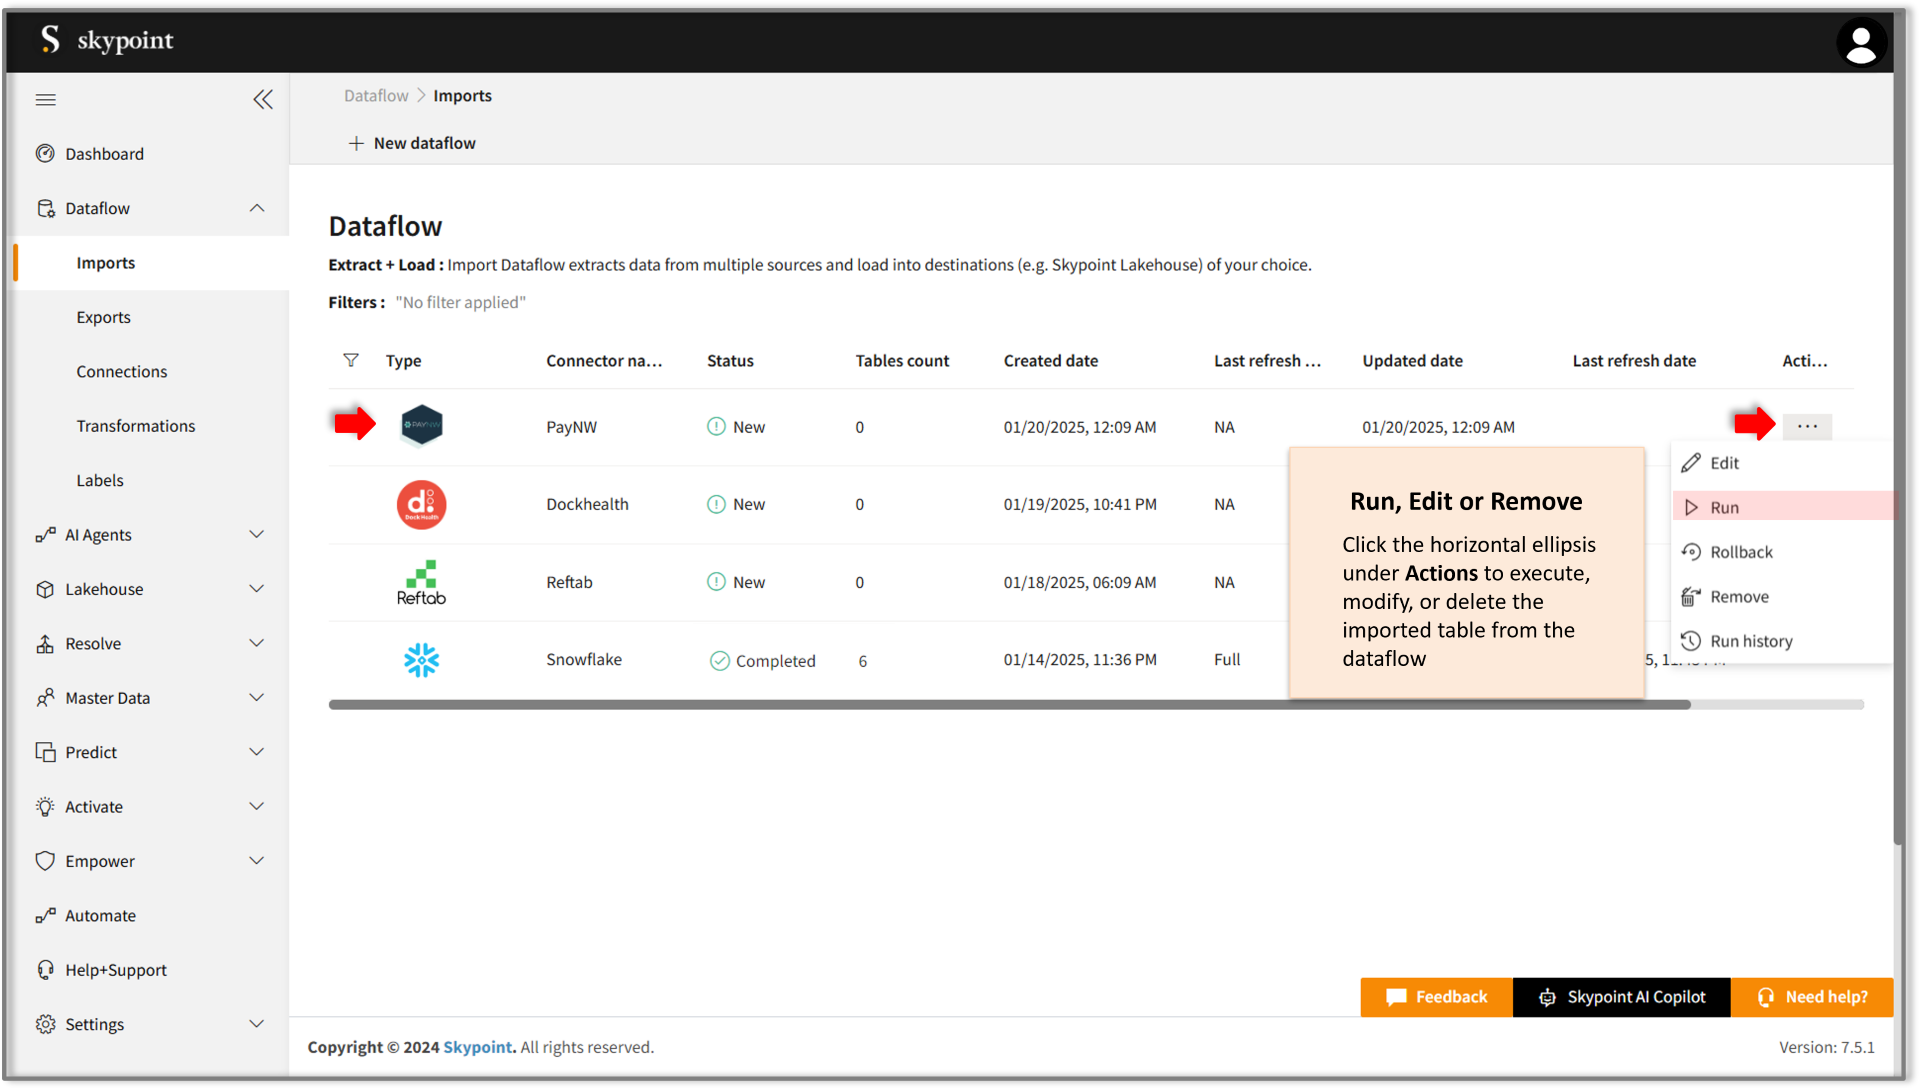
- Select the horizontal ellipsis under the Actions column and do the following:
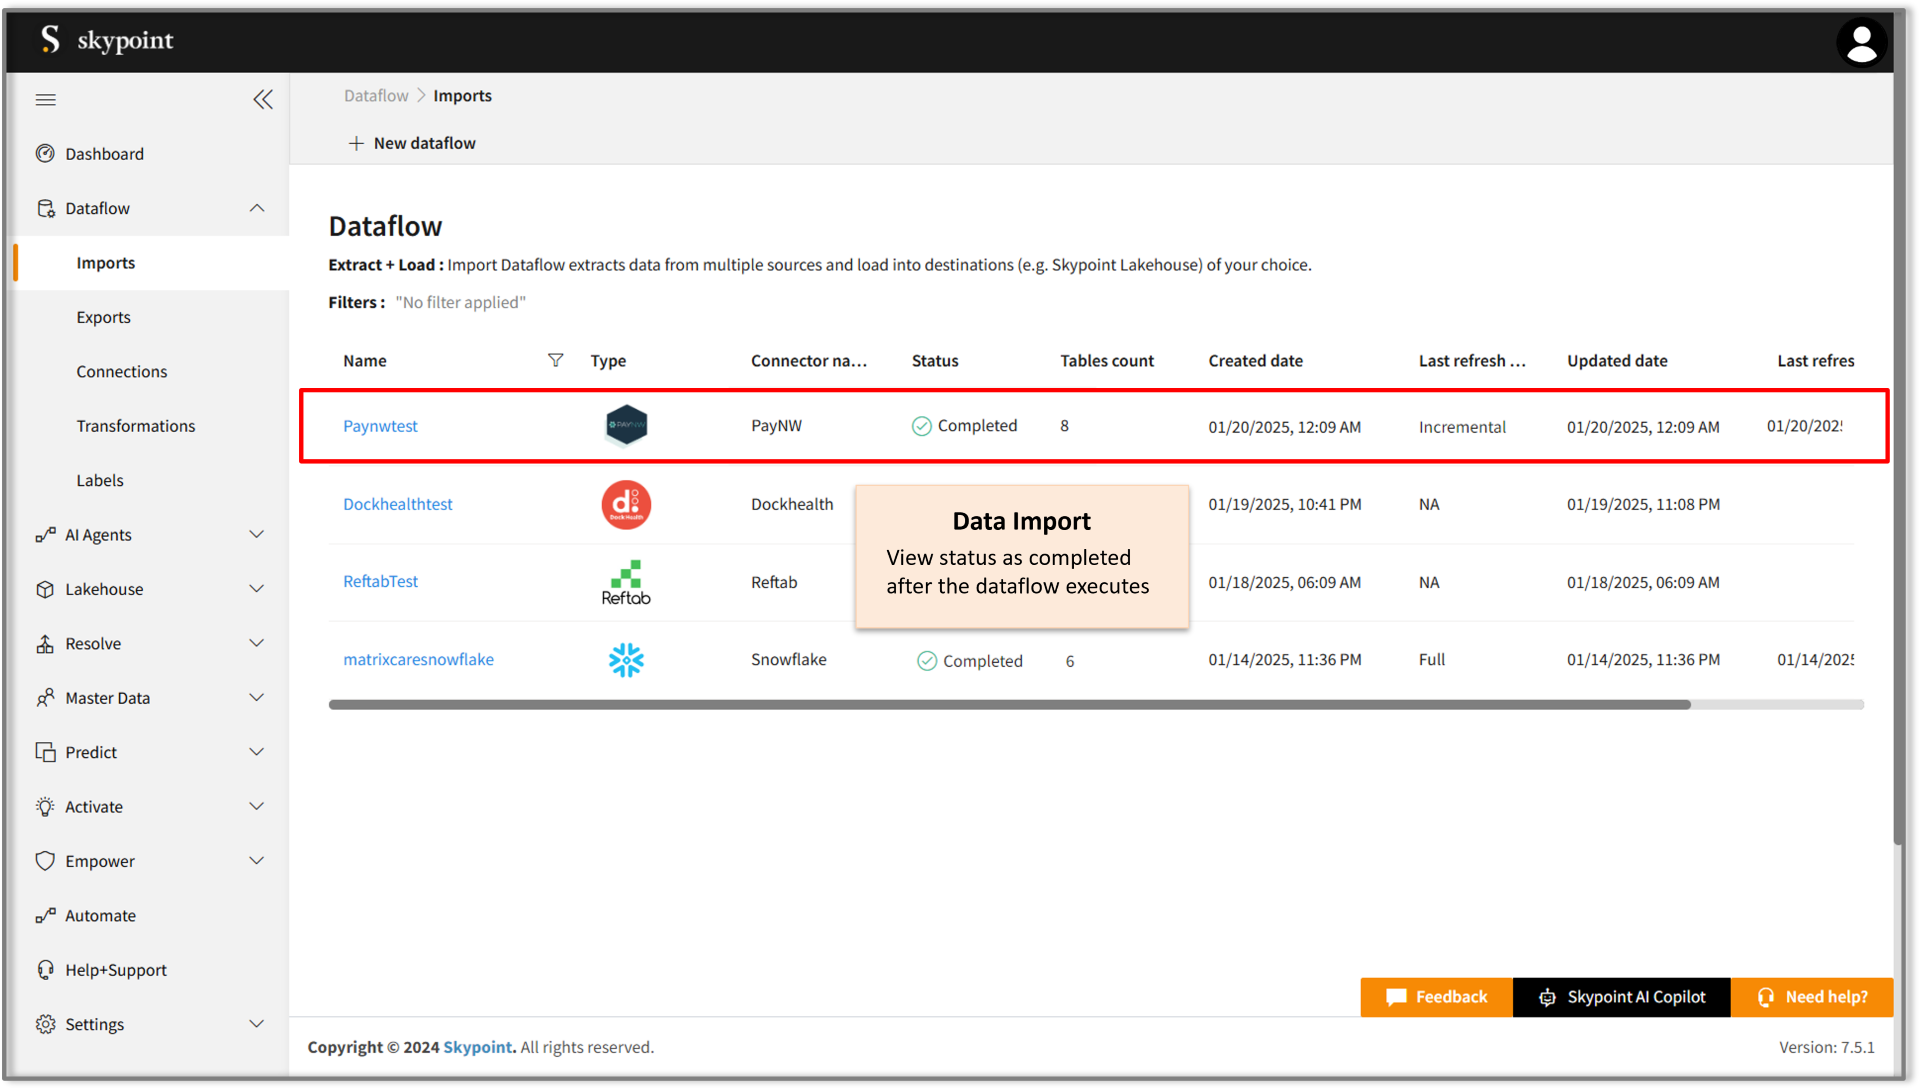
- Click Run to execute the dataflow. Once the execution is successful, the data pipeline status will update to Completed, as illustrated in the figure below.
In the Dataflow’s Run History Description, you can view error messages related to data import failures from a data source. Additionally, you can check the status, start time, and end time of the data pipeline execution.