Connecting to SFTP (Simple File Transfer Protocol)
Overview
SFTP (Simple File Transfer Protocol) features hierarchical folders and file management. It supports user authentication that requires the user to enter username and password to login into the server. You can implement SFTP by opening a TCP connection to the remote host’s port.
SFTP consists of 11 commands and supports features like user access control, file transfers, directory listing, directory changing, file renaming, and deleting. It supports three types of data transmission, namely:
- American Standard Code for Information Interchange (ASCII): ASCII bytes are taken from the source system file, sent over the connection, and saved in the destination system file.
- Binary: The 8-bit bytes are extracted from the source system file, sent through the connection, and saved in the target system file.
- Continuous: The bits are taken from the original system file and transmitted over the network in 8-bit bytes without respecting word boundaries. Without any word boundaries, the bits are continuously received by the target system.
Prerequisite
You will need the following details to configure and import data:
- Host
- Port
- Host Key Fingerprint
- Username
- Password
- Storage path.
Limitation
- Simple File Transfer Protocol (SFTP), which uses the Transmission Control Protocol port number 115, is an unencrypted, simplified form of File Transfer Protocol (FTP). It is less powerful than FTP and contains certain helpful features that are missing from Trivial FTP (TFTP).
Import data using SFTP connector
Follow the below steps to create a new dataflow for the SFTP import connector:
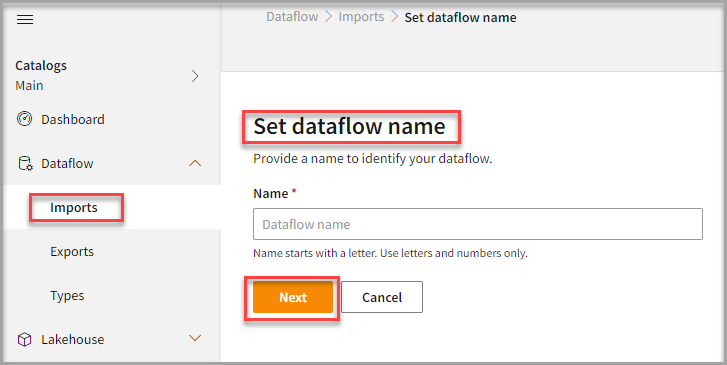
- Go to Dataflow > Imports.
- Click New dataflow.
The Set dataflow name page appears.

- In the Set dataflow name page, type dataflow name in the Name text area.
- Click Next.
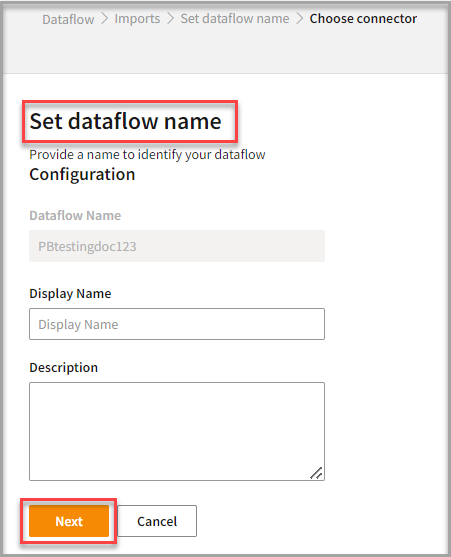
The Choose connector page appears.

To add SFTP connector
- In the Choose connector page, select SFTP connector.
You can also use the Search feature to find the connector. The SFTP connector is located under the Marketing category.

- Enter Display Name for your dataflow in the text area.
- Enter Description for your dataflow in the text area.
- Click Next.
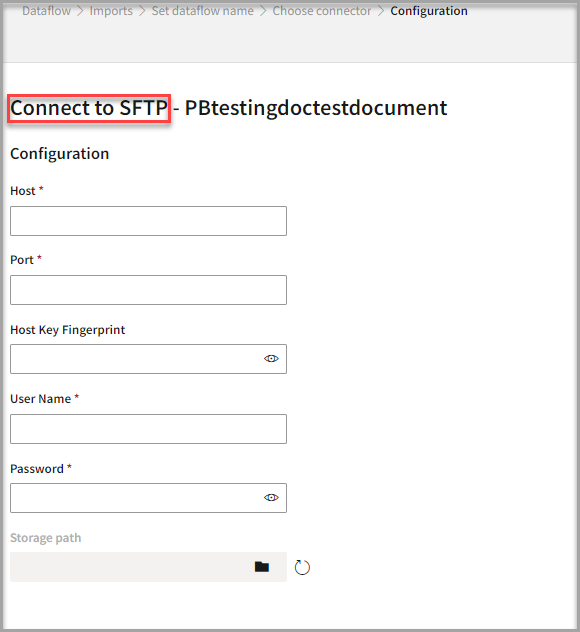
The Connect to SFTP page appears.

To configure SFTP
Follow the below steps to configure the connection to SFTP:
Enter your credentials such as Host, Port, Host Key Fingerprint, User Name and Password to connect with SFTP.
Click the folder icon on Storage Path to select the storage path folder.
Once you select your Storage path, the Table Details columns appear.

- Enter the Table details to process the data.
| Item | Description |
|---|---|
| Purpose | Option to assign a purpose (Data or Metadata) for each table. |
Data | Loads customer data. |
Metadata | Loads Metadata. |
| File Name | Displays the name of the file that you imported. |
| Table Name | Displays the imported table name. |
| Datetime format | Displays a number of Datetime Formats and Skypoint AI is set to automatically detect them. |
| Delimiter | Displays available separators for the variables in the imported data. |
| First Row as Header | Check the box for the system to automatically collect the data according to the Header Contents. |
| Advanced Settings | Select the options to modify the default settings. It gives more flexibility to apply advanced use cases. |
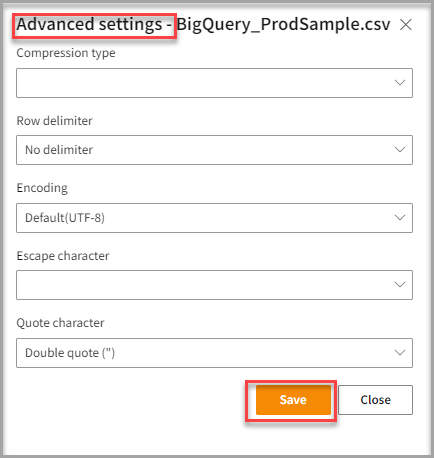
- If necessary, select the Advance settings option to modify the default settings.
The Advanced settings pop-up appears.

| If you want to | Then |
|---|---|
| Modify data types such as fixed or variable data types. | Select from the Compression type. It allows you to reduce the size of data by removing the number of bits. |
| Change the delimiter | Click Row delimiter. By default, a column delimiter is selected, and each row is separated with a comma. |
| Change information or instruction | Choose from the Encoding list. By default, UTF-8 encoding is selected. |
| Modify the escape character such as backslash (\) or slash (/) | Select from the Escape character. |
| Apply different quote characters such as Single quote (') or Double quote ("). | Select from the Quote character. |
- Click Save to apply the changes.
Run, edit, and delete the imported data
After saving the connection, imported data appears on the Dataflow page. Also, you can see a list of the created tables in the Databases section.

| Item | Description |
|---|---|
| Name | Displays the name of the imported Dataflow. |
| Type | Displays connector type symbol. |
| Status | Indicates whether the data is imported successfully. |
| Tables Count | Displays the number of tables. |
| Created Date | Displays date of creation. |
| Last refresh type | Displays the refresh value. You can see if the value is Full or Incremental after the last data refresh. |
| Updated Date | Displays last modified date. |
| Last Refresh | Displays the latest refresh date, which updates each time you refresh the data. |
| Group by | Option to view the items in a specific Group (For example, name, type, status). |
- Select the horizontal ellipsis in the Actions column and do the following:
| If you want to | Then |
|---|---|
| Modify the Dataflow | Select Edit and modify the Dataflow. Click Save to apply your changes. |
| Execute the Dataflow | Select Run. |
| Bring the data to its previous state | Select Rollback. |
| Delete the Dataflow | Select Remove and then click the Delete button. All tables in the data source get deleted. |
| See the run history of the Dataflow | Select Run history. |
Next step
After completing the data import, start the Master Data Management (MDM) - Stitch process to develop a unified view of your customers.