> ## Documentation Index
> Fetch the complete documentation index at: https://docs.skypoint.ai/llms.txt
> Use this file to discover all available pages before exploring further.
#
# Connecting to the Stripe connector
## Overview
Stripe is an online payment processing platform that offers payment processing software and API to manage flow of funds for e-commerce websites and mobile applications. You can use skyData's built-in connector for importing data from Stripe. Our platform collects, analyzes, and provides a solution to transform data into meaningful information for generating valuable insights.
## Prerequisite
* You have a [stripe account](https://dashboard.stripe.com/login) and credentials such as API Key. Each API user has credentials that must be used to authenticate requests.
## To import Data using the Stripe connector
1. In the left pane, go to **Dataflow** > **Imports**.
The Dataflow window appears.
 2. Click **New Dataflow** to create dataflow.
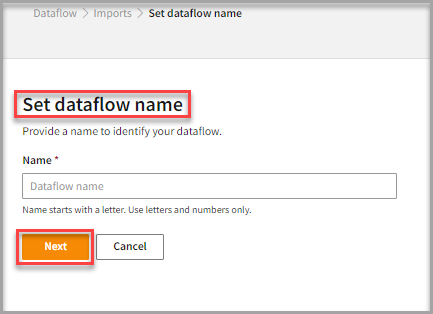 3. Enter a **Name** to identify your Dataflow.
The name must start with a letter and can only include letters and numbers, with no spaces between them.
4. Click **Next**.
## Add Stripe Connector
1. In the **All categories** or **Services and apps** tab, select the **stripe** connector to start the configuration.
3. Enter a **Name** to identify your Dataflow.
The name must start with a letter and can only include letters and numbers, with no spaces between them.
4. Click **Next**.
## Add Stripe Connector
1. In the **All categories** or **Services and apps** tab, select the **stripe** connector to start the configuration.
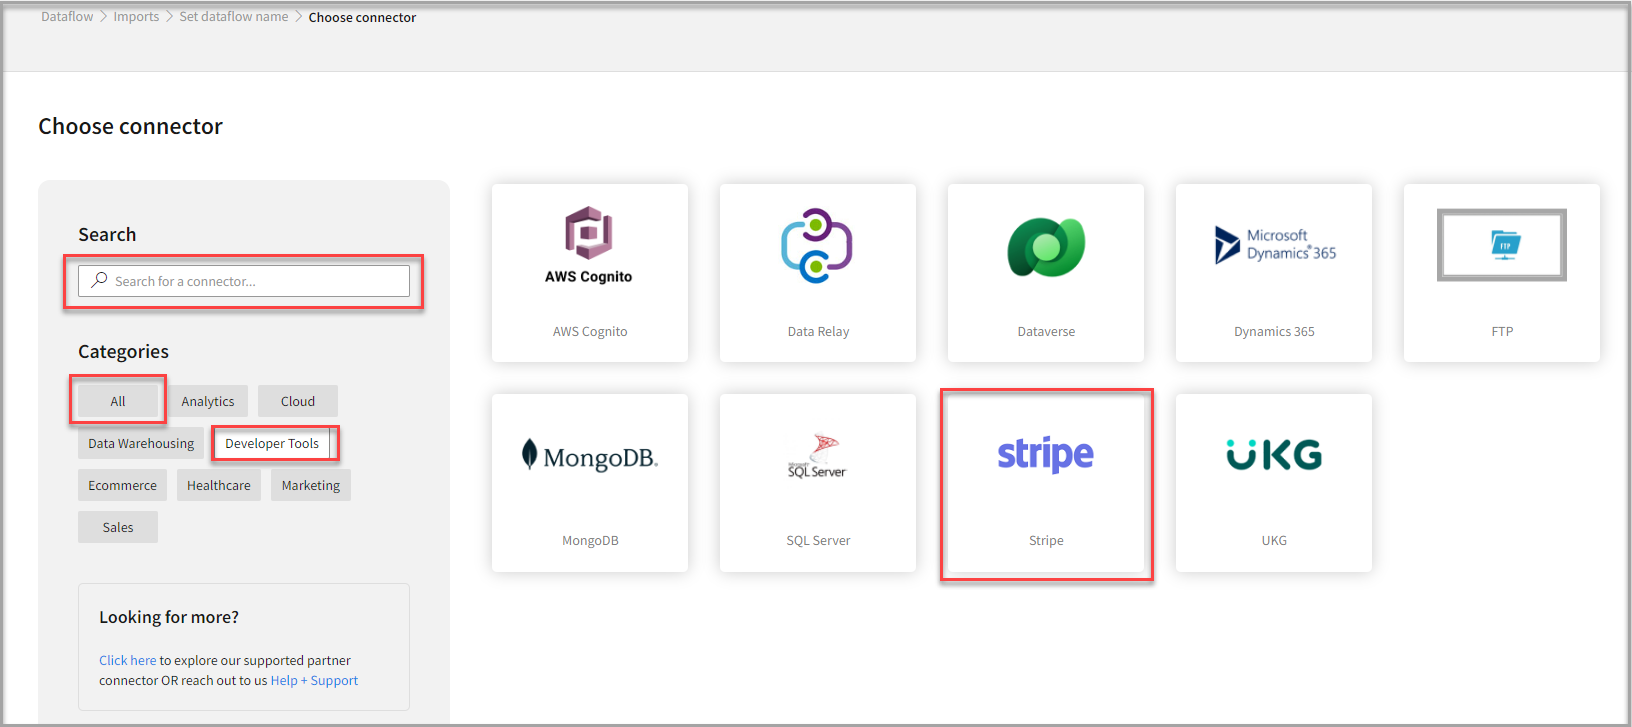 2. Also, you can use the **Search** function to find the **stripe** connector.
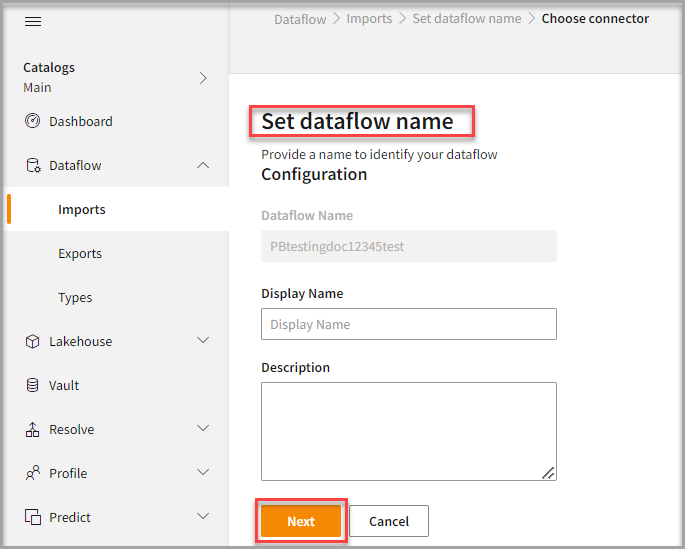 3. In the **Set dataflow name** page, enter the **Display Name** to identify your dataflow.
4. In the **Description** box, you can enter an explanation of the connector.
5. Click **Next**.
3. In the **Set dataflow name** page, enter the **Display Name** to identify your dataflow.
4. In the **Description** box, you can enter an explanation of the connector.
5. Click **Next**.
 ## To configure Stripe
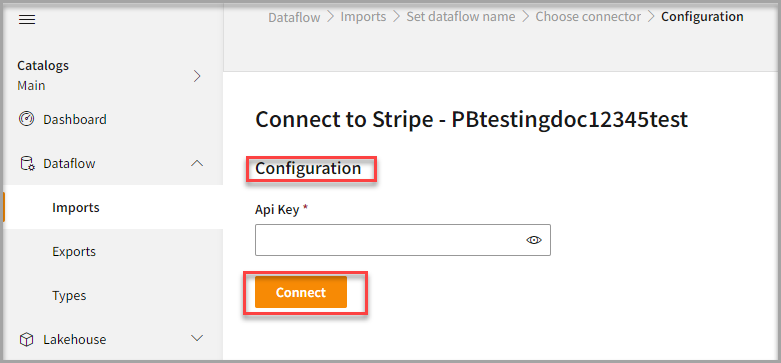
Follow the below steps to configure the connection to Stripe:
1. Enter the **Api Key** to configure with the Stripe connector. For details about the API key, click [API reference](https://stripe.com/docs/api).
2. Click **Connect**.
## To configure Stripe
Follow the below steps to configure the connection to Stripe:
1. Enter the **Api Key** to configure with the Stripe connector. For details about the API key, click [API reference](https://stripe.com/docs/api).
2. Click **Connect**.
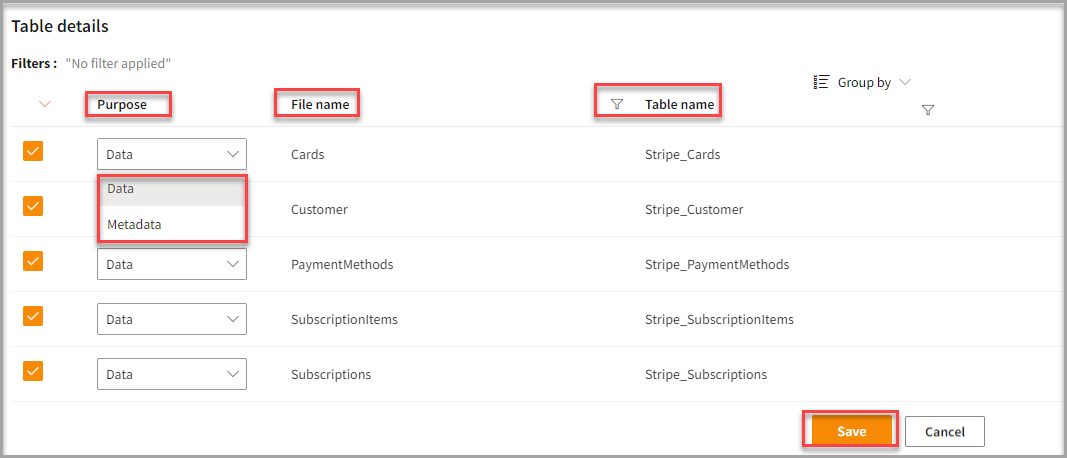 3. You can enter the **Table Details** to process the data.
After configuration, all tables that are part of the connector are listed in the **Table Details** section. By default, it displays a single table upon successful connection, showing information specific to the client connector and the tables it supports. For multiple tables, you can select only those tables you want to import and process. For example, to import customer data, choose the tables that contain customer information such as name, email, address, and contact details.
3. You can enter the **Table Details** to process the data.
After configuration, all tables that are part of the connector are listed in the **Table Details** section. By default, it displays a single table upon successful connection, showing information specific to the client connector and the tables it supports. For multiple tables, you can select only those tables you want to import and process. For example, to import customer data, choose the tables that contain customer information such as name, email, address, and contact details.
| Item | Description |
| :------------------------ | :---------------------------------------------------------------------------------- |
| Purpose | Option to assign a purpose (All, Customer 360, or Privacy-Metadata) for each table. |
| Data | Loads customer data |
| Metadata | Loads Metadata |
| File Name | Displays the name of the file that you imported. |
| Table Name | Displays the imported table name. |
4. Click **Save** to apply the changes.
## Run, edit, and delete the imported data
1. After saving the connection, the Stripe connector appears on the Dataflow page. Also, you can see the list of created tables in the [Databases](https://skypointcdpdocs.z22.web.core.windows.net/docs/entities.html) section.
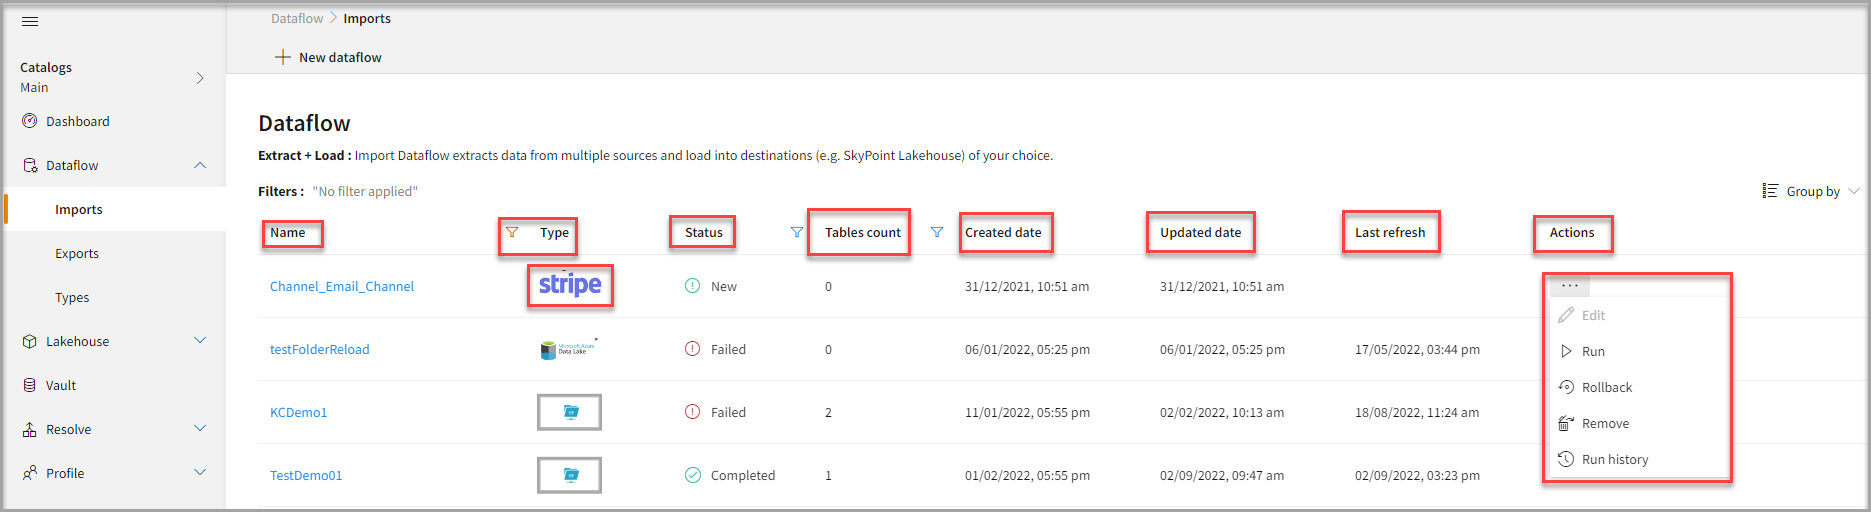 | Item | Description |
| :----------- | :------------------------------------------------------------------------------- |
| Name | Displays the name of the Dataflow. |
| Type | Displays connector type symbol. |
| Status | Indicates whether the data is imported successfully. |
| Tables Count | Displays the number of tables. |
| Created Date | Displays date of creation. |
| Updated Date | Displays last modified date. |
| Last Refresh | Displays the latest refresh date, which updates each time you refresh the data.. |
| Group by | Option to view the items in a specific Group (For example, name, type, status). |
2. Select the horizontal ellipsis in the **Actions** column and do the following:
| If you want to | Then |
| :----------------------------------- | :------------------------------------------------------------------------------------------------- |
| Modify the Dataflow | Select **Edit** and modify the Dataflow. Click **Save** to apply your changes. |
| Execute the Dataflow | Select **Run**. |
| Bring the data to its previous state | Select **Rollback**. |
| Delete the Dataflow | Select **Remove** and then click the **Delete** button. All tables in the data source get deleted. |
| See the run history of the Dataflow | Select **Run History**. |
You can view the error message for data import failures from a data source in the Dataflow under **Run History** > **Description**.
## Next step
After completing the data import, start the [Master Data Management (MDM) - Stitch process](stitch.md) to develop a unified view of your customers.
| Item | Description |
| :----------- | :------------------------------------------------------------------------------- |
| Name | Displays the name of the Dataflow. |
| Type | Displays connector type symbol. |
| Status | Indicates whether the data is imported successfully. |
| Tables Count | Displays the number of tables. |
| Created Date | Displays date of creation. |
| Updated Date | Displays last modified date. |
| Last Refresh | Displays the latest refresh date, which updates each time you refresh the data.. |
| Group by | Option to view the items in a specific Group (For example, name, type, status). |
2. Select the horizontal ellipsis in the **Actions** column and do the following:
| If you want to | Then |
| :----------------------------------- | :------------------------------------------------------------------------------------------------- |
| Modify the Dataflow | Select **Edit** and modify the Dataflow. Click **Save** to apply your changes. |
| Execute the Dataflow | Select **Run**. |
| Bring the data to its previous state | Select **Rollback**. |
| Delete the Dataflow | Select **Remove** and then click the **Delete** button. All tables in the data source get deleted. |
| See the run history of the Dataflow | Select **Run History**. |
You can view the error message for data import failures from a data source in the Dataflow under **Run History** > **Description**.
## Next step
After completing the data import, start the [Master Data Management (MDM) - Stitch process](stitch.md) to develop a unified view of your customers.