> ## Documentation Index
> Fetch the complete documentation index at: https://docs.skypoint.ai/llms.txt
> Use this file to discover all available pages before exploring further.
#
# Exporting Data to SendGrid
## Overview
SendGrid is a customer communication platform that allows you to send an email and manage recipient lists. You can export your data from skyData with built-in data Lakehouse to SendGrid and use them for email marketing and campaigns.
## Prerequisite
* You have a [SendGrid account](https://sendgrid.com/) and an [API key](https://docs.sendgrid.com/ui/account-and-settings/api-keys).
* You have created an [Audience](audiences.md) or [Profile](profiles.md) to export entities. If you need help and support, click **Need help?** button in the right corner of the page. For more information regarding raising a new ticket, refer [Help+Support](help%2Bsupport.md) section.
## To set up a SendGrid connection
1. In the left pane, go to **Dataflow** > **Exports**.
The **Exports** window appears. By default, the **Export gallery** tab opens.
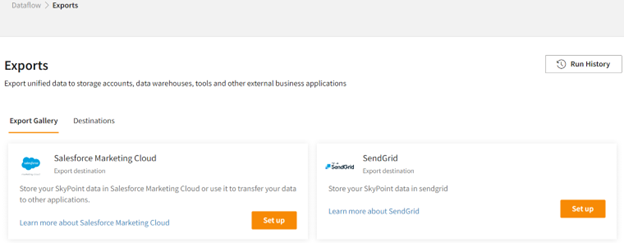 You can add the SendGrid connection in two ways. However, the procedure is similar in both cases. These are as follows:
* In the **Export Gallery** tab, click the **Set up** button in the **SendGrid** widget.
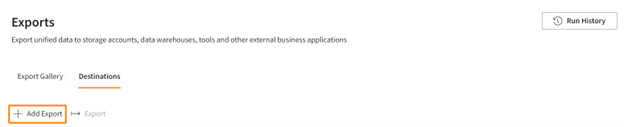
* In the **Destinations** tab, click **Add Export** to configure with the SendGrid connector.
You can add the SendGrid connection in two ways. However, the procedure is similar in both cases. These are as follows:
* In the **Export Gallery** tab, click the **Set up** button in the **SendGrid** widget.
* In the **Destinations** tab, click **Add Export** to configure with the SendGrid connector.
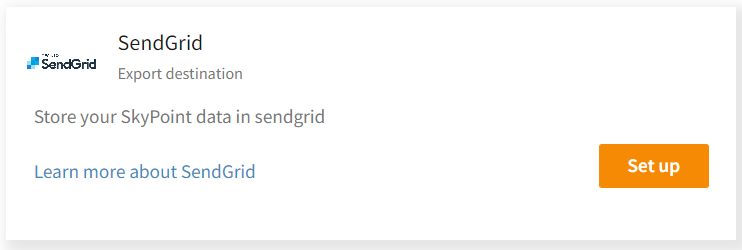
 2. To establish a SendGrid connection through **Export Gallery**, click the **Set up** button in the **SendGrid** widget.
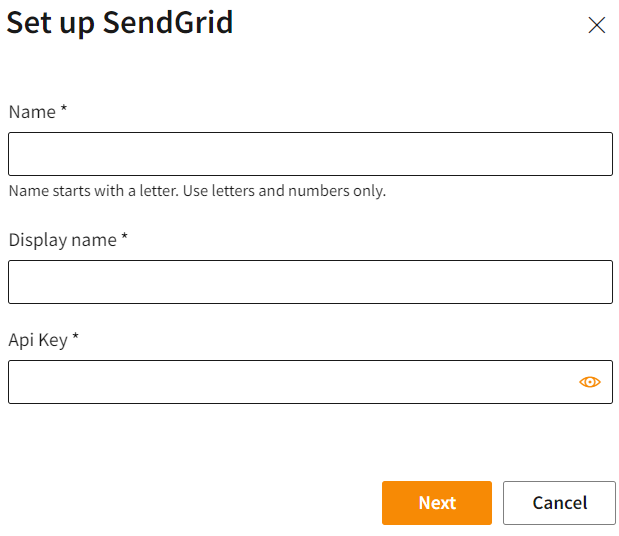 3. Enter **Name** and **Display name**. You can choose a name that explains the purpose of the connection.
4. Enter your SendGrid **API Key**.
5. Click **Next**.
3. Enter **Name** and **Display name**. You can choose a name that explains the purpose of the connection.
4. Enter your SendGrid **API Key**.
5. Click **Next**.
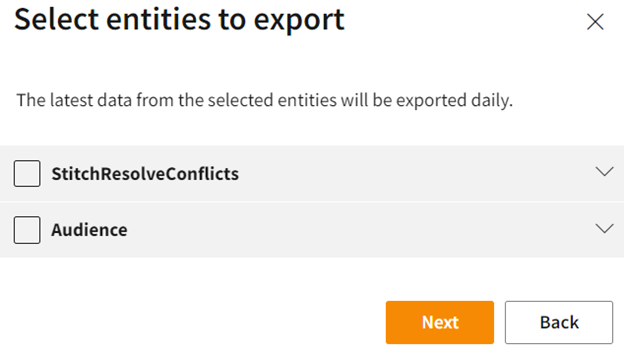 6. Select the entities that you want to export and click **Next**.
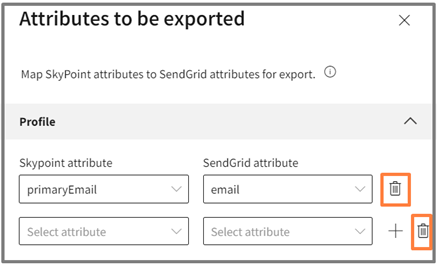 7. Select the attributes that you want to export and click **Create**.
Custom attribute allows you to add more attributes that you want to export. You can do mapping and export only the selected attributes. The custom fields are completely customizable to the use cases and user information that you need. You can also delete the added attributes.
* To delete an added attribute, click the **Delete** icon.
After creating an export connection, it appears in the **Destinations** tab.
7. Select the attributes that you want to export and click **Create**.
Custom attribute allows you to add more attributes that you want to export. You can do mapping and export only the selected attributes. The custom fields are completely customizable to the use cases and user information that you need. You can also delete the added attributes.
* To delete an added attribute, click the **Delete** icon.
After creating an export connection, it appears in the **Destinations** tab.
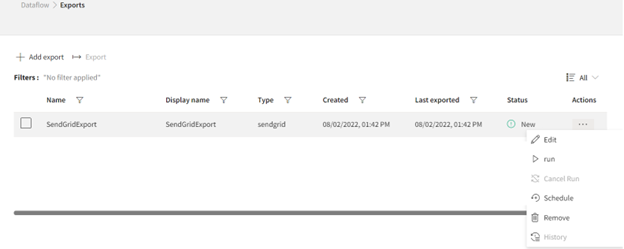 | Item | Description |
| :------------ | :---------------------------------------------------------------------------------------------------------------------------- |
| Name | Name of the Export connection. |
| Display name | Displays the name of the exported data. It can be different from the Export connection name. Also, you can change this later. |
| Type | Displays the connector type. |
| Created | Displays date of creation. |
| Last exported | Displays last modified date. |
| Status | Indicates whether the data is exported successfully. |
| Actions | Option to perform activities after completion of configuration, for example, edit, run. |
8. Select the horizontal ellipsis in the **Actions** column and do the following:
| If you want to | Then |
| :----------------------------------------------------------------------------- | :--------------------------- |
| Modify the SendGrid connection | Select **Edit**. |
| Execute the export process | Select **Run**. |
| Cancel the execution of the data export | Select **Cancel Run**. |
| Configure a refresh schedule to add new or updated data in the SendGrid export | Select **Schedule**. |
| Delete the SendGrid export connection | Select **Remove** > **Yes**. |
| See the history of the SendGrid export | Select **History**. |
## Edit the SendGrid connection
You can update the exported data for the existing SendGrid export account.
1. In the **Destinations** tab, select the SendGrid connection that you want to update.
2. In the **Actions** column, click the horizontal ellipsis and select **Edit**.
| Item | Description |
| :------------ | :---------------------------------------------------------------------------------------------------------------------------- |
| Name | Name of the Export connection. |
| Display name | Displays the name of the exported data. It can be different from the Export connection name. Also, you can change this later. |
| Type | Displays the connector type. |
| Created | Displays date of creation. |
| Last exported | Displays last modified date. |
| Status | Indicates whether the data is exported successfully. |
| Actions | Option to perform activities after completion of configuration, for example, edit, run. |
8. Select the horizontal ellipsis in the **Actions** column and do the following:
| If you want to | Then |
| :----------------------------------------------------------------------------- | :--------------------------- |
| Modify the SendGrid connection | Select **Edit**. |
| Execute the export process | Select **Run**. |
| Cancel the execution of the data export | Select **Cancel Run**. |
| Configure a refresh schedule to add new or updated data in the SendGrid export | Select **Schedule**. |
| Delete the SendGrid export connection | Select **Remove** > **Yes**. |
| See the history of the SendGrid export | Select **History**. |
## Edit the SendGrid connection
You can update the exported data for the existing SendGrid export account.
1. In the **Destinations** tab, select the SendGrid connection that you want to update.
2. In the **Actions** column, click the horizontal ellipsis and select **Edit**.
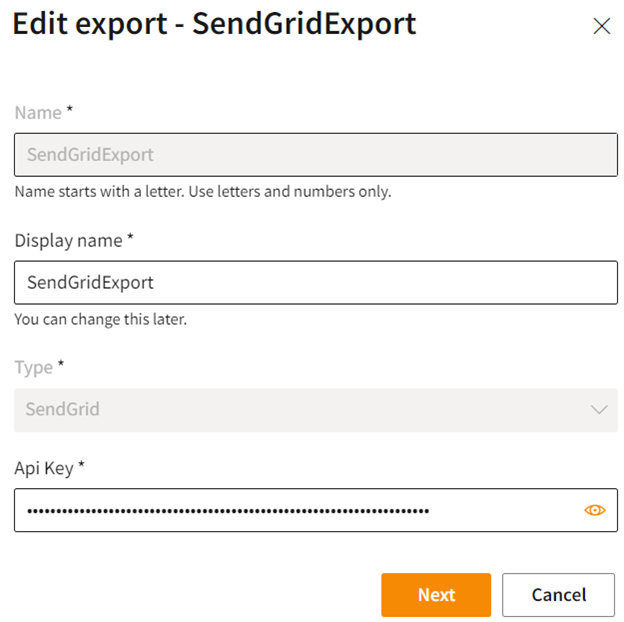 3. You can change the display name and select **Next** to modify entities and attributes.
4. Click **Update** and **Run** to execute modification.
## Schedule the SendGrid export
skyData provides you to set a time for new or updated data to include in the exported file. The export process runs whenever the system refreshes data or system refresh is triggered. With the **Schedule** feature, you can customize the refresh schedule. By default, export runs as part of every scheduled system refresh run for the particular instance. The system refresh schedule is shown on the **Settings** page. You can check through **Settings** > **Schedule**.
1. In the **Destinations** tab, select the SendGrid connection that you want to schedule.
2. In the **Actions** column, click the horizontal ellipsis and select **Schedule**.
The **Schedule** window appears.
3. You can change the display name and select **Next** to modify entities and attributes.
4. Click **Update** and **Run** to execute modification.
## Schedule the SendGrid export
skyData provides you to set a time for new or updated data to include in the exported file. The export process runs whenever the system refreshes data or system refresh is triggered. With the **Schedule** feature, you can customize the refresh schedule. By default, export runs as part of every scheduled system refresh run for the particular instance. The system refresh schedule is shown on the **Settings** page. You can check through **Settings** > **Schedule**.
1. In the **Destinations** tab, select the SendGrid connection that you want to schedule.
2. In the **Actions** column, click the horizontal ellipsis and select **Schedule**.
The **Schedule** window appears.
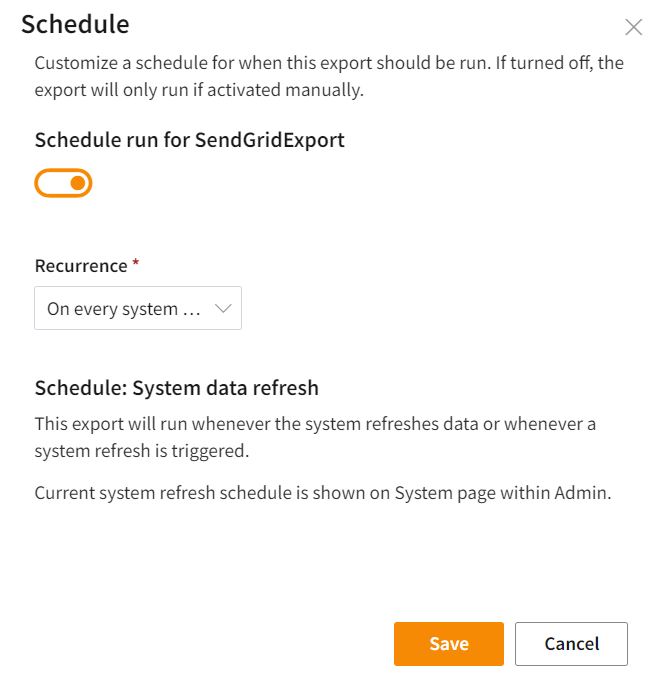 3. To activate the scheduled export automatically, click on the **Schedule run** button to set **On**. If turned off, the export will only run if activated manually.
4. Choose a **Recurrence** value to refresh the exported data automatically.
5. Click **Save** to apply your changes.
3. To activate the scheduled export automatically, click on the **Schedule run** button to set **On**. If turned off, the export will only run if activated manually.
4. Choose a **Recurrence** value to refresh the exported data automatically.
5. Click **Save** to apply your changes.