> ## Documentation Index
> Fetch the complete documentation index at: https://docs.skypoint.ai/llms.txt
> Use this file to discover all available pages before exploring further.
#
# Facebook Ads Manager
Export lets you extract data from the Lakehouse and load into Facebook Ads Manager.
## Steps to Export
1. Navigate to **Activate** > **Export**. You will see all the different categories of storages that can be used for export.
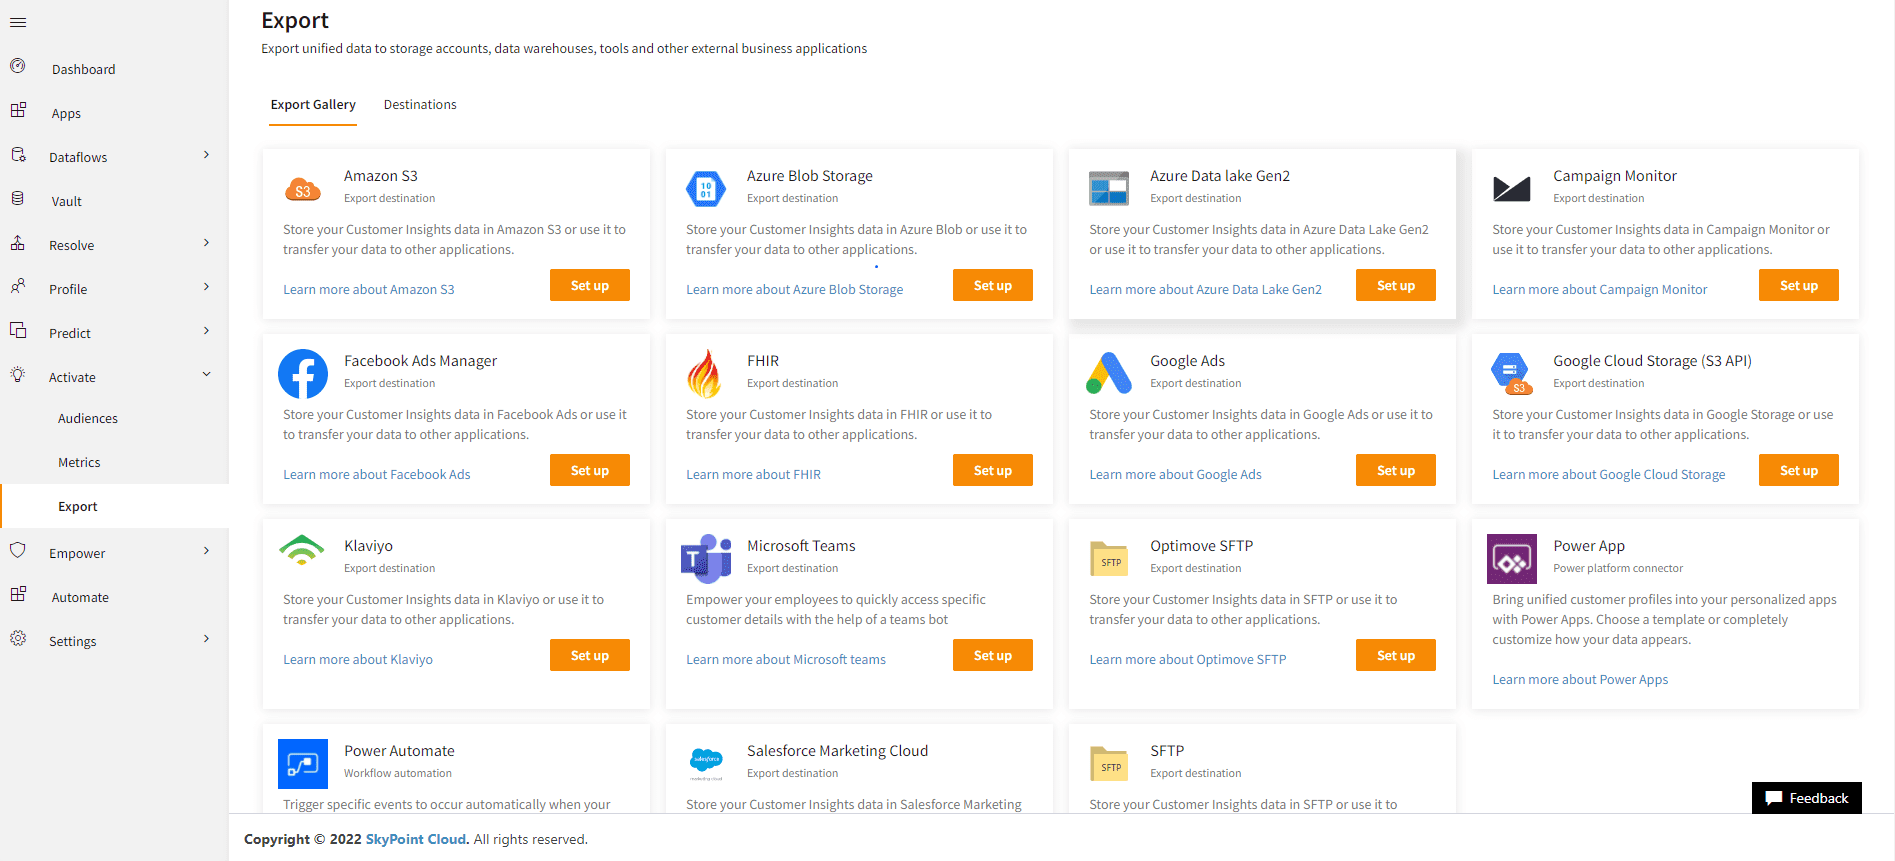 2. Go to **Destinations** and click on ***Add Export*** if the export connect is not there in the export gallery.
3. Fill up the name and the display name of the export and click on the dropdown column to select one of the type options. Here we select Facebook Ads.
2. Go to **Destinations** and click on ***Add Export*** if the export connect is not there in the export gallery.
3. Fill up the name and the display name of the export and click on the dropdown column to select one of the type options. Here we select Facebook Ads.
 4. As soon as we select it, there will be a choice to either select an existing dataflow or to create a new one.
5. In case you are choosing to create a new one, fill up the **APP Id**, **APP Secret**, **Access Token** and the **AD Account ID** and then click on NEXT.
6. You will be able to see all the Lakehouse data available infront of you entity wise. Choose all the entities that you will need to export.
7. Click on **create** and then click on three dot button and select Run.
8. In case you are choosing to select from existing, fill up the details **Select Account**, **APP ID**, **APP secret**, **Access Token**, **AD Account Id**.
9. Click on Next.
10. You will be able to see all the Lakehouse data available infront of you entity wise. Choose all the entities that you will need to export.
11. Click on **create** and then click on three dot button and select Run.
12. If the export connector- Facebook Ads manager is already present in the export gallery then click on setup.
13. Fill the details- Name, Display name , select from options- Select from existing, Create new
In case you are choosing to create a new one, fill up the **APP Id**, **APP Secret**, **Access Token** and the **AD Account ID** and then click on NEXT.
14. You will be able to see all the Lakehouse data available infront of you entity wise. Choose all the entities that you will need to export.
15. Click on **create** and then click on three dot button and select Run.
16. Your export will be started.
17. In case you are choosing to select from existing, fill up the details **Select Account**, **APP ID**, **APP secret**, **Access Token**, **AD Account Id**.
18. Click on Next.
Here all the Lakehouse data will be available Entity wise.
* Select the enities from the list to be exported.
* Click Create and then click on three dot button and select Run.
* Your export will be started.
## Steps to Extract App Credentials for Facebook Export
1. To export, you need to have an app created on developer's website.
2. Navigate to the [Developer's Portal](https://developers.facebook.com/apps/) and click on **Create App**.
4. As soon as we select it, there will be a choice to either select an existing dataflow or to create a new one.
5. In case you are choosing to create a new one, fill up the **APP Id**, **APP Secret**, **Access Token** and the **AD Account ID** and then click on NEXT.
6. You will be able to see all the Lakehouse data available infront of you entity wise. Choose all the entities that you will need to export.
7. Click on **create** and then click on three dot button and select Run.
8. In case you are choosing to select from existing, fill up the details **Select Account**, **APP ID**, **APP secret**, **Access Token**, **AD Account Id**.
9. Click on Next.
10. You will be able to see all the Lakehouse data available infront of you entity wise. Choose all the entities that you will need to export.
11. Click on **create** and then click on three dot button and select Run.
12. If the export connector- Facebook Ads manager is already present in the export gallery then click on setup.
13. Fill the details- Name, Display name , select from options- Select from existing, Create new
In case you are choosing to create a new one, fill up the **APP Id**, **APP Secret**, **Access Token** and the **AD Account ID** and then click on NEXT.
14. You will be able to see all the Lakehouse data available infront of you entity wise. Choose all the entities that you will need to export.
15. Click on **create** and then click on three dot button and select Run.
16. Your export will be started.
17. In case you are choosing to select from existing, fill up the details **Select Account**, **APP ID**, **APP secret**, **Access Token**, **AD Account Id**.
18. Click on Next.
Here all the Lakehouse data will be available Entity wise.
* Select the enities from the list to be exported.
* Click Create and then click on three dot button and select Run.
* Your export will be started.
## Steps to Extract App Credentials for Facebook Export
1. To export, you need to have an app created on developer's website.
2. Navigate to the [Developer's Portal](https://developers.facebook.com/apps/) and click on **Create App**.
 3. Choose which type of app you want to create and click on Continue.
4. Enter the name of the display name of the app, the contact email and add the purpose for creating the app.
3. Choose which type of app you want to create and click on Continue.
4. Enter the name of the display name of the app, the contact email and add the purpose for creating the app.
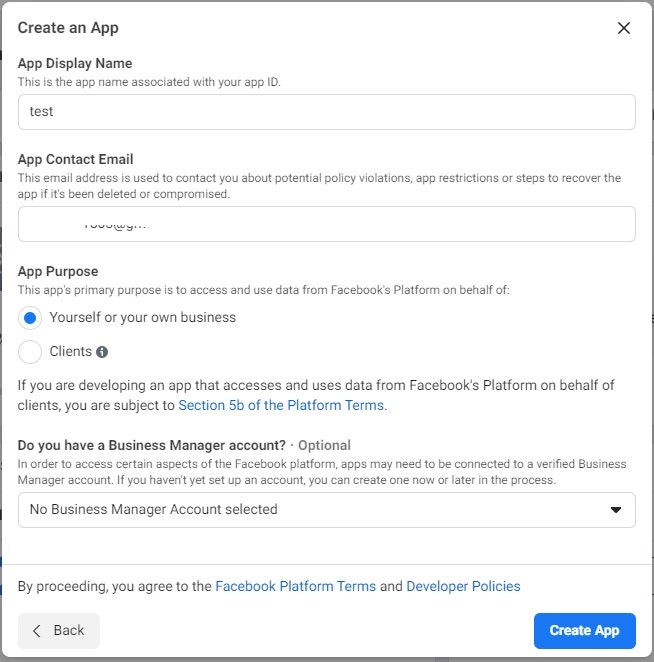 **Note :** Choosing the business manager account is optional but if you have one, selecting it would be preferable.
5. Your app is created and you will be redirected to the Dashboard.
**Note :** Choosing the business manager account is optional but if you have one, selecting it would be preferable.
5. Your app is created and you will be redirected to the Dashboard.
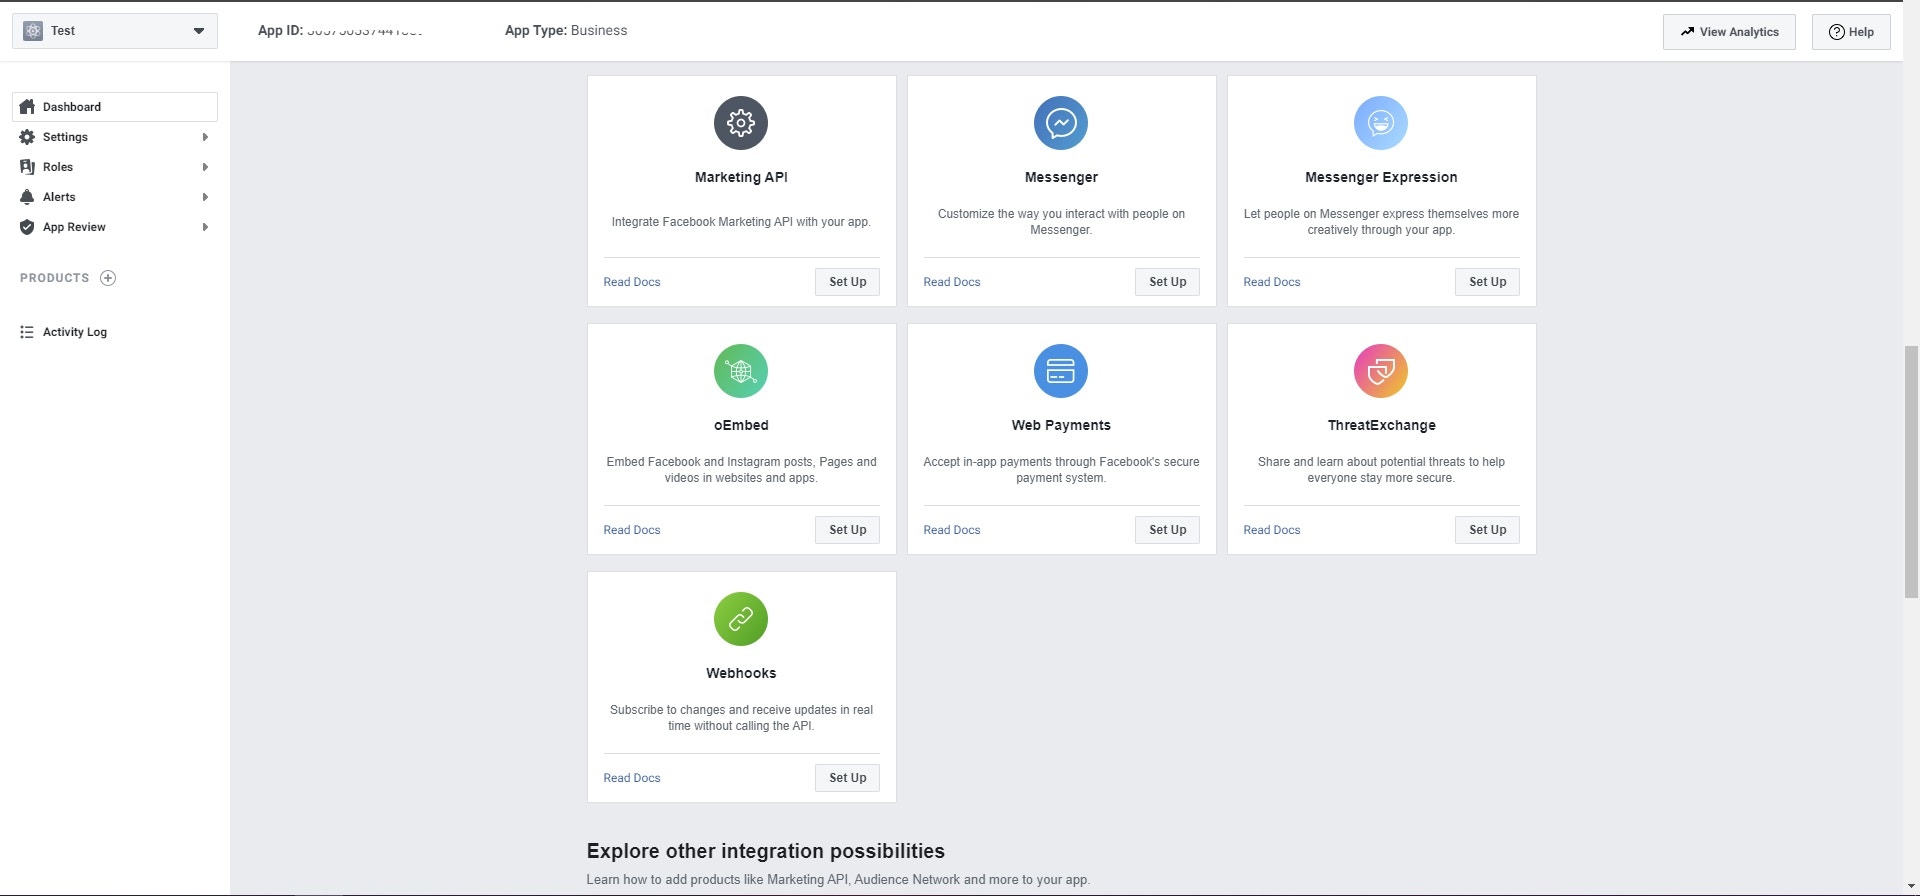
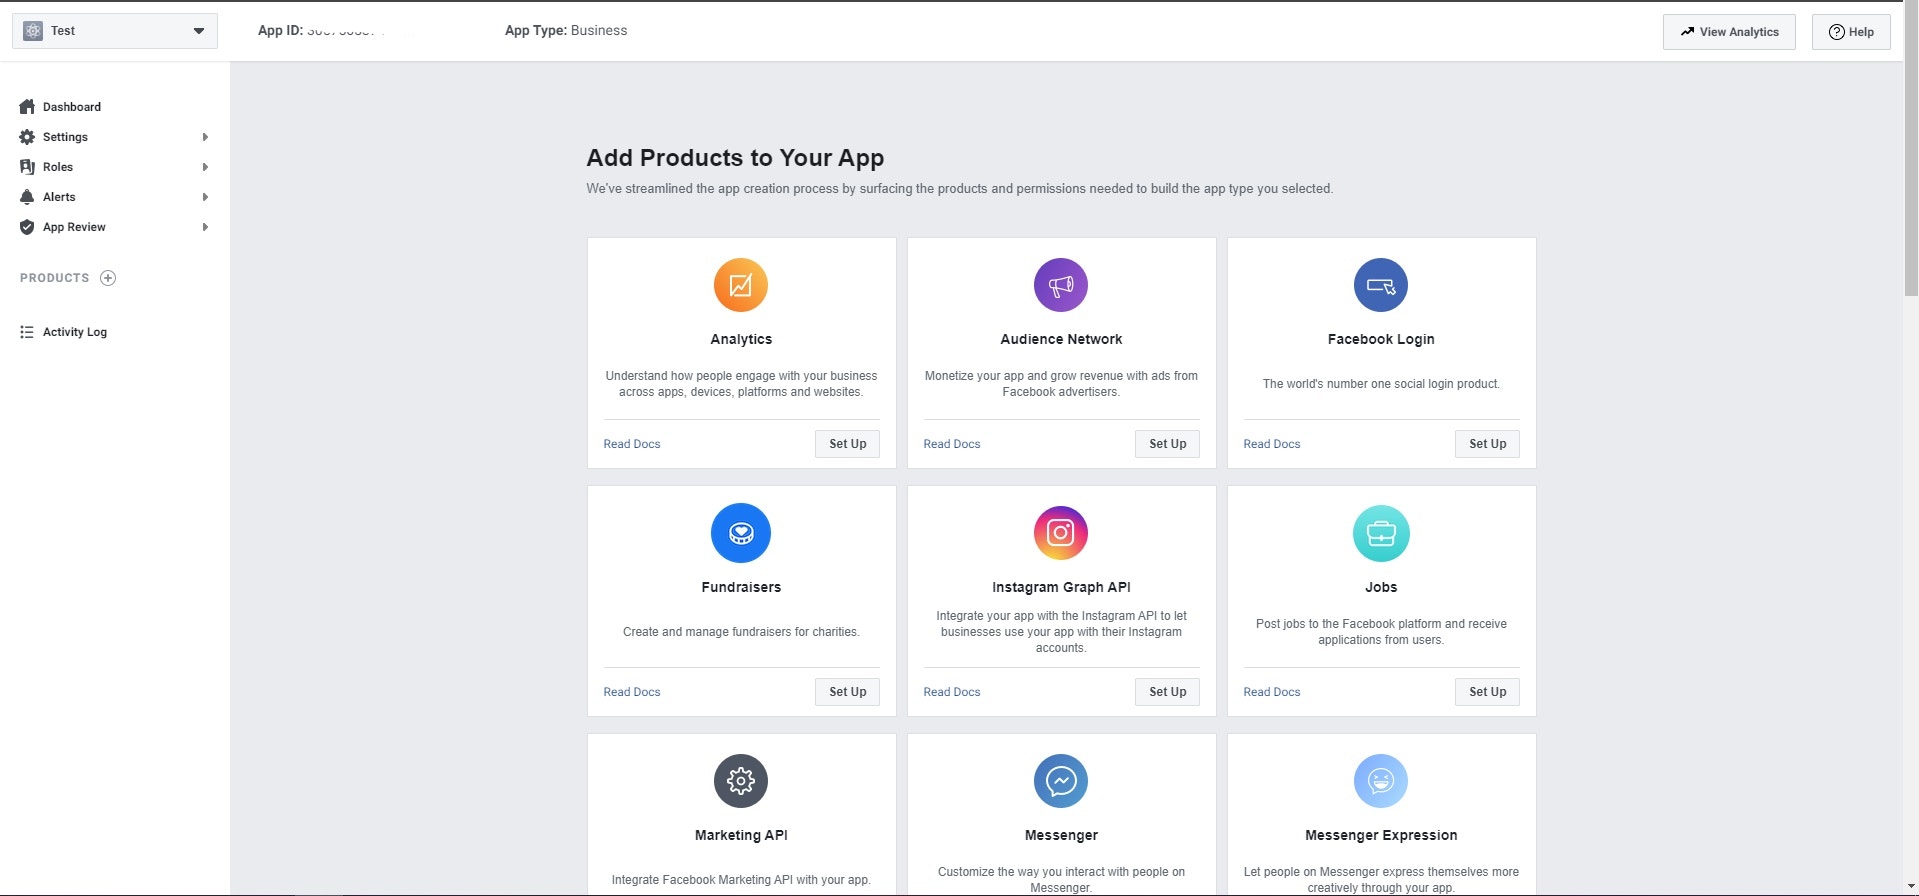 6. The last thing that you need to do is to Integrate the Facebook Marketing API with your app. Under the section **Add Products to your App**, watch out for **Marketing API** and click on ***Set Up***.
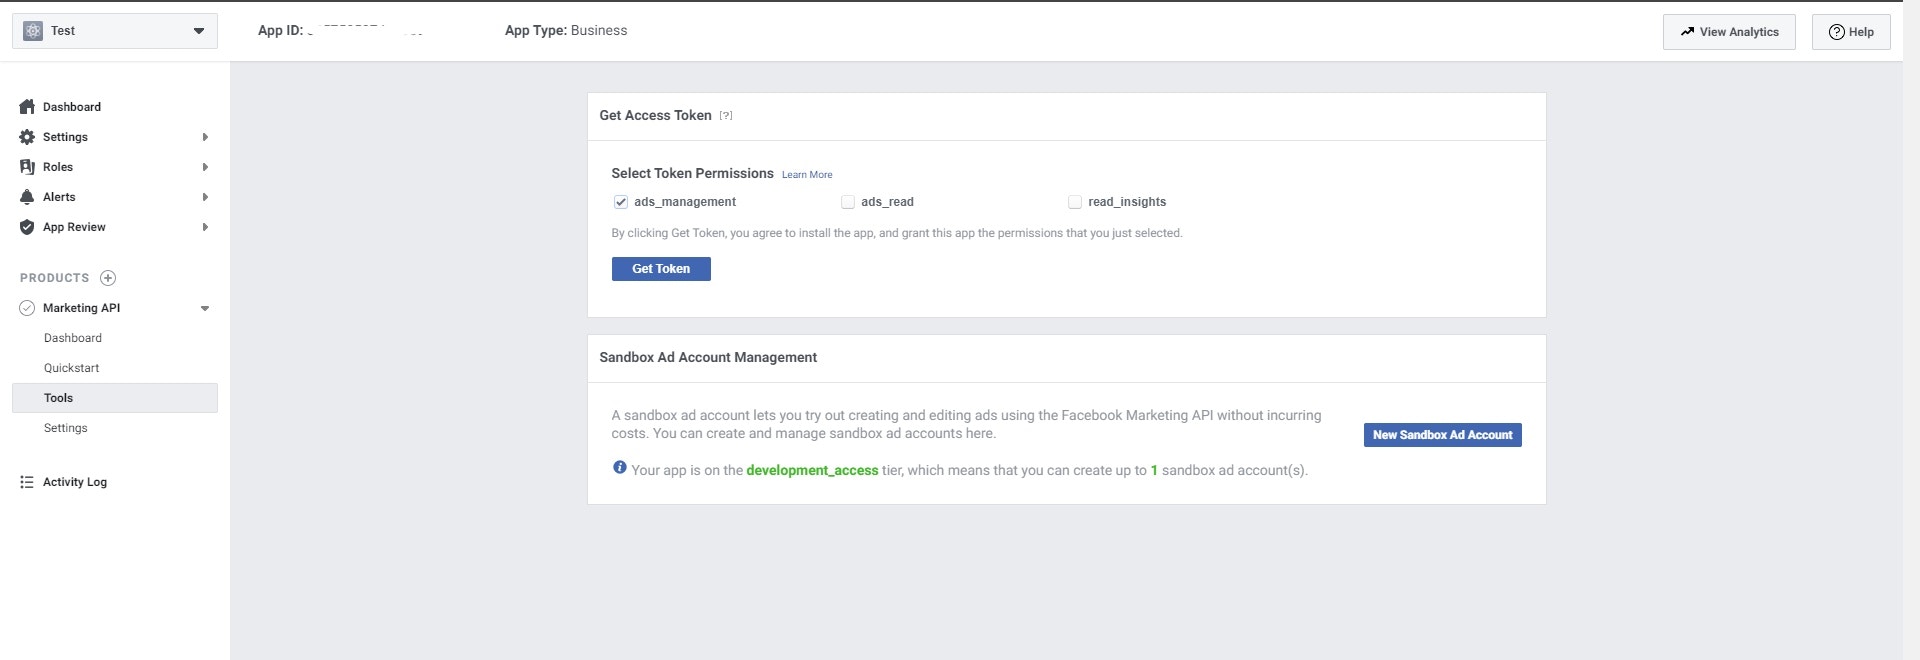
 7. Then, click on **Tools**, and select the token permissions and click on **Get Token** to extract the access token.
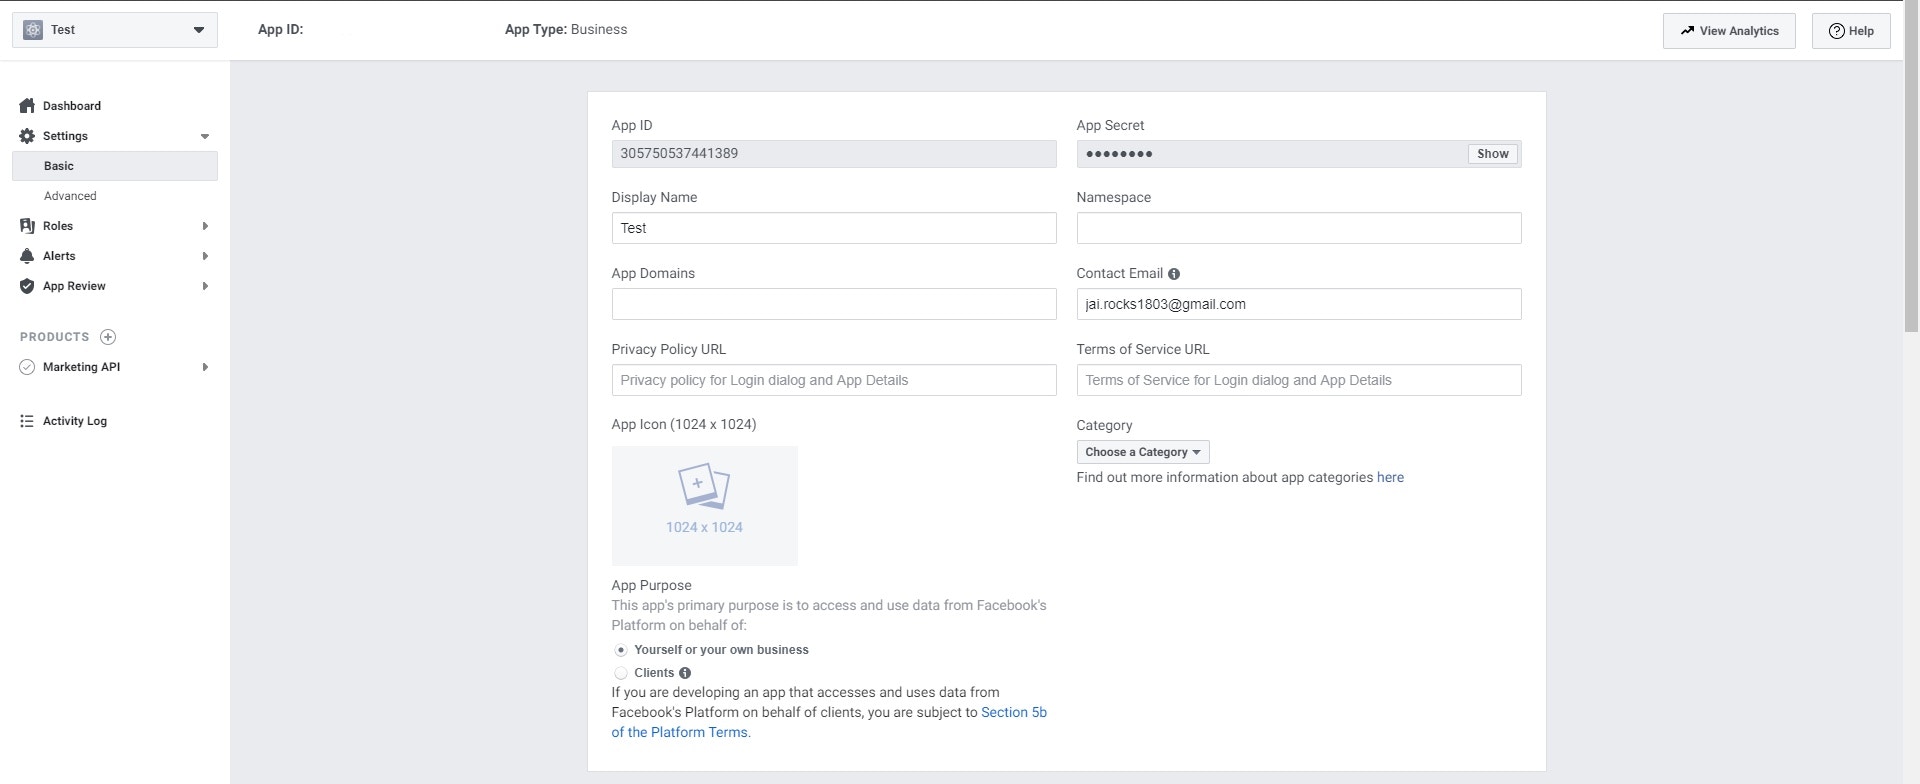
 8. You can get the **App ID** and **App Secret** when you navigate to **Settings** > **Basic**. The AD Account ID is the number written in parenthesis after the Business manager account name and has a prefix **act\_**.